
引言
昨天我們稍微將struct、linklist研究了一下後,
今天應該就有足夠的技術來實現放置方塊功能啦~
我們會對已經完成的第一版3D引擎做一些改造,
改造方向如下:
建立Cube型態的struct
我們在"Renderer.h"的變數定義上方加上新的Cube結構定義
/* File: Renderer.h */

#ifndef __RENDERER_H__
#define __RENDERER_H__

#define _CLEAN_MODE_ 0
#define _RENDER_MODE_ 1

// ------------新增部分-------------------
typedef struct cube  // 定義方塊
{
    struct cube *next;  // 指向下一塊方塊
    char style;  // 以下屬性是render_cube函數所需參數,
    int cx;      // 同時也是繪製方塊所需的資料。
    int cy;      // 我們可以在玩家按下"m"的時候將方塊資訊加入到linklist中,
    int cz;      // 此方塊就正式「加入」這個世界,
    int left;    // 因為往後的每次render_screen都會將linklist中所有方塊繪製出來。
    int right;
    int top;
    int bottom;
    int f;
    int r;
}Cube;

Cube allCubesHead;  // linklist的頭,標的物
Cube *allCubes;     // Cube指標,用來依序指向每一塊方塊
Cube newCube;       // 遊戲開始時預設在世界中的方塊,也就是類似以前的「大平台」
// --------------------------------------

float camera_x_pos, camera_y_pos, camera_z_pos;
float camera_speed;
float fov;
...
..
.
世界預設存在的方塊設定
我們會先把上述的newCube指定好所有參數,當作遊戲開始時預設會存在的方塊,
這部分會在init_renderer也就是renderer初始化的時候跟變數們一起初始化。
/* File: Renderer.c */

void init_renderer()
{
    camera_x_pos = 0.0;
    camera_y_pos = 0.0;
    camera_z_pos = -150;
    camera_speed = 5.0;
    fov = 120;
    x1 = 0.0;
    y1 = 0.0;
    z1 = 0.0;
    x2 = 0.0;
    y2 = 0.0;
    z2 = 0.0;
    rx = 1;
    ry = 1;
    rot_x = 0.0;
    rot_y = 0.0;
    sin_x = 0.0;
    cos_x = 0.0;
    sin_y = 0.0;
    cos_y = 0.0;

// ------------新增部分-------------------
    allCubes = &allCubesHead;  // 指標先指到開頭
    allCubes->next = &newCube;  // 將newCube連上開頭
    allCubes = allCubes->next;  // 指標移動到newCube上
    allCubes->next = NULL;  // newCube先將下一塊的位址設為NULL
    allCubes->cx = 0;       // 以下為設定各項屬性
    allCubes->cy = 5;
    allCubes->cz = -150;
    allCubes->left = 50;
    allCubes->right =50;
    allCubes->top = 2;
    allCubes->bottom = 2;
    allCubes->f = 50;
    allCubes->r = 50;
    allCubes = &allCubesHead;  // 指標回到開頭
// --------------------------------------
}
改變render_screen的方式
原先是寫死的繪製哪些方塊,現在需要動態繪製
,因此我們採用每次都讀取linklist來確認目前有哪些方塊
void render_screen(int mode)
{
    char render_style = '#';

    if(mode == _CLEAN_MODE_)
    {
        render_style = ' ';
    }
    else if(mode == _RENDER_MODE_)
    {
        render_style = '#';
    }
    else  /* Default */
    {
        render_style = '#';
    }

    calc_tri();  /* Here Must Calculate Again */

// ------------新增部分-------------------
    while(allCubes->next != NULL)  // 直到linklist到尾端前都
    {
        render_cube(render_style, allCubes->next->cx, allCubes->next->cy, allCubes->next->cz,
                    allCubes->next->left, allCubes->next->right, allCubes->next->top,
                    allCubes->next->bottom, allCubes->next->f, allCubes->next->r);
        allCubes = allCubes->next;  // 繪製每一塊方塊,指標指到下一個
    }
    allCubes = &allCubesHead;       // 都畫完後指標回到開頭
// --------------------------------------
}
建立m按鍵功能
我們設計成,將離目前位置最近的座標及其他資訊寫入到linklist的最尾端,讓下次render_screen能夠將其畫出來。
/* File: main.c */
        .
        ..
        ...
        // 寫在其他按鍵判斷下
        if(GetAsyncKeyState(77) != 0)  /*M*/  // put a cube
        {
            render_screen(_CLEAN_MODE_);
            while(allCubes->next != NULL)  // 將指標移到最後一塊
            {
                allCubes = allCubes->next;
            }

            allCubes->next = (Cube *)malloc(sizeof(Cube));  // 用malloc配置一塊方塊接到下一塊
            allCubes = allCubes->next;  // 指標移動到新方塊
            allCubes->cx = camera_x_pos;  // 以下設置所有屬性
            allCubes->cy = camera_y_pos;
            allCubes->cz = camera_z_pos;
            allCubes->style = '#';
            allCubes->left = 2;
            allCubes->right = 2;
            allCubes->top = 2;
            allCubes->bottom = 2;
            allCubes->f = 2;
            allCubes->r = 2;
            allCubes->next = NULL;
            allCubes = &allCubesHead;  // 指標移動回頭
            render_screen(_RENDER_MODE_);
            isFrameUpdated = True;
        }
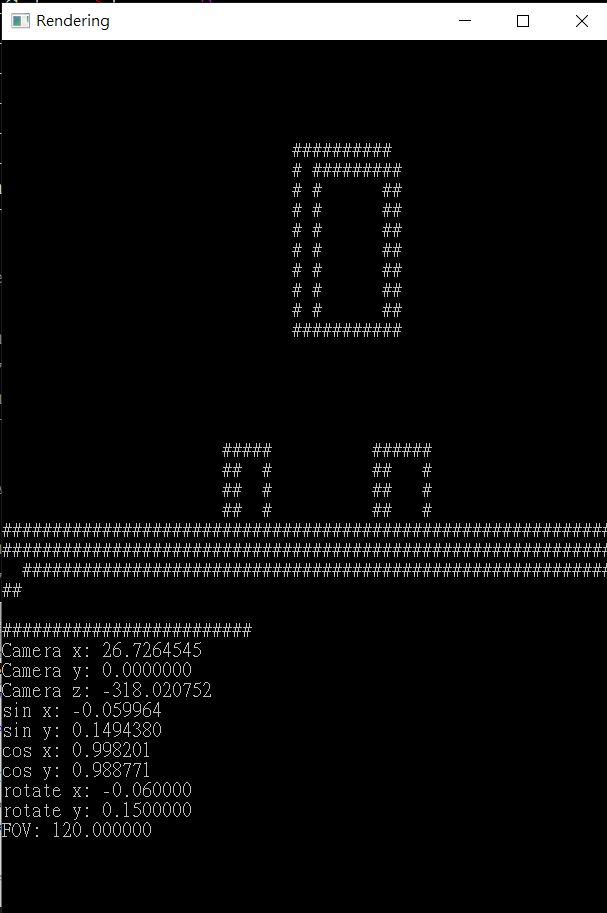
執行
作者測試在程式中創立了三個方塊:
轉個角度看: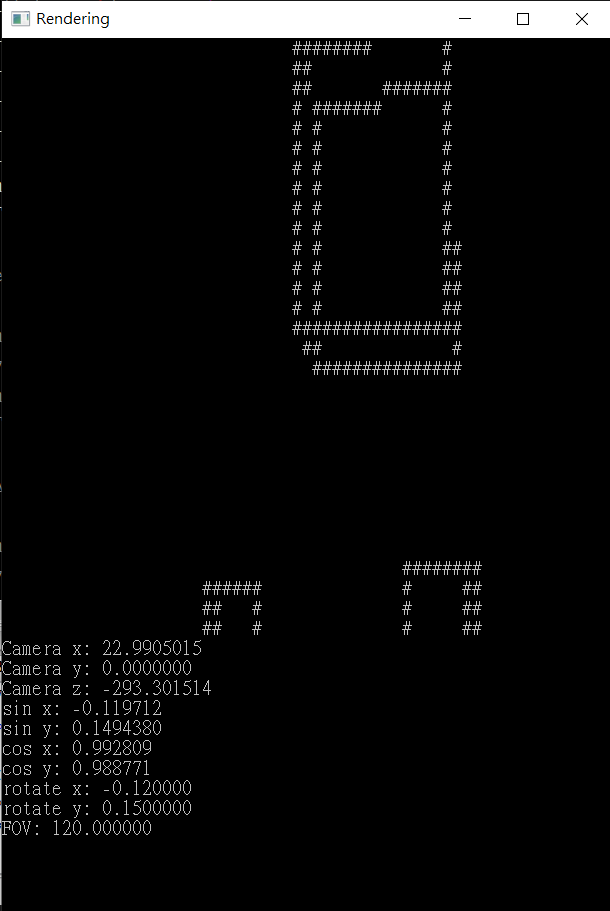
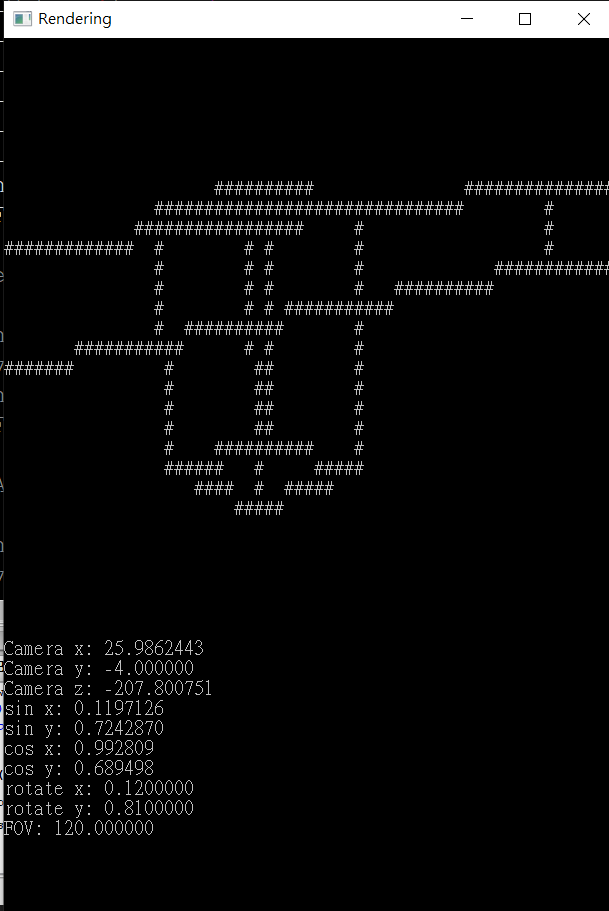
這是接近初始大平台上方的,可以看出「遠近處理」幾乎不存在,因為這需要牽涉光影、深淺等細節,
這次的主題就不贅述啦~
尾聲
這次主題的3D部分就告一段落啦,往後幾天會帶大家來體驗2D遊戲製作,
會製作類似魔塔的遊戲,就敬請期待囉~
