本篇會從Day19 MVVM專案-5 Fragments互動 開branch做修改
今天會用retrofit2與rxjava寫一個呼叫API的範例 最後會補上tests
然後今天的範例不需要建UI
不過因為要新增的東西有點多
所以solution我就先貼在前面 可以先運行看看之後再照著做
https://github.com/mars1120/jetpackMvvmDemo/tree/callapi
那麼首先先去 https://newsapi.org/
申請一組帳號拿到API key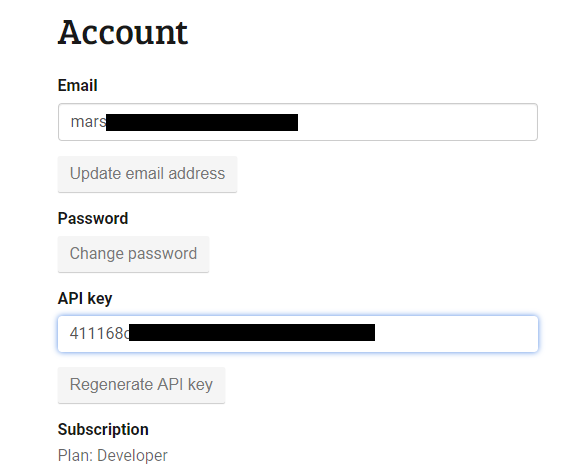
然後這是今天會使用到的url
https://newsapi.org/v1/articles?source=google-news&apiKey=YourAPIKey
YourApiKey替換成剛剛申請所拿到的API key
因為是get形式的 所以直接貼到瀏覽器就可以看到結果
如果資料沒錯的話應該會看到類似的訊息
{
"status":"ok",
"source":"google-news",
"sortBy":"top",
"articles":[
  ...
]
}
另外下面這個是獲取失敗的
https://newsapi.org/v1/articles?source=google-news&apiKey=""
apiKey隨便打或不帶都可以
然後你應該會看到類似這樣的訊息
{"status":"error","code":"apiKeyInvalid","message":"Your API key is invalid or incorrect. Check your key, or go to https://newsapi.org to create a free API key."}
測試用的API搞定了 接下來打開專案開始撰寫code
build.gradle(Module:app)
android {

   ...

    compileOptions {
        sourceCompatibility = 1.8
        targetCompatibility = 1.8
    }
}

dependencies {
...
    implementation 'io.reactivex.rxjava2:rxjava:2.1.7'
    implementation 'io.reactivex.rxjava2:rxandroid:2.0.1'
    implementation 'com.squareup.retrofit2:retrofit:2.4.0'
    implementation 'com.squareup.retrofit2:adapter-rxjava2:2.4.0'
    implementation 'com.squareup.retrofit2:converter-gson:2.4.0'
    testImplementation 'org.robolectric:robolectric:4.3'

}
新增一個config 將domain與API名稱分類
AppConfig.java
public class AppConfig {

    private final static String TestDomain = "https://newsapi.org/v1/";

    public static final String API_GET_NEWS = "articles?source=google-news";

    public static String getDomain() {
        return TestDomain;
    }
}
注意 這裡會把api (https://newsapi.org/v1/articles?source=google-news&apiKey=YourAPIKey)
拆開
變成 Domain = "https://newsapi.org/v1/"
GET_NEWS = "articles?source=google-news"
articles"?"之後的是參數 如果想要的話source=google-news也可以拆出去變成動態變化的
但今天的範例source會是固定不變的
變數apiKey在下面的class
NewstApiForm.java
public interface NewstApiForm {

    @GET(AppConfig.API_GET_NEWS)
    Observable<String> forGetNews(
            @Query("apiKey") String apiKey
    );

}
@Query("apiKey")對應上面url的"apiKey"
String apiKey 這邊的變數名稱可任意取
Observable 會將ResponseBody結果變為String之後往後傳遞
接著是重頭戲呼叫api的function
NewsApi.java
public class NewsApi {

    private static final int DEFAULT_TIMEOUT = 60;

    private Retrofit retrofit;
    private NewstApiForm mNewstApiForm;

    private static NewsApi INSTANCE;

    //獲取單例
    public static NewsApi getInstance() {
        if (INSTANCE == null) {
            synchronized (NewsApi.class) {
                if (INSTANCE == null) {
                    INSTANCE = new NewsApi();
                }
            }
        }
        return INSTANCE;
    }


    private NewsApi() {
        //設置okhttp且設定timeout
        OkHttpClient.Builder builder = new OkHttpClient.Builder();
        builder.connectTimeout(DEFAULT_TIMEOUT, TimeUnit.SECONDS)
                .writeTimeout(DEFAULT_TIMEOUT, TimeUnit.SECONDS)
                .readTimeout(DEFAULT_TIMEOUT, TimeUnit.SECONDS);

        retrofit = new Retrofit.Builder()
                .client(builder.build())
                .addConverterFactory(StringConverterFactory.getInstance())
                .addConverterFactory(GsonConverterFactory.create())
                .addCallAdapterFactory(RxJava2CallAdapterFactory.create())
                .baseUrl(AppConfig.getDomain())
                .build();
        mNewstApiForm = retrofit.create(NewstApiForm.class);
    }

    public Observable<BaseResponseObj> callGetNews(String apiKey) {
        return mNewstApiForm.forGetNews(apiKey)
                .compose(ResponseTransformer.handleResult(BaseResponseObj.class))
                .subscribeOn(Schedulers.io())
                .unsubscribeOn(Schedulers.io())
                .observeOn(AndroidSchedulers.mainThread());
    }
}
Observable
跟 .compose(ResponseTransformer.handleResult(BaseResponseObj.class))
是一組的
BaseResponseObj為你所設置的json object
另外如果你不想做任何加工的話
可以直接回傳String
例如
Observable
...
.compose(ResponseTransformer.handleResult(String.class))
以下是呼叫api的範例
NewsApi.getInstance().callGetNews(NEWS_API_KEY).subscribe(response -> {
           ...
           //呼叫成功的行為
           ...
        }, throwable -> {
            ...
            //途中有error時的行為
            ...
        });
然後要新增一個Converter
StringConverterFactory.java
public class StringConverterFactory extends Converter.Factory {

    private static StringConverterFactory INSTANCE;

    //獲取單例
    public static StringConverterFactory getInstance() {
        if (INSTANCE == null) {
            synchronized (StringConverterFactory.class) {
                if (INSTANCE == null) {
                    INSTANCE = new StringConverterFactory();
                }
            }
        }
        return INSTANCE;
    }

    // 將ResponseBody 轉換成 String
    @Override
    public Converter<ResponseBody, ?> responseBodyConverter(Type type, Annotation[] annotations, Retrofit retrofit) {
        if (type == String.class) {
            return StringConverter.getInstance();
        }
        //其餘不變
        return null;
    }

    private static class StringConverter implements Converter<ResponseBody, String> {

        private static StringConverter INSTANCE;

        //獲取單例
        public static StringConverter getInstance() {
            if (INSTANCE == null) {
                synchronized (StringConverter.class) {
                    if (INSTANCE == null) {
                        INSTANCE = new StringConverter();
                    }
                }
            }
            return INSTANCE;
        }

        @Override
        public String convert(ResponseBody value) throws IOException {
            return value.string();
        }
    }
}
用途就是前面提到的將ResponseBody轉換為String
接著撰寫一個自製的API Exception
ApiException.java
public class ApiException extends Exception {
    private int code;
    private String displayMessage;

    public ApiException(int code, String displayMessage) {
        this.code = code;
        this.displayMessage = displayMessage;
    }

    public int getCode() {
        return code;
    }

    public void setCode(int code) {
        this.code = code;
    }

    public String getDisplayMessage() {
        return displayMessage;
    }

    public void setDisplayMessage(String displayMessage) {
        this.displayMessage = displayMessage;
    }

    /**
     * 未定義
     */
    public static final int UNKNOWN = 1000;

    /**
     * parse錯誤
     */
    public static final int PARSE_ERROR = 1001;

    /**
     * 網路錯誤
     */
    public static final int NETWORK_ERROR = 1002;

    public static ApiException handleException(Throwable e) {
        ApiException ex;
        if (e instanceof JsonParseException
                || e instanceof JSONException
                || e instanceof ParseException) {
            //parse錯誤
            ex = new ApiException(ApiException.PARSE_ERROR, e.getMessage());
            return ex;
        } else if (e instanceof ConnectException) {
            //http錯誤
            ex = new ApiException(ApiException.NETWORK_ERROR, e.getMessage());
            return ex;
        } else if (e instanceof UnknownHostException || e instanceof SocketTimeoutException) {
            //連接錯誤
            ex = new ApiException(ApiException.NETWORK_ERROR, e.getMessage());
            return ex;
        } else if (e instanceof ApiException) {
            return (ApiException) e;
        } else {
            //未定義
            ex = new ApiException(ApiException.UNKNOWN, e.getMessage());
            return ex;
        }
    }
}
接著再新增一個ResponseTransformer
ResponseTransformer.java
public class ResponseTransformer {
    public static <T> ObservableTransformer<String, T> handleResult(Class<T> clazz) {
        return (ObservableTransformer<String, T>) upstream ->
                upstream.flatMap(new ResponseFunction(clazz)).onErrorResumeNext(new ErrorResumeFunction());
    }

    private static class ResponseFunction<T> implements Function<String, ObservableSource> {
        Class<T> clazz;

        public ResponseFunction(Class clazz) {
            this.clazz = clazz;
        }

        @Override
        public ObservableSource apply(String tResponse) throws Exception {
            BaseResponseObj response = new Gson().fromJson(tResponse, BaseResponseObj.class);
            //攔截
            if (response != null && !response.getStatus().equals("ok")) {
                return Observable.error(new ApiException(400, response.getMessage()));
            } else if (clazz.equals(String.class))
                return Observable.just(tResponse);
            else
                return Observable.just(new Gson().fromJson(tResponse, clazz));
        }

    }

    //異常判斷
    private static class ErrorResumeFunction<T> implements Function<Throwable, ObservableSource<T>> {
        @Override
        public ObservableSource<T> apply(Throwable throwable) throws Exception {
            return Observable.error(ApiException.handleException(throwable));
        }
    }
}
通常我在debug時會把斷點設在這個class
他的用途是拿到Response之後 可以做初步的歸納
例如今天server傳給你一個resultCode參數
200正常 直接放行
600要登出 ....之類的
可以在這邊統一處理行為
不過這段其實比較適合放在Interceptor處理
接著新增json object
BaseResponseObj.java
public class BaseResponseObj {
    private String code;
    private String message;
    private String status;
    private String source;
    private String sortBy;
    private List<ArticlesBean> articles;

    public String getCode() {
        return code;
    }

    public void setCode(String code) {
        this.code = code;
    }

    public String getMessage() {
        return message;
    }

    public void setMessage(String message) {
        this.message = message;
    }

    public String getStatus() {
        return status;
    }

    public void setStatus(String status) {
        this.status = status;
    }

    public String getSource() {
        return source;
    }

    public void setSource(String source) {
        this.source = source;
    }

    public String getSortBy() {
        return sortBy;
    }

    public void setSortBy(String sortBy) {
        this.sortBy = sortBy;
    }

    public List<ArticlesBean> getArticles() {
        return articles;
    }

    public void setArticles(List<ArticlesBean> articles) {
        this.articles = articles;
    }

    public static class ArticlesBean {

        private String author;
        private String title;
        private String description;
        private String url;
        private String urlToImage;
        private String publishedAt;

        public String getAuthor() {
            return author;
        }

        public void setAuthor(String author) {
            this.author = author;
        }

        public String getTitle() {
            return title;
        }

        public void setTitle(String title) {
            this.title = title;
        }

        public String getDescription() {
            return description;
        }

        public void setDescription(String description) {
            this.description = description;
        }

        public String getUrl() {
            return url;
        }

        public void setUrl(String url) {
            this.url = url;
        }

        public String getUrlToImage() {
            return urlToImage;
        }

        public void setUrlToImage(String urlToImage) {
            this.urlToImage = urlToImage;
        }

        public String getPublishedAt() {
            return publishedAt;
        }

        public void setPublishedAt(String publishedAt) {
            this.publishedAt = publishedAt;
        }
    }
}
關於這類物件 我是下載plugin(GsonFormat)來快速生成
自此呼叫api的function就完成了可以直接運行了
此時你可以把這段加到activity的某段中然後運行他
或是接著把tests完成 直接在test裡面運行
接著來撰寫單元測試
注意 這些檔案都要加到test底下 (不是androidTest)
FakeApplication.java(test)
public class FakeApplication extends Application {
    @Override
    public void onCreate() {
        super.onCreate();
    }
}
FakeApplication這個其實沒幹嘛 只是如果你原始專案的application有做一些行為可能會導致test出錯
所以直接做一個假的專門run測試用的比較省事
callApiTest.java(test)
import android.util.Log;

import com.ithome11.jetpackmvvmdemo.main.net.NewsApi;
import com.ithome11.jetpackmvvmdemo.main.net.exception.ApiException;

import org.junit.Before;
import org.junit.Test;
import org.junit.runner.RunWith;
import org.robolectric.RobolectricTestRunner;
import org.robolectric.annotation.Config;
import org.robolectric.shadows.ShadowLog;

import io.reactivex.android.plugins.RxAndroidPlugins;
import io.reactivex.plugins.RxJavaPlugins;
import io.reactivex.schedulers.Schedulers;

import static junit.framework.Assert.assertEquals;

@RunWith(RobolectricTestRunner.class)
@Config(sdk = 23, application = FakeApplication.class)
public class callApiTest {

    private static final String TAG = "connectApiTest";


    @Before
    public void setUp() {
        ShadowLog.stream = System.out;
        initRxJava2();
    }

    private void initRxJava2() {
        RxJavaPlugins.reset();
        RxJavaPlugins.setIoSchedulerHandler(scheduler -> Schedulers.trampoline());
        RxAndroidPlugins.reset();
        RxAndroidPlugins.setMainThreadSchedulerHandler(scheduler -> Schedulers.trampoline());
    }

    String ResultMsg = "";
    String errorMsg = "";
    int ResultCode = 0;

    @Test
    public void checkSearchSucessTest() {
        NewsApi.getInstance().callGetNews("NEWS_API_KEY").subscribe(response -> {
            ResultMsg = response.getStatus();
        }, throwable -> {
            ResultCode = ((ApiException) throwable).getCode();
            errorMsg = ((ApiException) throwable).getDisplayMessage();
            Log.d(TAG, "fail: " + errorMsg);
        });
        assertEquals(ResultMsg, "ok");
    }
}
initRxJava2這邊是將異步轉為同步的
拿checkSearchSucessTest()當例子 就是ResultMsg或errorMsg
更新之後才回運行assertEquals
然後NEWS_API_KEY記得改為你的API key
沒意外的話測試會順利通過
接著來看看另一個例子
https://newsapi.org/v1/articles?source=google-news&apiKey="ErrorKey"
首先先將NEWS_API_KEY隨便亂打 然後在運行一次test case
原本預期這段code應該會在進到ResponseTransformer底下的apply後才做轉換
實際上追code會發現他直接跳error了
接著直接複製url到網頁開啟
https://newsapi.org/v1/articles?source=google-news&apiKey=123456
然後開debug mode檢查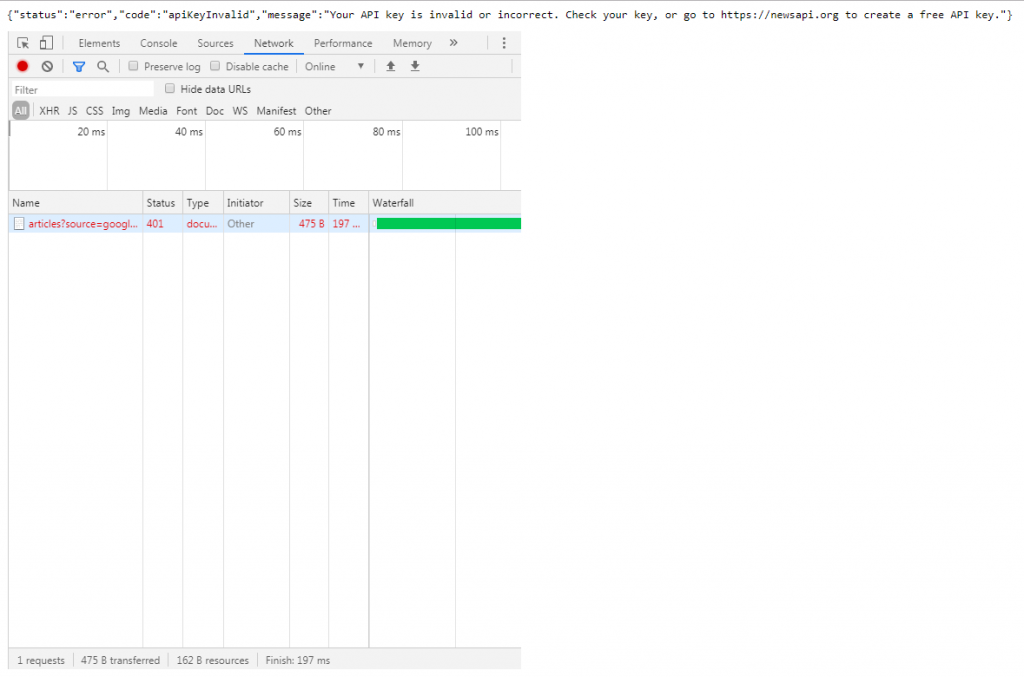
然後會發現雖然有回傳值 但還是被Exception捕捉
原因是因為Web API的Response直接就帶非200的參數了
以致於即使他有回傳訊息也直接跳到error
所以我們回到NewsApi新增一個Interceptor
NewsApi.java
public class NewsApi {
...
    private NewsApi() {
        //設置okhttp且設定timeout
        OkHttpClient.Builder builder = new OkHttpClient.Builder();
        builder.connectTimeout(DEFAULT_TIMEOUT, TimeUnit.SECONDS)
                .writeTimeout(DEFAULT_TIMEOUT, TimeUnit.SECONDS)
                .readTimeout(DEFAULT_TIMEOUT, TimeUnit.SECONDS).addInterceptor(new ResponseInterceptor());

        retrofit = new Retrofit.Builder()
                .client(builder.build())
                .addConverterFactory(StringConverterFactory.getInstance())
                .addConverterFactory(GsonConverterFactory.create())
                .addCallAdapterFactory(RxJava2CallAdapterFactory.create())
                .baseUrl(AppConfig.getDomain())
                .build();

        mNewstApiForm = retrofit.create(NewstApiForm.class);
    }

    private static class ResponseInterceptor implements Interceptor {
        @Override
        public Response intercept(Chain chain) throws IOException {
            Response response = chain.proceed(chain.request());

            if (response.code() == 401 || response.code() == 403) {
                return response.newBuilder().code(200).build();
            } else return response;

        }
    }

}
之後就能進到ResponseTransformer的判斷式了
ResponseTransformer.java
  @Override
        public ObservableSource apply(String tResponse) throws Exception {
            BaseResponseObj response = new Gson().fromJson(tResponse, BaseResponseObj.class);
            //攔截
            if (response != null && !response.getStatus().equals("ok")) {
                return Observable.error(new ApiException(400, response.getMessage()));
            } else if (clazz.equals(String.class))
                return Observable.just(tResponse);
            else
                return Observable.just(new Gson().fromJson(tResponse, clazz));
        }
此時就可以做一些加工做後續處理
然後再提一點
就是關於敏感的KEY不建議直接加進版控
接著會來介紹怎麼樣從外部讀取資料做使用
build.gradle(Module:app)
// Read credentials
def credentialFile = rootProject.file("credentials.properties")
def credentialProperty = new Properties()
credentialProperty.load(new FileInputStream(credentialFile))
android {
  ...
    defaultConfig {
       ...
        buildConfigField("String", "NEWS_API_KEY", credentialProperty['NEWS_API_KEY'])
    }
}
然後在project的rootpath新增一個credentials.properties
大概是這樣的位置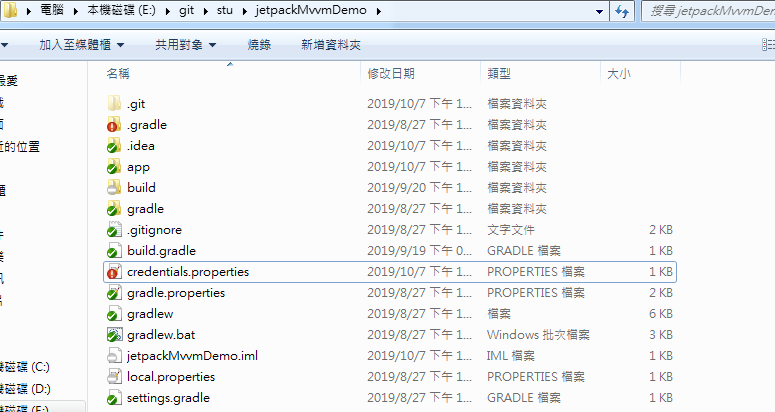
credentials內容
credentials.properties
NEWS_API_KEY="YourKey"
然後把credentials.properties
ignore掉不要加進版控
這樣就能避免將敏感資料存入版控中了
最後再貼一次solution
https://github.com/mars1120/jetpackMvvmDemo/tree/callapi