延續昨天,今天我們要將 Auto DevOps 搭配 K8S,讓它能夠發揮更多的功能。
其實艦長自己有試過要架設 K8S 然後與自己架設的 GitLab 整合,但我必須說那真不是一件簡單的事情,如果不是本來就一直有在關注 K8S,有實際架設、操作並維運過 K8S Cluster,那我建議還是先交給專業的來,時間可以花費在更有效益的地方。然後自己架設的 GitLab 要啟用 Auto DevOps 也是有一些先決條件與地雷要處理,並不是快快樂樂點兩下按鈕就能搞定的。因此為了避免大家太挫折,如果你只是想要感受一下 Auto DevOps 到底有多神奇,建議先按著 GitLab 官方的 Quick Start Guide,先乖乖投靠 GCP 的 GKE,並透過授權給 gitlab.com 幫你代勞建立所需的 GKE 資源。
首先進入昨天我們在 gitlab.com 上以 template 建立好的 Ruby on Rails Project。
進入 project 的 Operations > Kubernetes,按下 Add Kubernetes cluster 。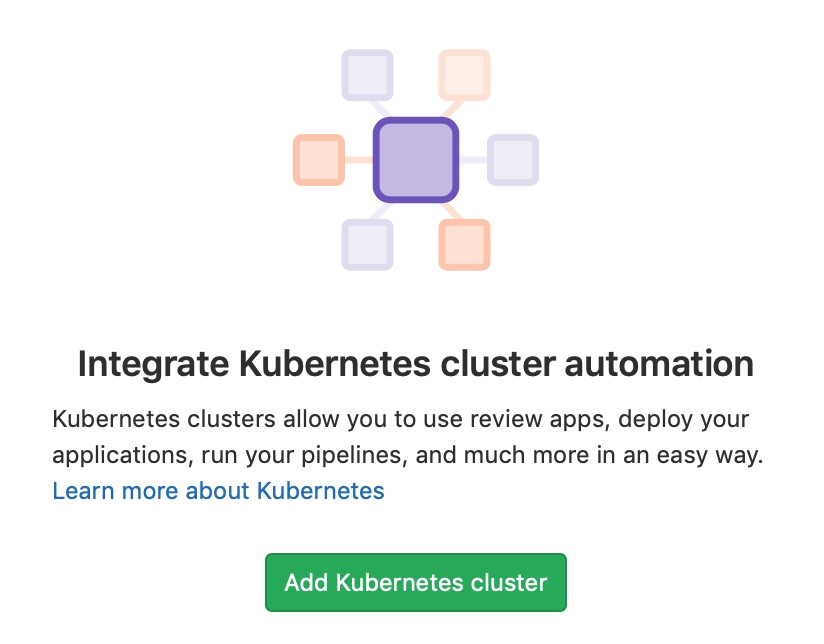
接著選擇 Create new Cluster on GKE,並且準備 Sign in with Google。
但在 Sign in with Google 之前,我們要先去 GCP 上把前置作業完成。
請用你的 Google 帳號登入 GCP,先建立一個「專案」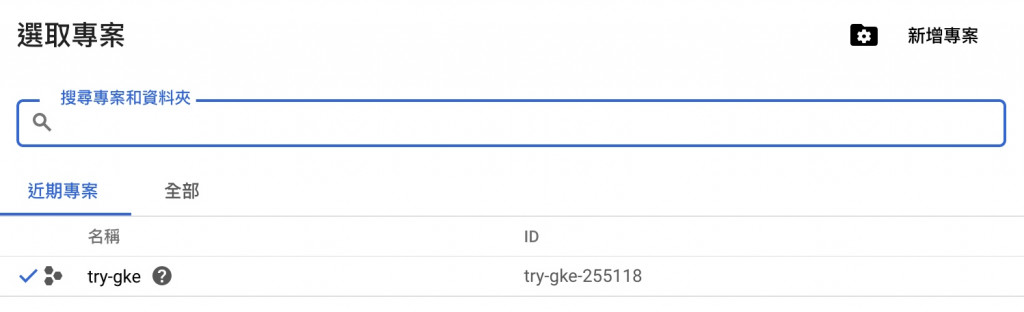
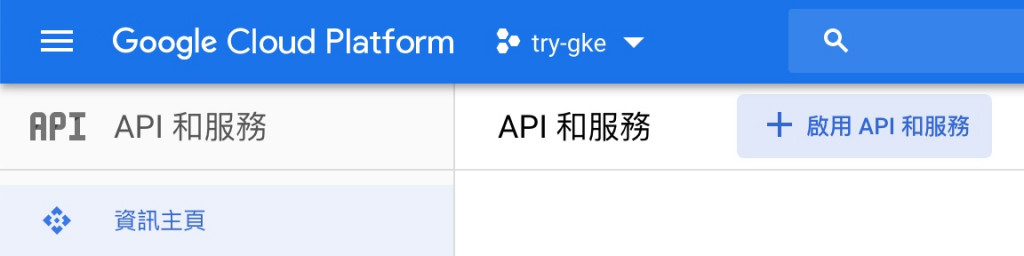
如果是首次使用 GCP 應該會引導你完成申請 GCP 試用額度,然後要填寫信用卡資料⋯⋯等動作,等到動作都完畢之後,接著進入「API 和服務」,並且點擊「啟用 API 和服務」。
進入之後,透過搜尋功能找到「Kubernetes Engine API」。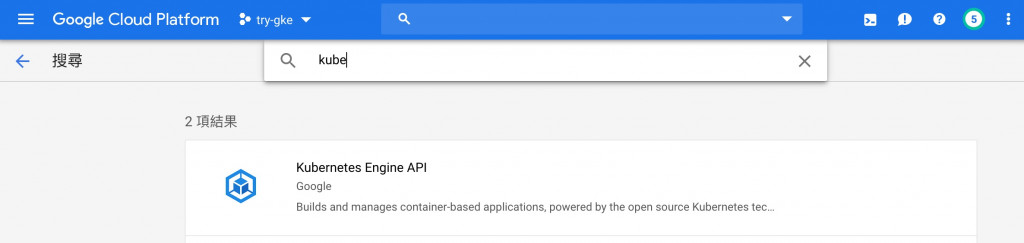
並且將它「啟用」。
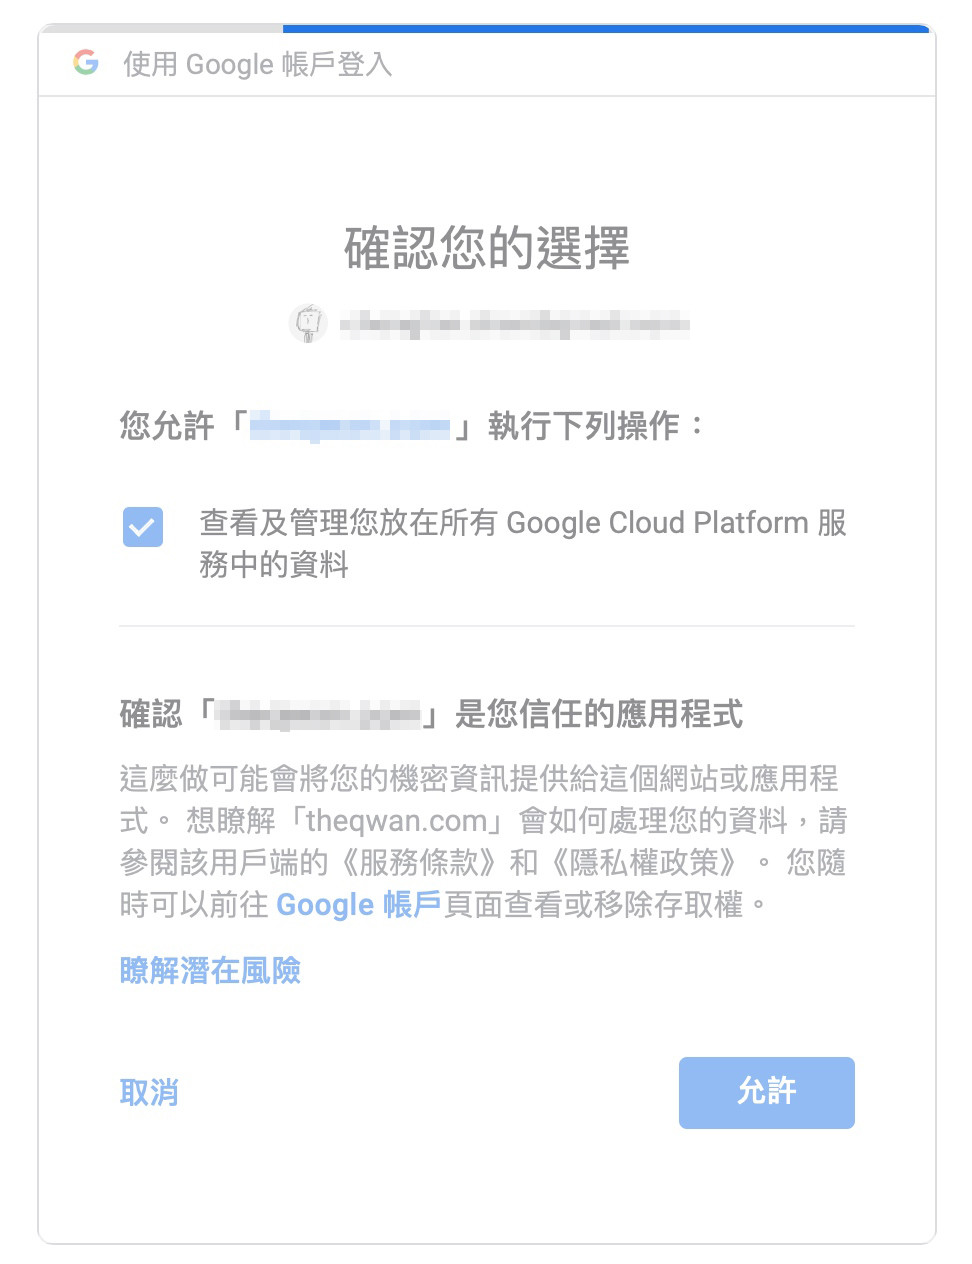
前置作業完成,回到 gitlab.com,現在可以按下 Sign in with Google,然後就登入,並且授權給 gitlab.com 可以幫你代勞建置 GKE。
根據你的財力來建立 K8S Cluster 吧!
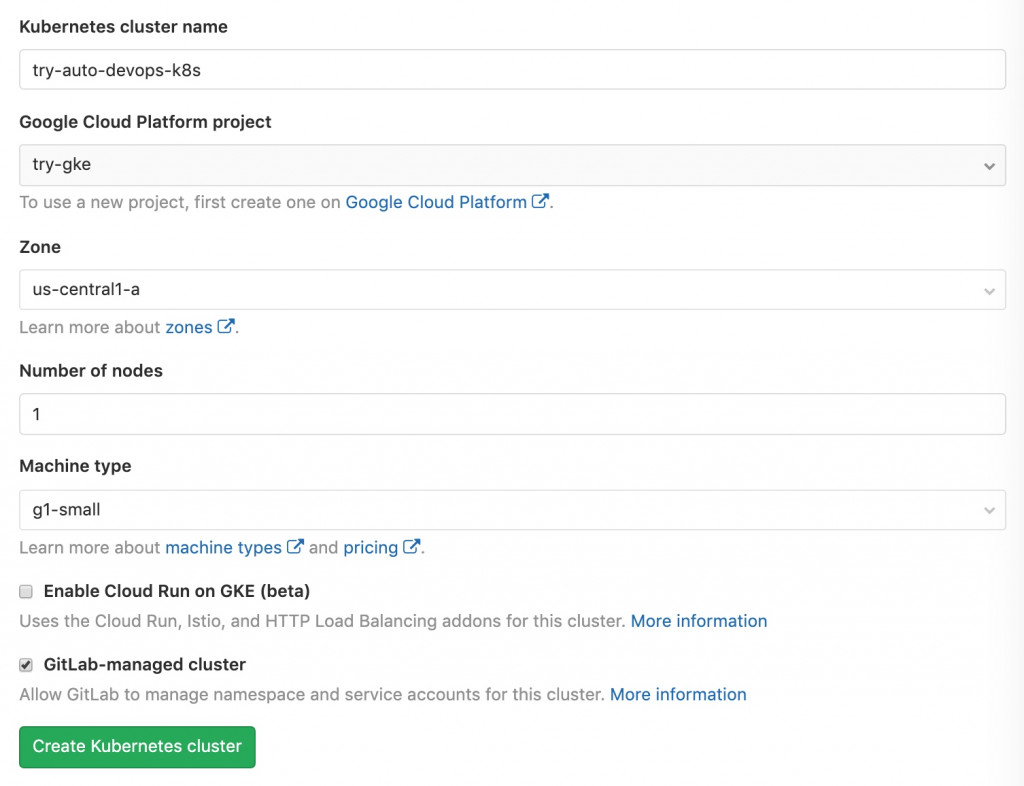
按下 Create Kubernetes cluster,接著等待畫面轉圈圈,大概需要等待幾分鐘。

gitlab.com 轉圈圈的同時你也可以到 GCP 查看,會發現這邊一樣也在轉圈圈,正在建立 K8S Cluster。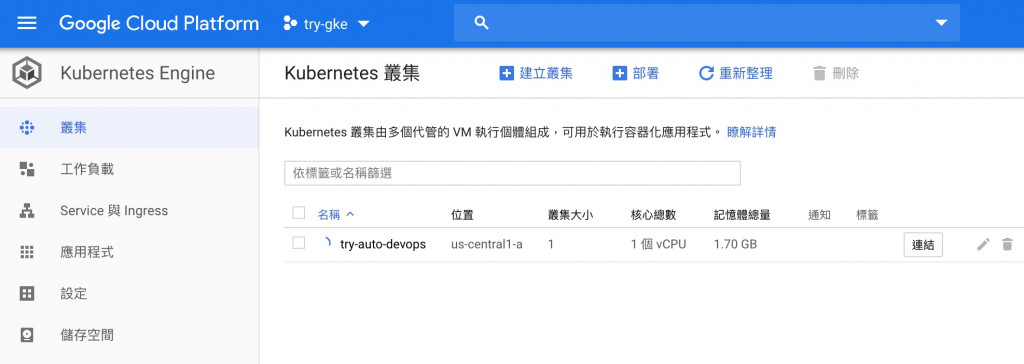
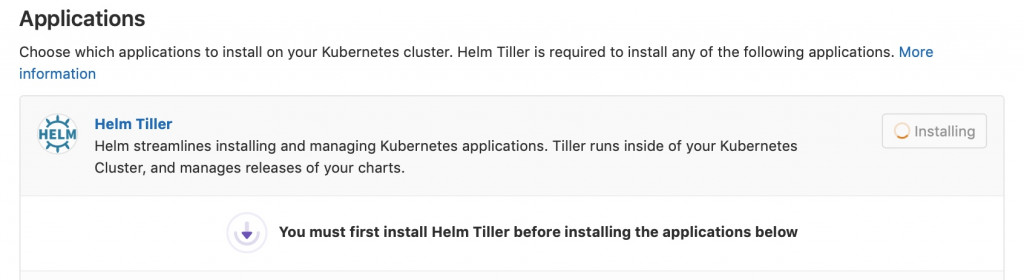
等到 K8S Cluster 建立完畢,接著要在 K8S 上安裝必備的 Applications。首先是 Helm Tiller。
接著是 Ingress 與 Prometheus。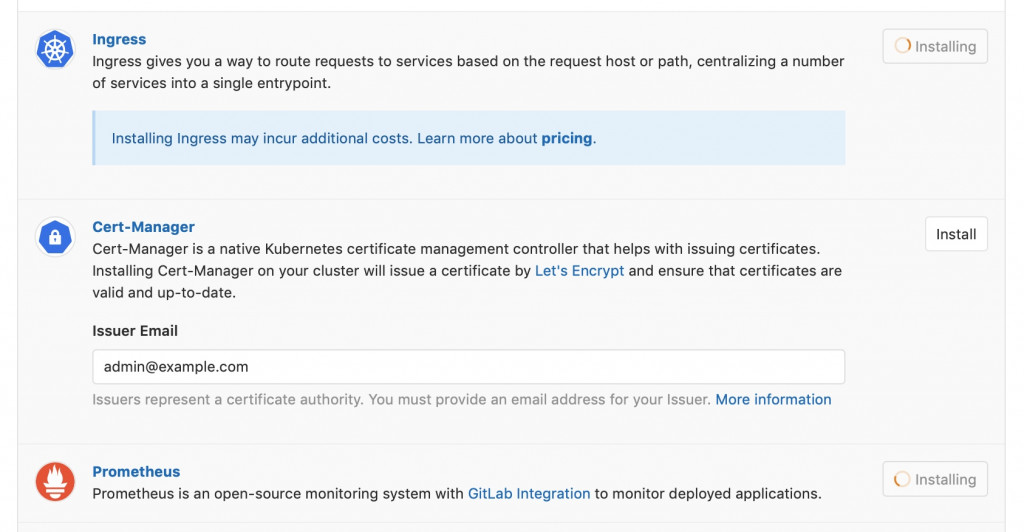
最後是 GitLab Runner。
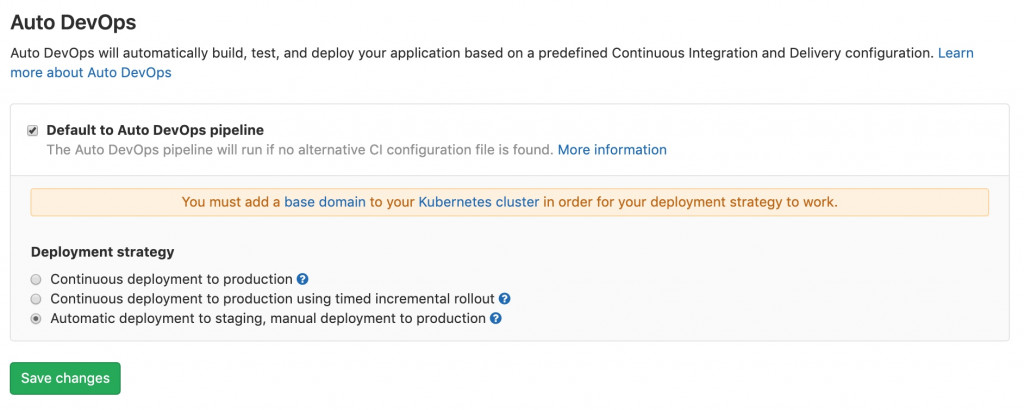
這些都完成之後,讓我們回到 Settings > CI/CD > Auto DevOps,重新啟用 Auto DevOps。
最後,就大功告成了,來到 CI/CD Pipeline 即可看到 Auto DevOps 幫你自動產生的精美的 Pipeline。
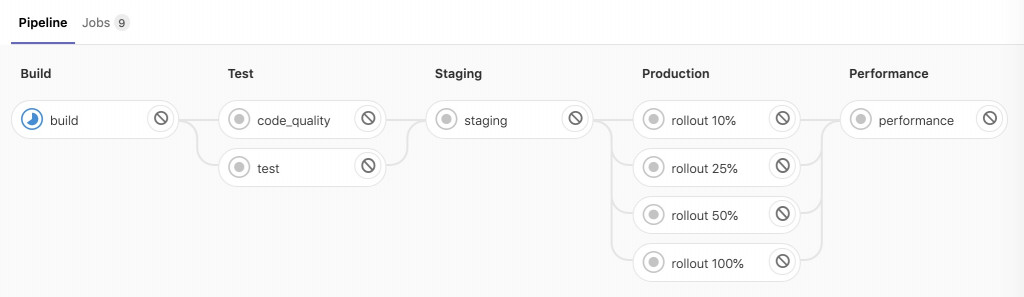
但接著在 Stage: Staging,就炸了 XDDDD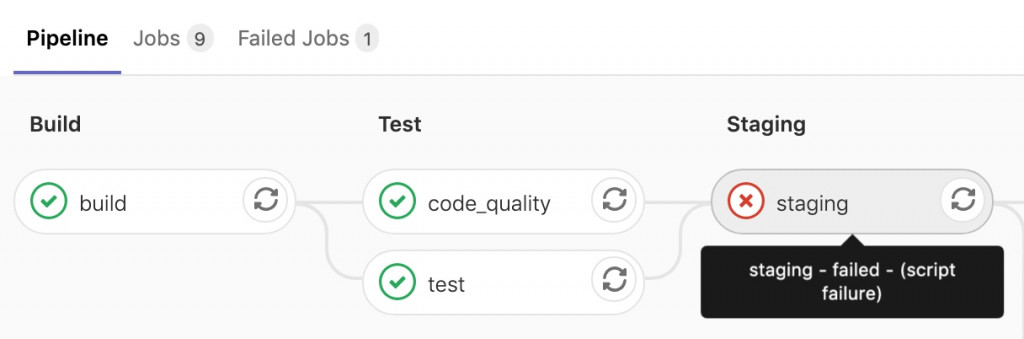
這裡會炸是正常的,因為我們還沒有設置 Auto DevOps 所需的 Base domain。人家 GitLab 可是有再三叮嚀過這件事。我們昨天的文章也有提到 Auto DevOps 的四大 Requirements,而其中一項「能自由掌控的 Domain name」就是在這裡要派上用場。
不過今天讓我們先在這裡打住,明天再繼續 Auto DevOps 後續的步驟,下面先補充說明一些其他內容。
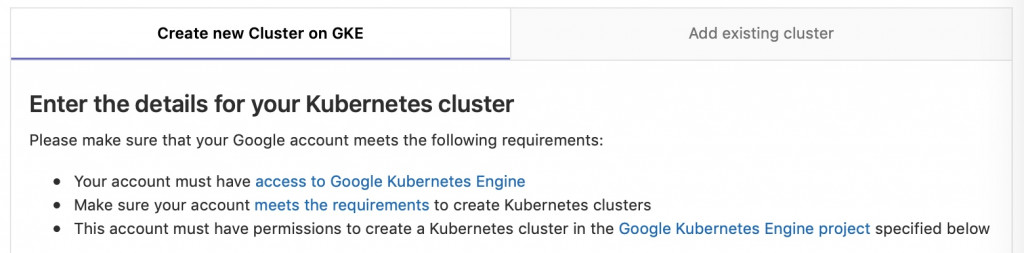
上面我們是偷懶直接使用 gitlab.com 來試用 Auto DevOps,如果你是自架 GitLab Server,但也想按著官方的 Quick Start Guide 來試用 Auto DevOps,那麼有另外一個前置作業需要完成,那就是啟用 Google OAuth。
在沒有啟用 Google OAuth 的狀況下,同樣是在 Create new Cluster on GKE 這個頁面,你只會看到下圖的畫面,是找不到那顆 Sign in with Google 的按鈕。
要啟用 Google OAuth,動作也不難,首先我們一樣要先擁有一個 GCP 的帳號,並且建立一個「專案」。
接著同樣進入「API 和服務」,在「OAuth 同意畫面」為你自架之 GitLab Server 的網域設置「已授權網域」。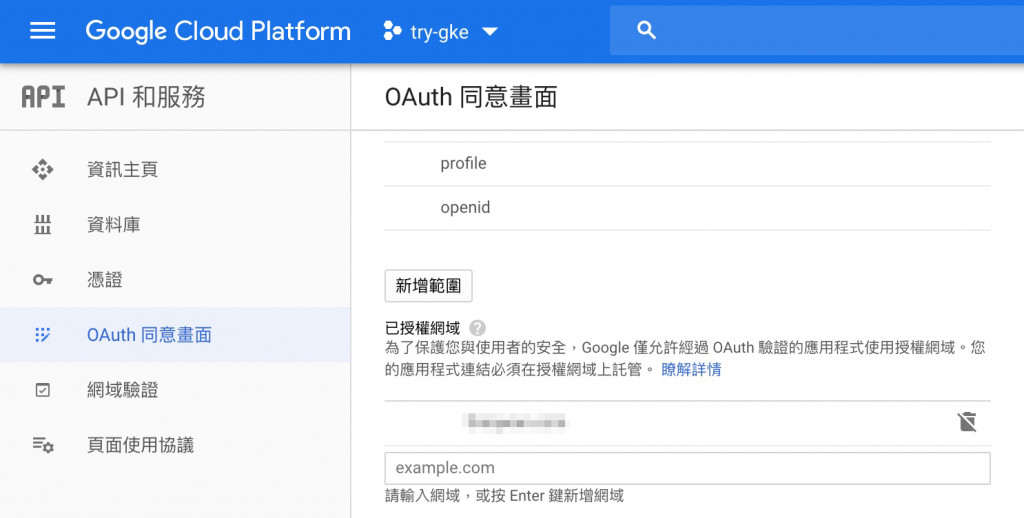
下一步新建一個「憑證」,申請過程會需要填寫「已授權的 JavaScript 來源」、「已授權的重新導向 URI」。
https://你的 GitLab Server 網址/users/auth/google_oauth2/callback、https://你的 GitLab Server 網址/-/google_api/auth/callback
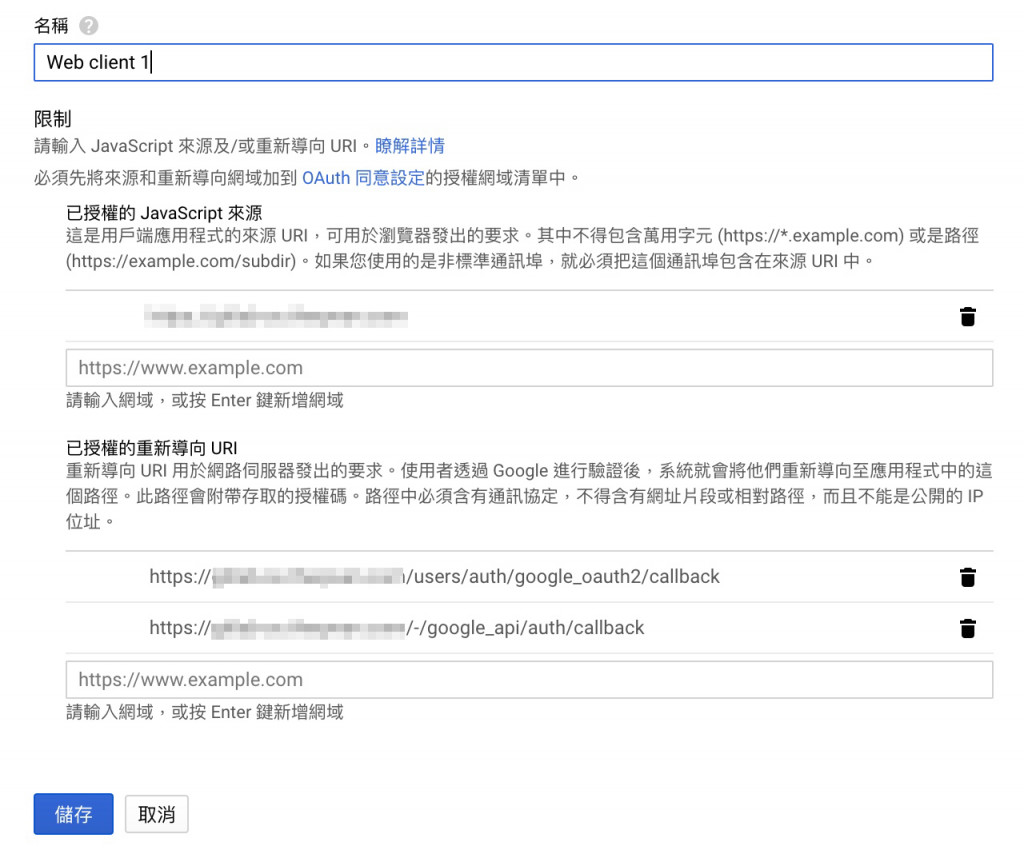
憑證建立完畢之後,你應該會取得一組 client ID 與 client secret,記得先保存下來。
再來,又要啟用 API,如前面說明過的,進入「API 和服務」並且點擊「啟用 API 和服務」,透過搜尋找到下面三個 API 並且將它們啟用。
終於到最後一步了,回到你的 GitLab Server,去修改你的 GitLab Configuration。找到下面這段,並且將 Client ID、Client secret 填進去,然後 gitlab-ctl reconfigure。
 gitlab_rails['omniauth_providers'] = [
   {
     "name" => "google_oauth2",
     "app_id" => "your client id",
     "app_secret" => "your client secret",
     "args" => { "access_type" => "offline", "approval_prompt" => "" }
   }
 ]
當你的 GitLab Server 重新啟動完畢之後,Sign in with Google 的按鈕就會出現啦!
友善提醒,因為 GitLab 已更新版本,此文的內容已部分過期。
自 2021 年 12 月 12 日開始,我就一直想要將原發佈在 iT 邦幫忙的鐵人賽系列文章搬移至 https://gitlab-book.tw 並補充說明文章內容已有過期之處。
因為當初參加 iThome 鐵人賽時,GitLab 仍在 12 版,但如今 GitLab 已更新好幾版了,需要提醒大家注意一下。
本文已完成搬遷