TDD 測試驅動開發(Test-driven development),是一種「先寫測試再開發程式」的開發技巧。先寫測試除了確保測試程式碼的運作,更有助於在開發初期就先想清楚需求是什麼,先弄清楚程式介面如何設計。
步驟:
1.先寫失敗的測試案例。
2.快速實作功能讓測試案例通過。
3.重構:在不改變功能的前提下,修改程式碼。改善可維護性。
實體書,內容更完整!
Android TDD 測試驅動開發:從 UnitTest、TDD 到 DevOps 實踐
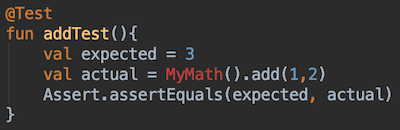
我們用一個加法計算的功能來示範TDD。
先寫測試案例,MyMath.add 傳入1與2,回傳值應為3。
這時候因為還沒有MyMath,可以看到上面顯示紅字。
在MyMath上按下Option + Enter,Create class MyMath
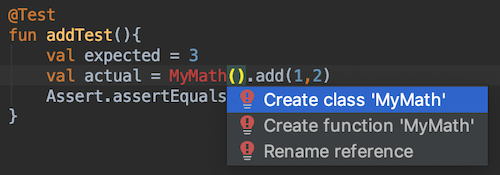
新增類別MyMath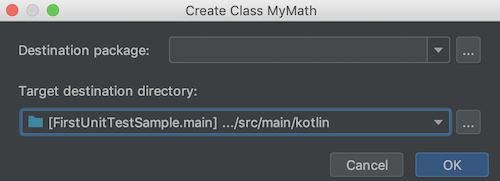
產生完Class後,回到Testing Code。在add 上按 Option + Enter( Alt + Enter ),Create member function MyMath.add, 產生add方法。
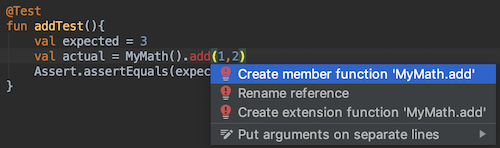
產生add 之後,這時候還不要實作add這個function。
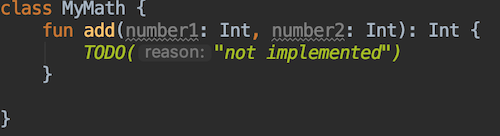
回到測試,執行測試。看到 An operation is not implemented。這時完成了TDD的第一步驟,撰寫失敗的測試。

接著是TDD的第二步驟,讓ProductionCode 通過測試。這時我們才要完成
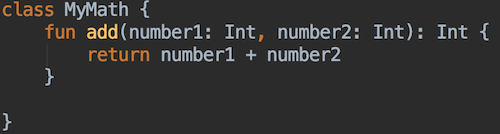
這樣就完成了TDD的先寫測試,再讓測試通過。先寫測試最主要的好處是讓你先想清楚需求是什麼,依照需求撰寫測試案例,再把Production Code 完成。
再來看一個稍微複雜的案例。在第一單元的賣雨傘的計價範例(晴天打9折)。
第一步:撰寫失敗的測試案例。這個案例描述購買3隻雨傘,1隻100元時,總價應是300
@Test
fun totalPrice(){
    val umbrella = Umbrella()
    val actual = umbrella.totalPrice(3,100)
    val expected = 300
    Assert.assertEquals(expected,actual)
}
透過option + Enter 產生這段尚未實作的Production code
class Umbrella {
    fun totalPrice(quantity: Int, price: Int) :Int {
        TODO("not implemented")
    }
}
執行測試,得到了第一個失敗的測試
An operation is not implemented: not implemented
kotlin.NotImplementedError: An operation is not implemented: not implemented
    at Umbrella.totalPrice(Umbrella.kt:3)
接著讓ProductionCode完成測試。
class Umbrella {
    fun totalPrice(quantity: Int, price: Int) :Int {
        return quantity * price
    }
}
再執行測試就會通過了。
加上晴天打9折的測試案例。購買3份,應是270元。將 IWeather.isSunny()固定回傳晴天。
class UmbrellaTest {

    @Mock
    lateinit var weather: IWeather

    @Before
    fun setup(){
        MockitoAnnotations.initMocks(this)
    }

    @Test
    fun totalPrice_sunnyDay() {
        `when`(weather.isSunny()).thenReturn(true)
        val umbrella = Umbrella(weather)
        val actual = umbrella.totalPrice(3, 100)
        val expected = 270
        Assert.assertEquals(expected, actual)
    }
}
Umbrella的建構子加上了weather
class Umbrella(val weather: IWeather) {
    fun totalPrice(quantity: Int, price: Int) :Int {
        return quantity * price
    }
}
這時候只有IWeather的Interface,並未實作
interface IWeather {
    fun isSunny(): Boolean
}
執行測試,得到失敗的測試。
java.lang.AssertionError: expected:<270> but was:<300>
接著用最簡單的方式完成ProductionCode。加上晴天打9折的判斷。
class Umbrella(val weather: IWeather) {
    fun totalPrice(quantity: Int, price: Int): Int {
        if (weather.isSunny()) {
            return quantity * (price * 0.9).toInt()
        }
        return quantity * price
    }
}
執行測試,通過測試。代表這個需求完成了。
接著TDD的第三步驟:重構程式碼。
fun totalPrice(quantity: Int, price: Int): Int {
    var unitPrice = price

    if (weather.isSunny()) {
        unitPrice = (price * 0.9).toInt()
    }

    return quantity * unitPrice
}
執行全部測試,通過測試後就完成了,也證明了你沒有因為重構而改壞掉。
TDD的先寫測試,其重點在於先想好要的目標,所以這個測試,不只是測試,更是一種需求的描述。以最少量、剛好能運作的測試,不斷的逼出需求的關鍵分歧點。
如果先寫Production code再寫測試,你可能會覺得浪費時間,既然需求都完成了,為什麼還要寫測試。TDD也正好可以解決這個問題。
範例下載:
https://github.com/evanchen76/TDD_DISample
出版書:
Android TDD 測試驅動開發:從 UnitTest、TDD 到 DevOps 實踐
線上課程:
Android 動畫入門到進階
Android UI 進階實戰(Material Design Component)


 iThome鐵人賽