各位好這個系列到目前為止我們用 Rust + Actix + Diesel 的架構已經做了下面的事情,
那麼今天就要來用試試看使用 r2d2 改寫 DB 的 connection 進一步優化我們的 web service。
筆者研究了一下發現原來 Diesel 本身就有整合 r2d2 所以我們在添加依賴的時候在 feature 把他加進來即可,
diesel = { version = "1.0.0", features = ["postgres", "r2d2"] }
首先 r2d2 官方的 example 很簡單如下,
use std::thread;

extern crate r2d2;
extern crate r2d2_foodb;

fn main() {
    // 新增主要的 pool
    let manager = r2d2_foodb::FooConnectionManager::new("localhost:1234");
    let pool = r2d2::Pool::builder()
        // max size 很重要尤其是如果你的 cpu 線程夠多的時候很容易就會超出 postgresql 的最大連線數
        // 計算方式為 workers * max_size
        .max_size(15)
        .build(manager)
        .unwrap();

    // 這邊只是示例用實際的程式碼只需要 pool 即可
    for _ in 0..20 {
        let pool = pool.clone();
        thread::spawn(move || {
            let conn = pool.get().unwrap();
            // use the connection
            // it will be returned to the pool when it falls out of scope.
        })
    }
}
這邊要注意的就是 max_size ,筆者我踩到的這個雷是因為 actix 預設就會執行跟你 CPU 線程數一樣多的 thread,而這個數值可以在啟動 server 時看到,如下圖。

而 r2d2 的 pool 又會在單的線程上開啟多個連線因此當 workers 越多越容易超過 postgresql 預設的最大連線數(100),其算法為 workers * max_size。
若是超過的話就會顯示像這樣的錯誤,
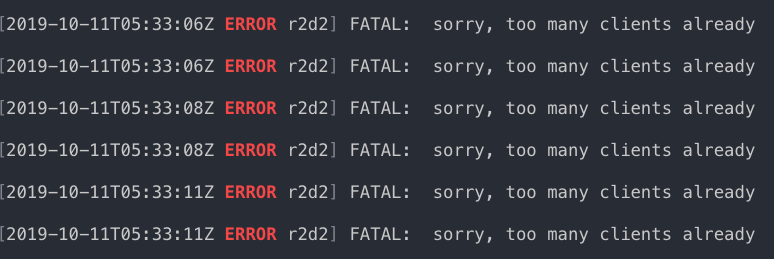
那麼我們繼續來修改原本的 establish_connection 吧,
use diesel::r2d2::{ ConnectionManager, Pool };

pub type PgPool = Pool<ConnectionManager<PgConnection>>;

pub fn establish_connection() -> PgPool {
    dotenv().ok();

    let database_url = env::var("DATABASE_URL")
        .expect("DATABASE_URL must be set");
    let manager = ConnectionManager::<PgConnection>::new(database_url);
    Pool::builder().max_size(8).build(manager).expect("Failed to create pool.")
}
這裏我們定義了 PgPool 的 type,另外就是改寫了 establish_connection 也就是跟上面的範例一樣並且在最後把 Pool 回傳。
那麼接著我們就來調整 main 這支程式,首先我們先把剛剛的 establish_connection 加在 App Data 裡面這樣我們就可以讓 api 取得 pool。
fn main() {
    let mut server = HttpServer::new(
        || App::new()
            .data(establish_connection())
}
然後我們就可以把 api 改寫成這樣,
#[post("/post")]
fn create_post_handler(pool: web::Data<PgPool>, params: web::Json<NewPost>) -> Result<HttpResponse> {
    let result = create_post(&pool.get().unwrap(), params.0);

    Ok(HttpResponse::Ok().json(result))
}
這樣就大功告成了,是不是很簡單呢?
完整專案程式看這邊

practical-rust-web-development-connection-pool