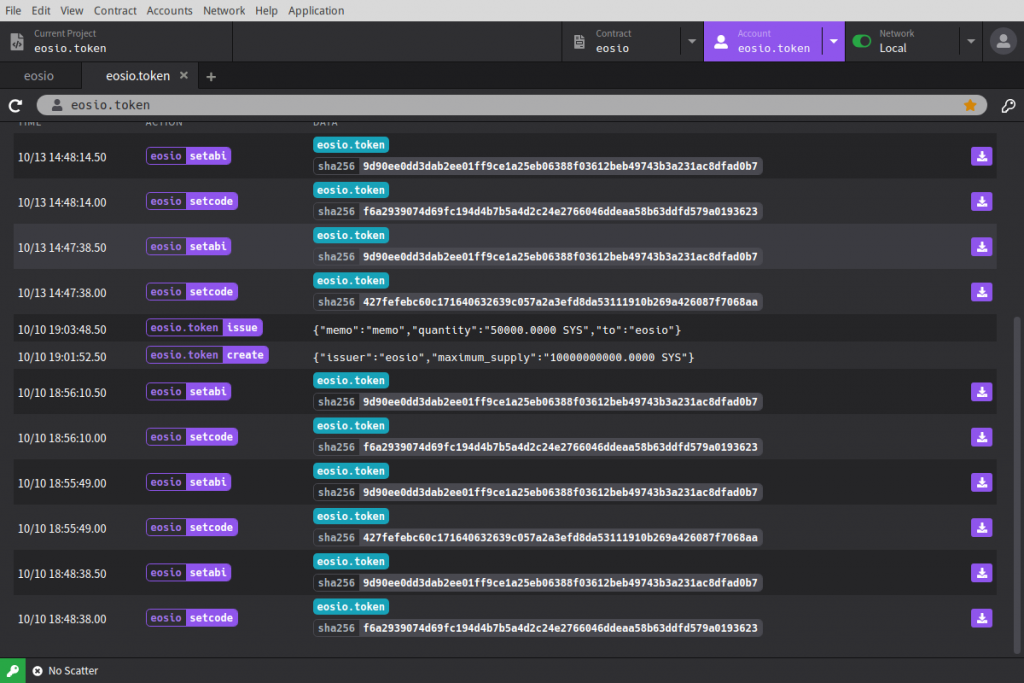
EOS Studio啟動節點後,有夠容易當...
之前說過,EOS Studios也是使用Docker的技術,這次來找找他啟動容器與使用的方式:
docker run -dt --name eosio_v1.8.4 --publish 8888:8888 --publish 5555:5555 --volume $HOME/.eosio/v1.8.4:/eosio -w /eosio eostudio/eos:v1.8.4 /bin/bash
eostudio/eos是映像檔的成,比較特別的是除了常用的背景執行參數-d,還加了個反而我在docker exec比較會使用的--tty -t參數。不過最終只是運行服務於背後而已,還沒正式啟動節點。但同樣的綁定8888和5555阜號,好使用eosio的HTTP RPC。
接下來才是真正運行節點:
docker exec -it -w /eosio eosio_v1.8.4 /bin/bash -c "nodeos -e -p eosio --plugin eosio::http_plugin --plugin eosio::chain_plugin --plugin eosio::chain_api_plugin --plugin eosio::producer_plugin --plugin eosio::history_plugin --plugin eosio::history_api_plugin --data-dir /eosio/data --config-dir /eosio/config --http-server-address=0.0.0.0:8888 --access-control-allow-origin=* --http-validate-host=false --max-transaction-time=200 --replay-blockchain --hard-replay-blockchain --disable-replay-opts --contracts-console --filter-on=* --filter-out=eosio:onblock:"
和之前啟動nodeos很類似,不過因為EOS Studio實在太容易當掉,為了還原交易紀錄,還加了--replay-blockchain
和--hard-replay-blockchain,實際啟動久很多...如果正常關閉節點,應該無需要加上這兩個參數,會快很多。
EOS Studio將開發套件放在另一個映像檔案中--eostudio/eosio.cdt。在這邊需要先將專案資料夾路徑給設進$PROJECT參數裡。然後直接透過/bin/bash -c 來執行編譯指令eosio-cpp(合約名稱也可以改掉,改掉下歷中hicontract)。不過編譯在EOS Studio穩定多了,這可能沒什麼機會用。
docker run --rm --name eosio.cdt_v1.6.2 --volume $PROJECT_DIR:/project -w /project eostudio/eosio.cdt:v1.6.2 /bin/bash -c "eosio-cpp -abigen -I include -R resource -contract hicontract -o hicontract.wasm src/hicontract.cpp"
部署合約要在回到使用eostudio/eosio。不過EOS Studio似乎是直接使用HTTP RPC部署合約。實際上部署合約就是觸發eosio合約的setcode和setabi活動。

說實話,不管這樣都有些麻煩,所以以下先提供一些思路:
js4eos
eosio.js
cleos到本機eostudio/eosio
拿最後一個方式來說,但不管哪個都須要有個儲存鑰匙的地方,所以先來建立資料夾$HOME/eosio-wallet,接著來改寫一下啟動容器的方式:
docker run -dt --name eosio_v1.8.4 --publish 8888:8888 --publish 5555:5555 --volume $HOME/.eosio/v1.8.4:/eosio --volume $HOME/eosio-wallet:/root/eosio-wallet --volume $PROJECT:/root/project -w /eosio eostudio/eos:v1.8.4 /bin/bash
來把錢包資料夾和專案資料夾也掛載進去,然後啟動節點:
docker exec -it -w /eosio eosio_v1.8.4 /bin/bash -c "nodeos -e -p eosio --plugin eosio::http_plugin --plugin eosio::chain_plugin --plugin eosio::chain_api_plugin --plugin eosio::producer_plugin --plugin eosio::history_plugin --plugin eosio::history_api_plugin --data-dir /eosio/data --config-dir /eosio/config --http-server-address=0.0.0.0:8888 --access-control-allow-origin=* --http-validate-host=false --max-transaction-time=200 --replay-blockchain --hard-replay-blockchain --disable-replay-opts --contracts-console --filter-on=* --filter-out=eosio:onblock:"
再來就是建立keosd錢包與匯入私鑰。
最後來部署看看:
docker exec -it -w /root/project eosio_v1.8.4 /bin/bash -c "cleos set contract <ACCOUNT> <CONTRACT>"
替換掉<ACCOUNT> 和 <CONTRACT>,然後執行。
Output:
Reading WASM from /root/project/eosio.token/eosio.token.wasm...
Skipping set code because the new code is the same as the existing code
Skipping set abi because the new abi is the same as the existing abi
no transaction is sent
成功,完美,不過我們沒有修改過合約,所以無須更新合約,也沒有交易送出。
