今天來實作的是複數角色卡存取功能......在那之前這邊先老實自首,之前寫的存檔方式超零散,基本上是各欄位分別存進localstorage裡,讀取時也是各元件自己讀localstorage資料,所以首先需要先整合同一份角色卡的資料讀取方式。
原本的localstorage長相,存檔存得localstorage超醜XD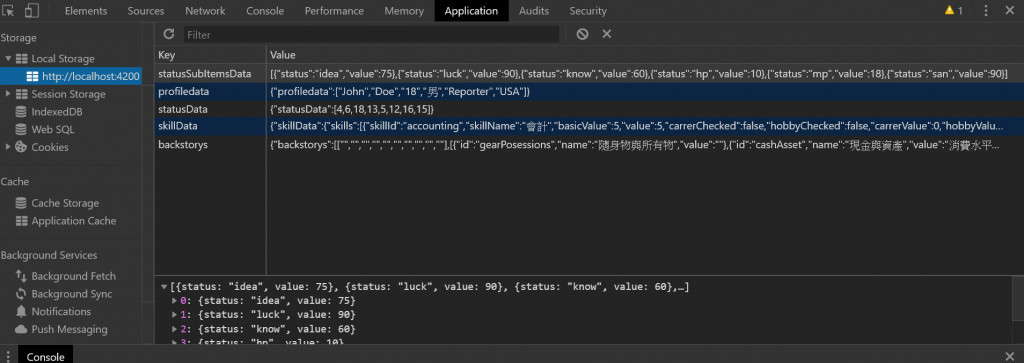
實作方式這邊想到兩種方法:
因為之前的存檔方式就是各元件自己存自己讀,所以這邊決定選方法2,這樣一來只需要按照原本存檔方式改寫即可,也可以免去資料在元件間傳來傳去萬一傳丟了怎麼辦。
以下是實作:
首先要讓整份角色卡在localstorage只存一份資料,所以這邊新增存取該角色卡的key,charactorNum暫時寫死為1,ngOnInit指定只要localstorage內還沒有該角色卡就新增進去。
export class CharacterComponent {

    title = `Character Card`
    subtitle = `CALL Of CTHULHU`;

    charactorNum = 1
    CHcard = 'CH' + this.charactorNum;

    ngOnInit() {
        if (localStorage.getItem(this.CHcard) == null) {
            let data = { "Charactor": this.CHcard };
            localStorage.setItem(this.CHcard, JSON.stringify(data));
        }
    }

}
各元件存檔方式則是從父元件Input進存取localstorage用的key,也就是上面程式碼裡的CHcard取出localstorage的值後,更新自己的資料再用變數CHcard存回去。
【character.component.html】
<profile #myProfile [CHcard]="CHcard"></profile>
【profile.component.ts】
import { Component, Input } from '@angular/core';

...

export class ProfileComponent {

    @Input() CHcard;

    ...

    saveProfileData() {
        let profiledata = [
            this.chName,
            this.plName,
            this.age,
            this.gender,
            this.occupation,
            this.birthplace
        ];
        let data = JSON.parse(localStorage.getItem(this.CHcard));
        data.profiledata = profiledata;
        localStorage.setItem(this.CHcard, JSON.stringify(data));
    }

    getProfileData() {
        let data = JSON.parse(localStorage.getItem(this.CHcard));

        if (data.profiledata == undefined) {
            alert('找不到該角色卡資料');
        } else {
            this.chName = data.profiledata[0];
            this.plName = data.profiledata[1];
            this.age = data.profiledata[2];
            this.gender = data.profiledata[3];
            this.occupation = data.profiledata[4];
            this.birthplace = data.profiledata[5];
        }
    }

}
每個元件都重複以上步驟,最後就成功整合一份角色卡的存讀檔功能了。coding的時候常常跑不出資料或者報錯,重頭看一遍程式碼後才回想起當初怎麼做的,然後一點一點debug。
目前為止的Save/Load功能其實還是有點小bug,不過這部分就先暫緩,明天來把複數角色卡生出來。
= = = = =
你今天的努力,
是否有跟未來的夢想
同一個等級?


 iThome鐵人賽