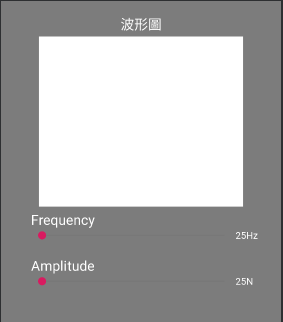
今天要使用onDraw繪出波形圖並且能使用seekbar來調整波型。
首先是layout的部分,需要兩個SeekBar來調整之後繪出的波形圖。
<?xml version="1.0" encoding="utf-8"?>
<LinearLayout xmlns:android="http://schemas.android.com/apk/res/android"
    android:layout_width="match_parent"
    android:layout_height="match_parent"
    android:background="#7c7c7c"
    android:orientation="vertical">


    <TextView
        android:layout_width="match_parent"
        android:layout_height="wrap_content"
        android:layout_marginTop="20dp"
        android:gravity="center"
        android:text="波形圖"
        android:textColor="#ffffff"
        android:textSize="20dp" />

    <com.example.retrofittest.WaveView
        android:id="@+id/wavedraw"
        android:layout_width="300dp"
        android:layout_height="250dp"
        android:layout_gravity="center"
        android:layout_margin="5dp" />

    <RelativeLayout
        android:layout_width="wrap_content"
        android:layout_height="wrap_content"
        android:layout_gravity="center">

        <TextView
            android:id="@+id/text_hz"
            android:layout_width="wrap_content"
            android:layout_height="wrap_content"
            android:layout_marginStart="10dp"
            android:layout_marginLeft="10dp"
            android:text="Frequency"
            android:textColor="#ffffff"
            android:textSize="20dp" />

        <SeekBar
            android:id="@+id/seekBar_Hz"
            android:layout_width="300dp"
            android:layout_height="wrap_content"

            android:layout_below="@id/text_hz"
            android:layout_marginStart="10dp"
            android:layout_marginLeft="10dp"
            android:layout_marginBottom="20dp"
            android:max="50"
            android:maxHeight="2dp"
            android:minHeight="20dp" />

        <TextView
            android:id="@+id/value_hz"
            android:layout_width="wrap_content"
            android:layout_height="wrap_content"
            android:layout_below="@id/text_hz"
            android:layout_toRightOf="@id/seekBar_Hz"
            android:text="25"
            android:textColor="#ffffff" />

        <TextView
            android:layout_width="wrap_content"
            android:layout_height="wrap_content"
            android:layout_below="@id/text_hz"
            android:layout_centerVertical="true"
            android:layout_toRightOf="@id/value_hz"
            android:text="Hz"
            android:textColor="#ffffff" />

    </RelativeLayout>


    <RelativeLayout
        android:layout_width="wrap_content"
        android:layout_height="wrap_content"
        android:layout_gravity="center">

        <TextView
            android:id="@+id/text_n"
            android:layout_width="wrap_content"
            android:layout_height="wrap_content"
            android:layout_marginStart="10dp"
            android:layout_marginLeft="10dp"
            android:text="Amplitude"
            android:textColor="#ffffff"
            android:textSize="20dp" />

        <SeekBar
            android:id="@+id/seekBar_N"
            android:layout_width="300dp"
            android:layout_height="wrap_content"
            android:layout_below="@+id/text_n"
            android:layout_marginStart="10dp"
            android:layout_marginLeft="10dp"
            android:layout_marginBottom="20dp"
            android:max="50"
            android:maxHeight="2dp"
            android:minHeight="20dp" />

        <TextView
            android:id="@+id/value_n"
            android:layout_width="wrap_content"
            android:layout_height="wrap_content"
            android:layout_below="@id/text_n"
            android:layout_toRightOf="@id/seekBar_N"
            android:text="25"
            android:textColor="#ffffff" />

        <TextView
            android:layout_width="wrap_content"
            android:layout_height="wrap_content"
            android:layout_below="@id/text_n"
            android:layout_toRightOf="@id/value_n"
            android:text="N  "
            android:textColor="#ffffff" />
    </RelativeLayout>
</LinearLayout>
接下來是波形的繪製,這邊有兩個方法用來調整波形圖的數值。
public class WaveView extends View {
    //數值
    private int offset = -100;

    //波長
    private int wavelength = 400;
    private int center = 300;

    //頻率
    private int frequency = 25;

    //震幅
    private int amplitude = 250;

    public void setFrequency(int hz){
        frequency = hz;
        wavelength = 400-8*hz;
        if (hz == 0){
            offset = 0;
        }
    }

    public void setAmplitude(int n){
        amplitude = n*10;
    }

    Paint mPaint = new Paint();
    public WaveView(Context context){
        super(context);
    }

    protected void onDraw(Canvas canvas) {
        super.onDraw(canvas);
        canvas.drawColor(Color.WHITE);
        mPaint.setColor(Color.argb(255, 255, 255, 255));
        mPaint.setStyle(Paint.Style.STROKE);
        mPaint.setStrokeWidth(5);
        mPaint.setAntiAlias(true);

        Path mPath = new Path();
        mPath.reset();
//        mPath.moveTo(-wavelength + offset, center);
        for (int i = 0; i <= frequency; i++) {
            int totaloffset = i * wavelength + offset;
            //波峰上方
            mPath.quadTo(-wavelength * 3 / 4 + totaloffset, center + amplitude, -wavelength / 2 + totaloffset, center);
            //波峰下方
            mPath.quadTo(-wavelength / 4 + totaloffset, center - amplitude, totaloffset, center);
            canvas.drawPath(mPath, mPaint);
            invalidate();
        }
    }
}
最後使用seekbar在onProgressChanged下取得seekbar的數值並帶入setFrequency、setAmplitude兩個方法中,這樣子就完成能夠調整的波形圖了。
public class MainActivity extends AppCompatActivity {
    private WaveView waveView;
    private TextView textView_hz, textView_n;
    private SeekBar seekBar_Hz, seekBar_N;

    @Override
    protected void onCreate(Bundle savedInstanceState) {
        super.onCreate(savedInstanceState);
        setContentView(R.layout.activity_main);
        waveView = findViewById(R.id.wavedraw);
        textView_hz = findViewById(R.id.value_hz);
        textView_n = findViewById(R.id.value_n);
        seekBar_Hz = findViewById(R.id.seekBar_Hz);
        seekBar_N = findViewById(R.id.seekBar_N);
        seekBar_Hz.setProgress(25);
        seekBar_N.setProgress(25);
        seekBar_Hz.setOnSeekBarChangeListener(new SeekBar.OnSeekBarChangeListener() {
            @Override
            public void onProgressChanged(SeekBar seekBar, int hz, boolean b) {
                waveView.setFrequency(hz);
                textView_hz.setText(Integer.toString(hz));
            }

            @Override
            public void onStartTrackingTouch(SeekBar seekBar) {

            }

            @Override
            public void onStopTrackingTouch(SeekBar seekBar) {

            }
        });

        seekBar_N.setOnSeekBarChangeListener(new SeekBar.OnSeekBarChangeListener() {
            @Override
            public void onProgressChanged(SeekBar seekBar, int n, boolean b) {
                waveView.setAmplitude(n);
                textView_n.setText(Integer.toString(n));
            }

            @Override
            public void onStartTrackingTouch(SeekBar seekBar) {

            }

            @Override
            public void onStopTrackingTouch(SeekBar seekBar) {

            }
        });
    }
}
