上一章 Day 29 - React Tree Graph 樹狀結構圖
在這隱私權高漲的年代, 所有個資與重要資訊都必須加密
之前有寫過一篇用Java做MD5加密的文章
今天來講如何用資料庫加密
MySQL Trigger
Trigger 意即觸發事件, 有分以下幾種:
BEFORE INSERT, AFTER INSERT
BEFORE UPDATE, AFTER UPDATE
BEFORE DELETE, AFTER DELETE
我們希望能在新增會員之前, 幫密碼做MD5加密
所以選擇 BEFORE INSERT
CREATE TRIGGER encrypt_pwd BEFORE INSERT ON members FOR EACH ROW SET new.password = md5(new.password);
md5是MySQL裡面自帶的Function
許多DB都有預設MD5 Function可以用, 直接呼叫即可。
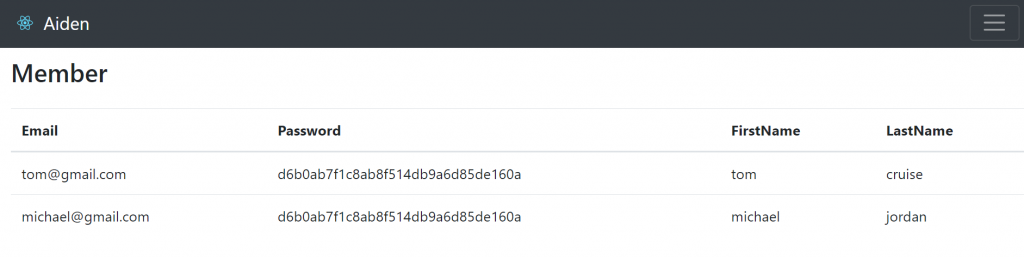
現在我們Member的密碼欄位就有加密了
之前都用非同步取資料, 但有些功能仍然需要同步處理(例如: 新增, 刪除)
Fetch API也能做到同步, 這裡就用新增會員來示範。
新增AddMember.js
import React, { Component } from 'react';
import { Link, withRouter } from 'react-router-dom';
import {
    Button,
    Container,
    Form,
    FormGroup,
    Input,
    Label
} from 'reactstrap';
import MyNavbar from './MyNavbar';

class AddMember extends Component {
    emptyMember = {
        email: '',
        password: '',
        firstName: '',
        lastName: '',
    };

    constructor(props) {
        super(props);
        this.state = { member: this.emptyMember };
        this.handleChange = this.handleChange.bind(this);
        this.handleSubmit = this.handleSubmit.bind(this);
    }

    handleChange(event) {
        const target = event.target;
        const value = target.value;
        const name = target.name;
        let member = { ...this.state.member };
        member[name] = value;
        this.setState({ member });
    }

    async handleSubmit(event) {
        event.preventDefault();
        const { member } = this.state;

        await fetch("/api/member", {
            method: 'POST',
            headers: {
                'Content-Type': 'application/json'
            },
            body: JSON.stringify(member)
        }).then(response => {
            if(response.status === 201){
                alert("Success");
            }else{
                alert("Failure");
            }
        });
        this.props.history.push('/members');

    }

    render() {
        const { member } = this.state;

        return (
            <div>
                <MyNavbar />
                <Container>
                    <h2>新增會員</h2>
                    <Form onSubmit={this.handleSubmit}>
                        <FormGroup>
                            <Label for="email">Email</Label>
                            <Input type="email" name="email" value={member.email} onChange={this.handleChange}/>
                        </FormGroup>
                        <FormGroup>
                            <Label for="password">Password</Label>
                            <Input type="password" name="password" value={member.password} onChange={this.handleChange}/>
                        </FormGroup>
                        <div className="row">
                            <FormGroup className="col-md-6">
                                <Label for="firstName">firstName</Label>
                                <Input type="text" name="firstName" value={member.firstName} onChange={this.handleChange}/>
                            </FormGroup>
                            <FormGroup className="col-md-6">
                                <Label for="lastName">lastName</Label>
                                <Input type="text" name="lastName" value={member.lastName} onChange={this.handleChange} />
                            </FormGroup>
                        </div>
                        <FormGroup>
                            <Button color="primary" type="submit">Submit</Button>{' '}
                            <Button color="secondary" tag={Link} to="/members">Cancel</Button>
                        </FormGroup>
                    </Form>
                </Container>
            </div>
        )
    }
}

export default withRouter(AddMember);
使用上很簡單, 只要在fetch的前面加上await 就變成同步了
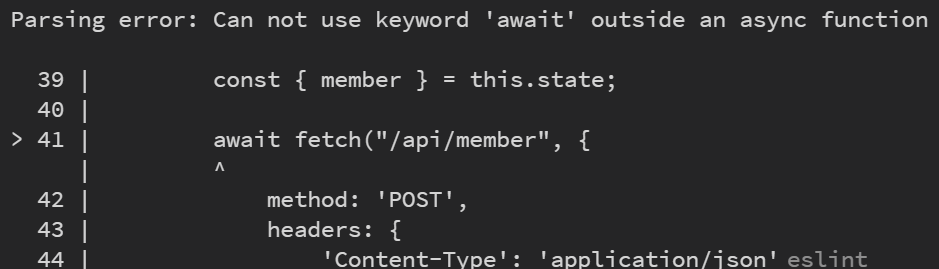
可以看到我們fetch的前綴是await, 但handleSubmit的前綴卻是async
因為await必須要在async裡面才能使用, 如果把外層的async刪掉會直接報錯
新增AddMember按鈕
Member.js
import React, { Component } from 'react';
import { Button, ButtonGroup, Container, Table } from 'reactstrap';
import 'bootstrap/dist/css/bootstrap.css';
import { Link } from 'react-router-dom';
import MyNavbar from './MyNavbar';

class Member extends Component {

    constructor(props) {
        super(props);
        this.state = { members: [] };
    }

    componentDidMount() {
        fetch('api/members').then(response => response.json())
            .then(data => this.setState({ members: data }));
    }

    render() {
        const { members } = this.state;

        const memberList = members.map(member => {
            return <tr key={member.mid}>
                <td>{member.email}</td>
                <td>{member.password}</td>
                <td>{member.firstName}</td>
                <td>{member.lastName}</td>
            </tr>
        });

        return (
            <div>
                <MyNavbar />
                <Container fluid>
                    <div className="float-right">
                        <Button color="success" tag={Link} to="/member/new">Add Member</Button>
                    </div>
                    <h3>Member</h3>
                    <Table className="mt-4">
                        <thead>
                            <tr>
                                <th>Email</th>
                                <th>Password</th>
                                <th>FirstName</th>
                                <th>LastName</th>
                            </tr>
                        </thead>
                        <tbody>
                            {memberList}
                        </tbody>
                    </Table>
                </Container>
            </div>
        );
    }

}
export default Member;
現在啟動專案, 新增會員看看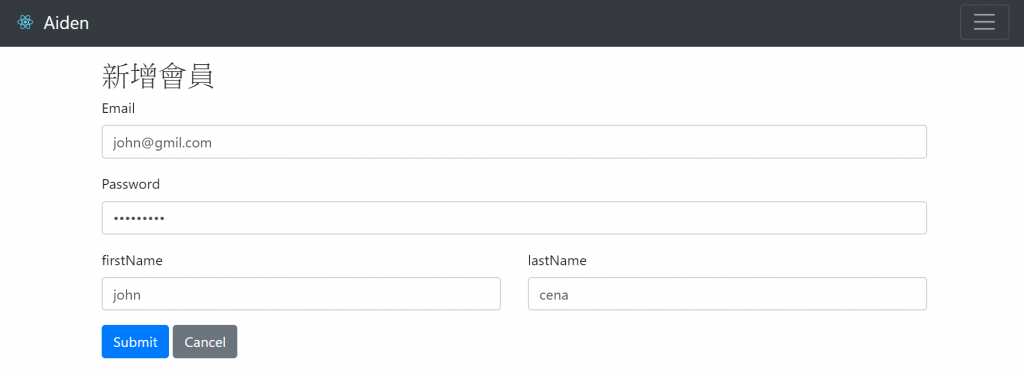
可以發現新增完會自動更新列表, 是因為我們用了this.props.history.push
30天教學就到這, 有興趣的朋友們可以做看看刪除功能。
有任何問題都歡迎交流討論。


