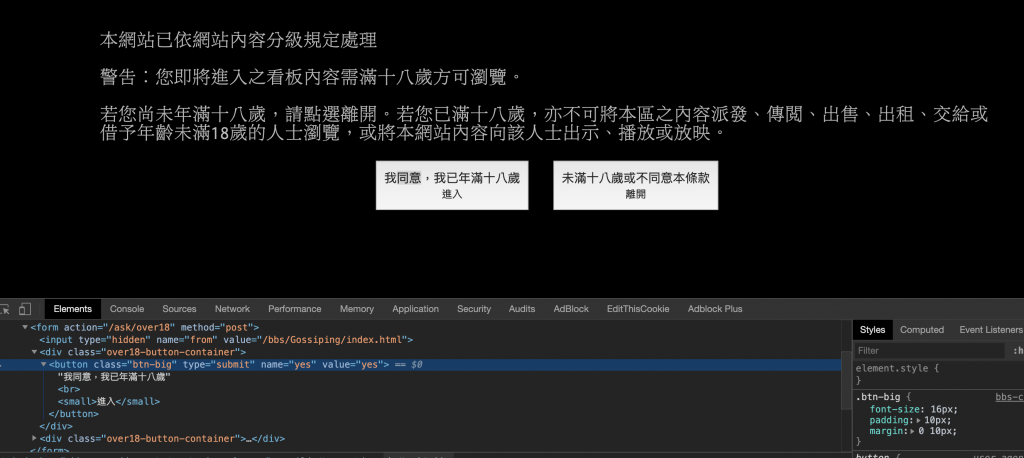
可以先來看到 https://www.ptt.cc/ask/over18 的驗證頁面:

按下我同意後就會跳轉至主頁,可以看到表單是以POST的形式傳送,確認預設的值是'yes',所以接下來我們要帶著建立的session,以POST的方式帶著參數登入,再用cookie以GET的方式帶著餐數進入主頁。
因為requests.post()附帶了payload和自訂headers參數,所以我們先建立他們。P.S.這邊表頭(headers)的user-agent我是用google-bot的 詳細網址。
#最好加入於import模塊下方
payload = {
    'from': 'https://www.ptt.cc/bbs/Gossiping/index.html',
    'yes': 'yes'
}
headers = {
    'user-agent': 'Mozilla/5.0 AppleWebKit/537.36 (KHTML, like Gecko; compatible; Googlebot/2.1; +http://www.google.com/bot.html) Safari/537.36'
}
#下面其實可以先省略,因為等等要用requests.Sessions()儲存cookie
requests.post('https://www.ptt.cc/ask/over18', data = payload, headers = my_headers)
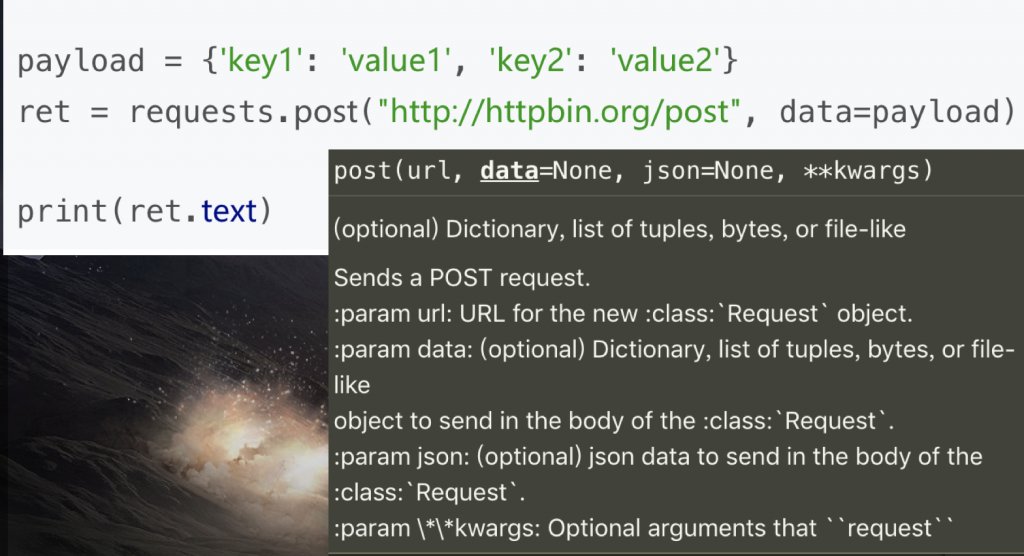
requests.post()範例,參數:
接下來我們要開始用requests.Sessions()去產生、儲存cookie,先建立sessions物件'rs'以post方式去請求,最後以get方式用相同的cookie向目標頁面提出請求,並將傳回的結果儲存在res中。
    #這邊依舊是在for迴圈裡~
    rs = requests.Session()
    rs.post('https://www.ptt.cc/ask/over18', data = payload,headers = my_headers)
    res = rs.get(url = header_url, headers = my_headers)
最後再次將取得的資料用BeautifulSoup去進行解析整理。
    # 接下來解析get到的res資料
    soup = BeautifulSoup(res.text, 'html.parser')
    r_ent = soup.select('div.r-ent')[0].text
    a_url = soup.select('div.title a')[0]['href']
    a_title = soup.select('div.title')[0]
    print('版被第一篇:', a_title.text)
    a_author = soup.select('div.author')[0]
    print('第一篇寫者:',a_author.text)
    a_date = soup.select('div.date')[0]
    print('第一篇日期:',a_date.text)
    print('第一篇網址:'+'https://www.ptt.cc'+ a_url)
    print('\n') #這邊空一行才不會跟下面連一起
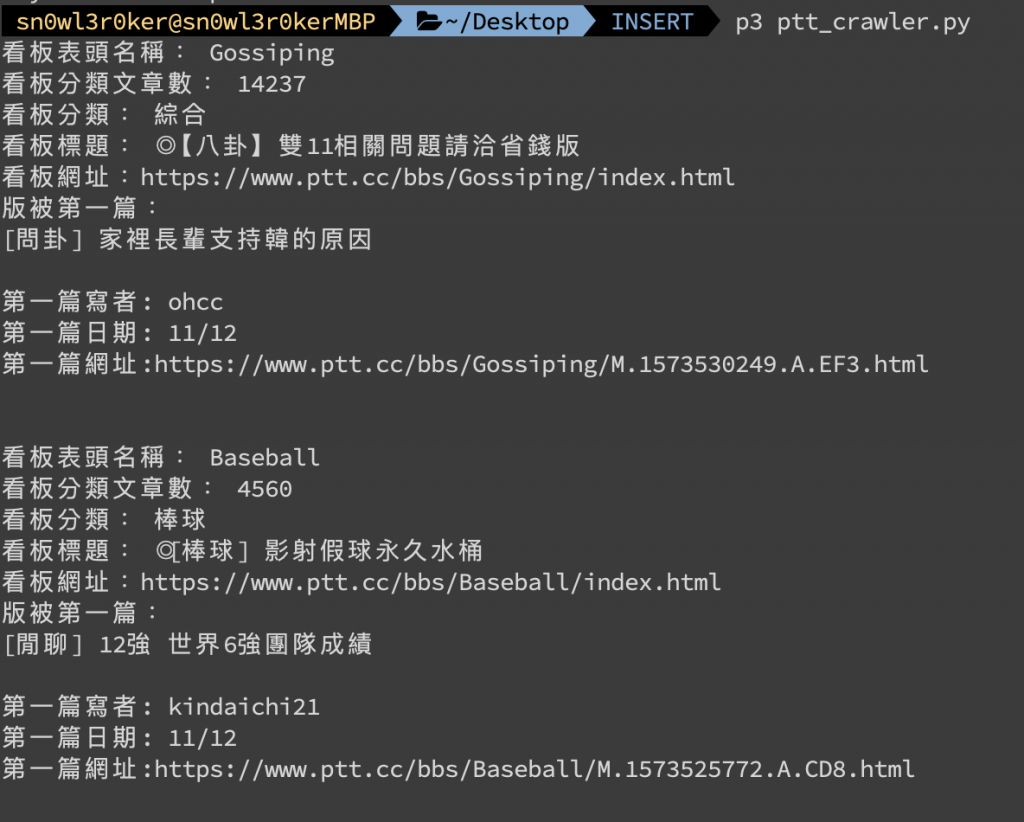
運行的結果:

自從被 froce大 推坑 requests-html 後
我就再也沒碰過 BeautifulSoup
requests-html 跟 requests 是同一個作者
從 fetch data 到 解析 html 都可以只靠 requests-html 解決
甚至 js render 的 page 也沒問題 ![]()
感謝推坑~小弟我還在廢廢的只會用beautifulsoup QQ 晚點去學起來:)