
今天要介紹的是 .NET Core 的 Log,會介紹 Log 是因為 LineBot 不能在本機 Debug,需要直接在 Azure 排除錯誤,為了解決這個問題自己花了很多時間研究,過程中發現相關的文章不多,所以才想獨立寫一篇和大家分享。
因為 .NET Core 原生的 Log 只能輸出到 Console 視窗,所以這邊會配合 NLog 套件改為輸出成檔案,這就開始吧。
需要安裝的套件 (Nuget)
1. 新增 nlog.config
在根目錄下新增 nlog.config 檔案。
參考文章: https://github.com/NLog/NLog/wiki/Getting-started-with-ASP.NET-Core-3
<?xml version="1.0" encoding="utf-8" ?>
<nlog xmlns="http://www.nlog-project.org/schemas/NLog.xsd"
      xmlns:xsi="http://www.w3.org/2001/XMLSchema-instance"
      autoReload="true"
      internalLogLevel="Info"
      internalLogFile="D:\home\site\AspNetCoreNlog\Logs\internal-nlog.txt">

  <extensions>
    <add assembly="NLog.Web.AspNetCore"/>
  </extensions>

  <targets>
    <target xsi:type="File" name="allfile" fileName="D:\home\site\AspNetCoreNlog\Logs\all\nlog-all-${shortdate}.log"
            layout="${longdate}|${event-properties:item=EventId_Id}|${uppercase:${level}}|${logger}|${message} ${exception:format=tostring}" />

    <target xsi:type="File" name="ownFile-web" fileName="D:\home\site\AspNetCoreNlog\Logs\own\nlog-own-${shortdate}.log"
            layout="${longdate}|${event-properties:item=EventId_Id}|${uppercase:${level}}|${logger}|${message} ${exception:format=tostring}|url: ${aspnet-request-url}|action: ${aspnet-mvc-action}" />
  </targets>

  <rules>
    <logger name="*" minlevel="Trace" writeTo="allfile" />
    <logger name="*" minlevel="Trace" writeTo="ownFile-web" />
  </rules>
</nlog>
修改輸出路徑 internalLogFile 和 fileName,我會將 Log 輸出到 D:\home\site 的 AspNetCoreNlog 目錄下。
internalLogFile="D:\home\site\AspNetCoreNlog\Logs\internal-nlog.txt"
fileName="D:\home\site\AspNetCoreNlog\Logs\all\nlog-all-${shortdate}.log"
fileName="D:\home\site\AspNetCoreNlog\Logs\own\nlog-own-${shortdate}.log"
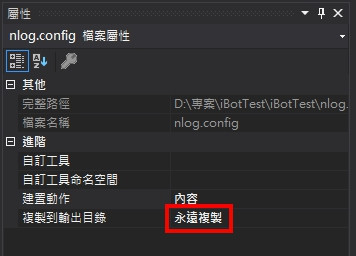
2. 開啟 nlog.config 的 屬性視窗 將 複製到輸出目錄 改為 永遠複製。
3. 調整 Program.cs 加入 NLog。
.UseNLog()
完整的 Program.cs
public class Program
{
    public static void Main(string[] args)
    {
        CreateHostBuilder(args).Build().Run();
    }

    public static IHostBuilder CreateHostBuilder(string[] args) =>
        Host.CreateDefaultBuilder(args)
            .UseNLog()
            .ConfigureWebHostDefaults(webBuilder =>
            {
                webBuilder.UseStartup<Startup>();
            });
}
4. 在 LineBotController 的建構式內透過 DI 注入 ILogger。
private readonly ILogger _logger;
public LineBotController(
    ...
    ILogger<LineBotController> logger)
{
    ...
    _logger = logger;
}
故意讓程式出錯,發行後測試一下。
try
{
    throw new Exception("出錯了~出錯了~");
    ...
}
catch (Exception ex)
{
    _logger.LogError(JsonConvert.SerializeObject(ex));
}
完整 LineBotController 程式
[Route("api/linebot")]
public class LineBotController : Controller
{
    private readonly IHttpContextAccessor _httpContextAccessor;
    private readonly HttpContext _httpContext;
    private readonly LineBotConfig _lineBotConfig;
    private readonly ILogger _logger;

    public LineBotController(IServiceProvider serviceProvider,
        LineBotConfig lineBotConfig,
        ILogger<LineBotController> logger)
    {
        _httpContextAccessor = serviceProvider.GetRequiredService<IHttpContextAccessor>();
        _httpContext = _httpContextAccessor.HttpContext;
        _lineBotConfig = lineBotConfig;
        _logger = logger;
    }

    [HttpPost("run")]
    public async Task<IActionResult> Post()
    {
        try
        {
            throw new Exception("出錯了~出錯了~");

            var events = await _httpContext.Request.GetWebhookEventsAsync(_lineBotConfig.channelSecret);
            var lineMessagingClient = new LineMessagingClient(_lineBotConfig.accessToken);
            var lineBotApp = new LineBotApp(lineMessagingClient);
            await lineBotApp.RunAsync(events);
        }
        catch (Exception ex)
        {
            _logger.LogError(JsonConvert.SerializeObject(ex));
        }
        return Ok();
    }
}
接下來要介紹哪裡可以看 Log,這是我亂點功能時發現的。
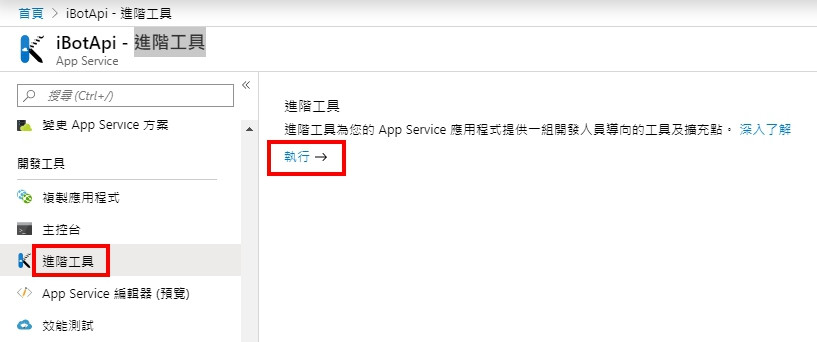
開啟 App Service 管理介面,在左邊選單找到 進階工具,點開選執行。
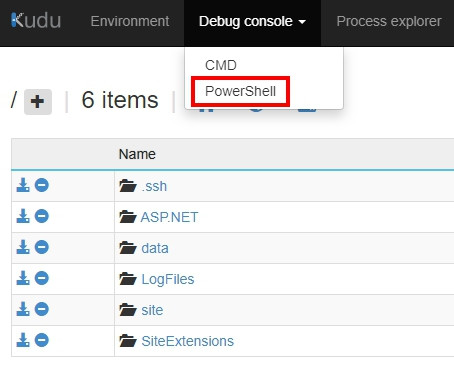
接下來找到上方選單 Debug console 然後選 PowerShell 就可以看到這個畫面。
到這裡大家應該知道怎麼找了,上面有透漏 Log 的存放路徑。
D:\home\site\AspNetCoreNlog\Logs
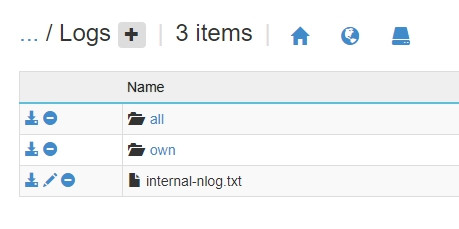
開啟目錄 all 或 own 都可以,差別是顯示的格式不同,進入目錄後可以看到 Log 會依日期分割檔案,開啟今天日期的檔案後,可以看到測試的錯誤訊息 出錯了~出錯了~。

到這裡查 Log 的部分已經完成,以下為碎碎念,可以不要理我 ~~~
預設存放 log 的路徑其實是根目錄 wwwroot,我本來也想放在這裡,不過 Azure 新的部屬方式會將 wwwroot 變成唯讀的,導致 Log 寫入失敗,退而求其次才修改了 Log 的路徑,相關說明: 從套件檔案執行 Azure Functions。
修改 wwwroot 內的檔案會出現下面錯誤訊息。
409 Conflict: Cannot delete directory. It is either not empty or access is not allowed.

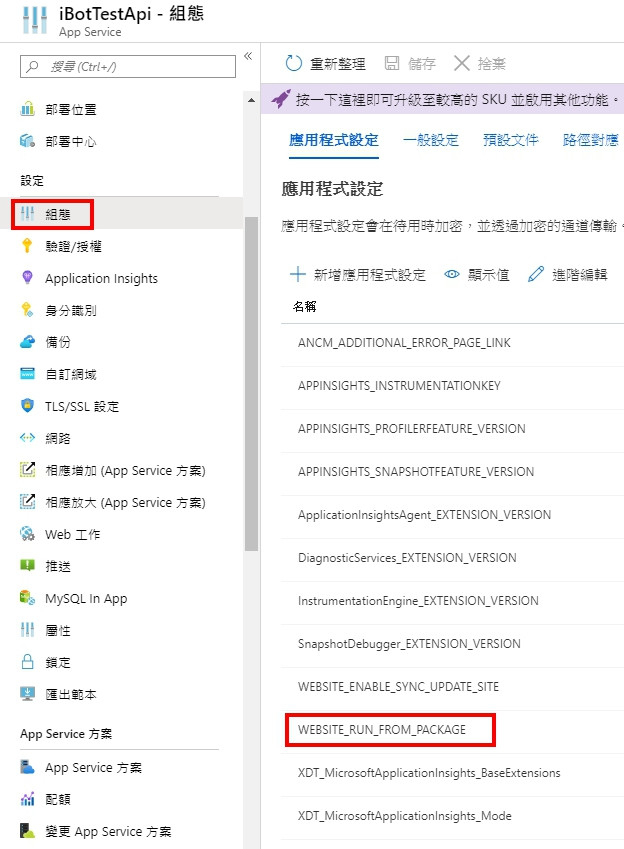
雖然可以透過修改 組態 參數 WEBSITE_RUN_FROM_PACKAGE=0 暫時將 wwwroot 改為可讀寫,不過資料夾內的檔案會被全部刪除,且重新發行後參數又會被改回去,因此這個解決方案顯然行不通。
繼續研究找到這篇文章: Write operations to any file under wwwroot folder fails with 409 conflict when using Azure DevOps pipeline.
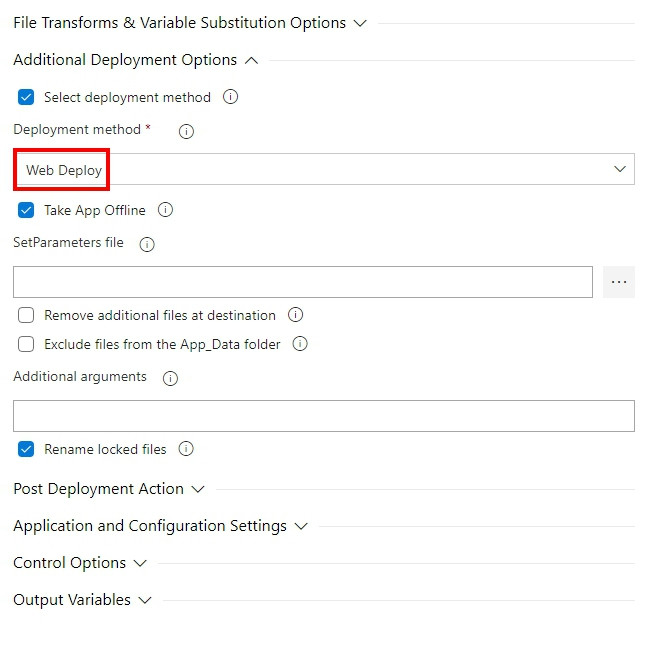
發現可以將 Pipelines 的部屬方式由 Zip Deploy 改成 Web Deploy 這樣就能像以前一樣正常讀寫 wwwroot 資料夾。
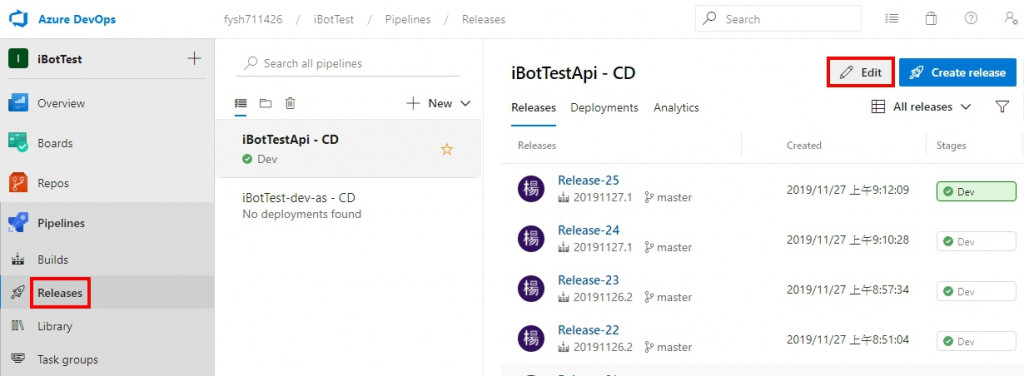
到 Azure DevOps 管理頁面,進入 Releases 選單,點選右上角的 Edit。
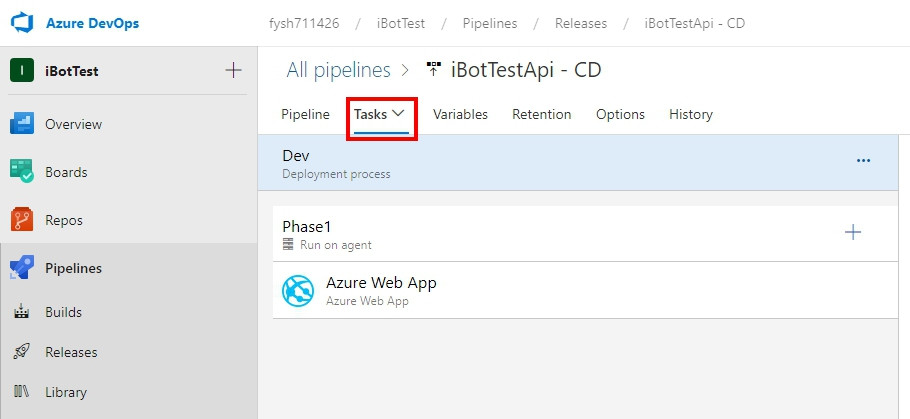
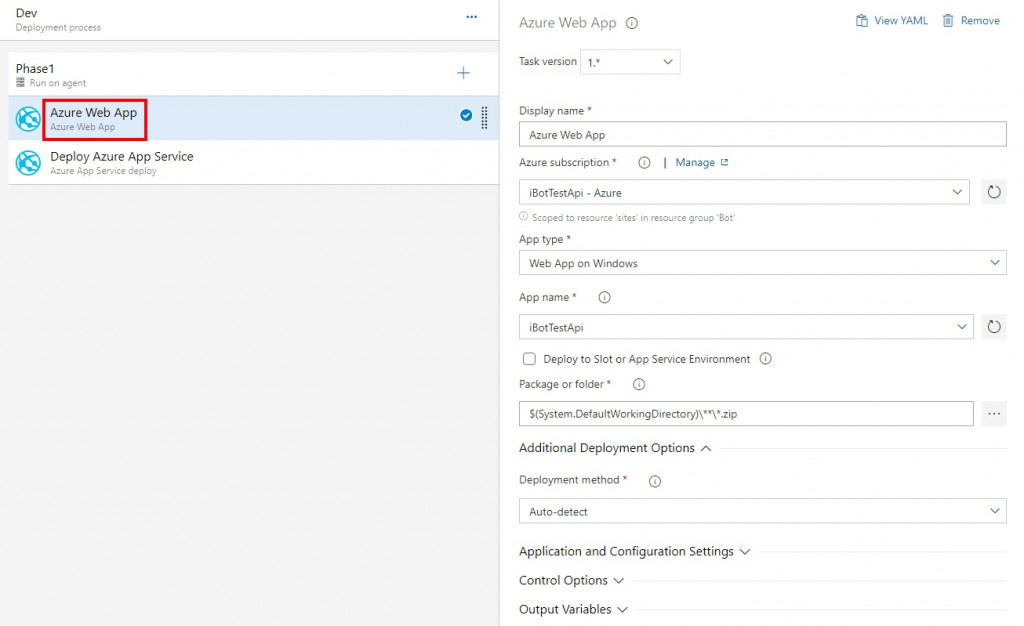
接著選擇 Tasks 選項,會看到下列畫面,發現和文章中的不太一樣,文章中使用的是 Azure App Service deploy 而我的是 Azure Web App 且部屬選項不能選擇 Web Deploy,到這裡我想就算了,新的部屬方式也有其優點,wwwroot 唯讀就唯讀吧,所以就把 log 拉到外層,心路歷程是這樣,哈哈哈。
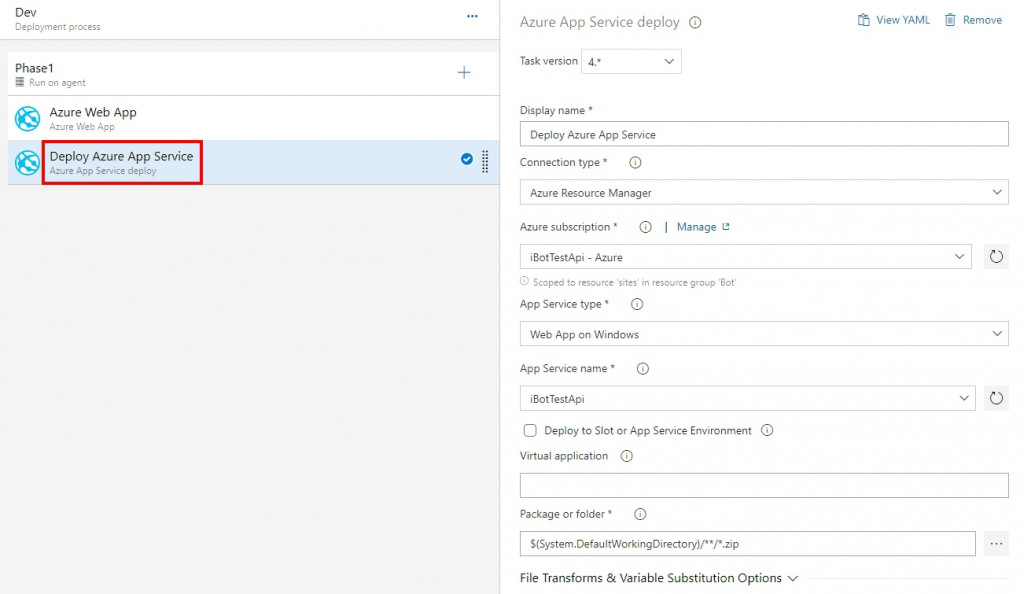
下面留給追求完美的人看,將原 Azure Web App 刪除,新增 Azure App Service deploy 將部屬方式改為傳統的 Web Deploy。
我把兩邊的配置都留下,大家選自己喜歡的用吧。
最後介紹一個好用的功能,App Service 編輯器 可以線上修改文件和查看相關設定檔,不過只限於 wwwroot 資料夾。
在 App Service 管理頁面找到 App Service 編輯器選單,進入後點執行。
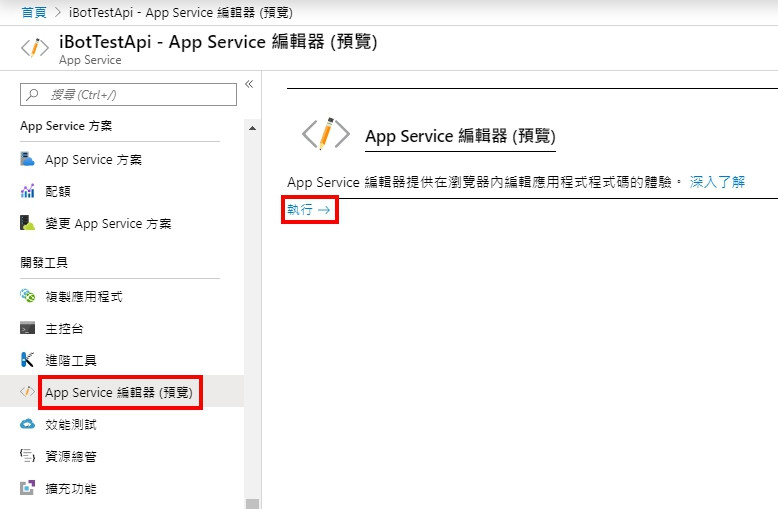
介面如下。
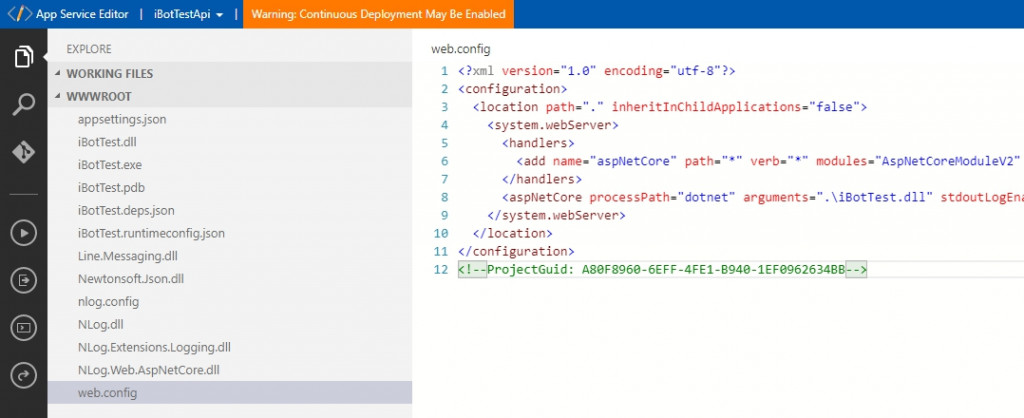
這篇介紹了 NLog 和在 Azure 上設定 Log 會碰到的一些問題,本來想和 MySQL 一起寫,後來想想還是留到後面好了,還沒想好 LineBot 要做的功能,沒辦法開資料表,下一篇會介紹 LUIS 語意分析服務,今天就到這裡,感謝大家觀看。
這篇困難重重,滿滿的坑 QQ...... 
將 ASP.NET Core 的預設 log 輸出至 NLog 或 Serilog
