先複習一下前面章節:
python的asyncio模組(三):建立Event Loop和定義協程我們學會建立aysncio異步程式的兩個最基本元素:
python的asyncio模組(四):Event loop常用API介紹了Event loop基本的常用method,也有帶到說Coroutine在可被Event loop執行之前會經歷以下的對象轉換:
Coroutine function --> Coroutine object --> Task
python的asyncio模組(五):Future對象與Task對象和之後的兩篇教學,用了筆者理解的方式釐清網路上asyncio教學常常沒深入探討的Future對象和Task對象的差別,並和javascript的程式做了比對,講解了這兩個對象是如何改善異步程式的結構。
之前的教學比較偏向概念方面的探討,之後的教學會比較偏向實作面,而我們實作的項目都會以爬蟲為主。
這次的教學我們會先實作一個簡單的同步的新聞爬蟲,然後用一個方法loop.run_in_executor將其轉成一個異步爬蟲。
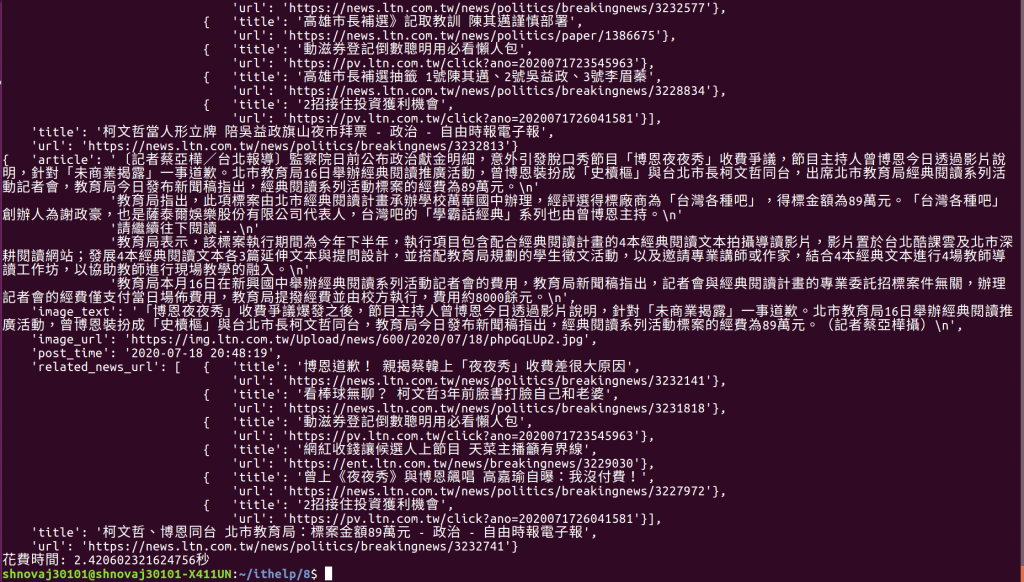
我們先來做一個自由時報網站的爬蟲,一開始的任務要求不高,只需要寫一個程式爬取10個自由時報頁面,然後解析出以下的欄位資訊:
以下程式是一個沒有用到asyncio模組的非異步爬蟲,主要用的工具是requests和BeautifulSoup,這兩個模組的使用教學就不詳述了,在網路上有很多相關的教學。
import requests
import pprint
from bs4 import BeautifulSoup

def get_info_from_soup(soup, url):
    output_json = {}

    # 抓取 url
    # ===================================
    output_json['url'] = url

    # 抓取標題
    # ===================================
    title_elem = soup.find('title')
    output_json['title'] = title_elem.string

    # 抓取發佈時間
    # ===================================
    post_time_elem_list = soup.select('span.time')
    output_json['post_time'] = post_time_elem_list[0].string.strip()

    # 抓取圖片url
    # ===================================
    img_url_elem_list = soup.select('div.text div.photo img')

    if len(img_url_elem_list) == 0:
        output_json['image_url'] = ''
    else:
        output_json['image_url'] = img_url_elem_list[0]['src']

    # 抓取圖片註解
    # ===================================
    img_text_elem_list = soup.select('div.text div.photo p')
    output_json['image_text'] = ''

    if len(img_text_elem_list) == 0:
        output_json['image_text'] += '\n'
    else:
        output_json['image_text'] += img_text_elem_list[0].string + '\n'

    # 抓取文章
    # ===================================
    article_elem_list = soup.select('div.text > p')
    output_json['article'] = ''

    for article_elem in article_elem_list:
        if article_elem.string is not None:
            output_json['article'] += article_elem.string + '\n'

    # 抓取相關新聞url和標題
    # ===================================
    related_news_elem_list = soup.select('div[data-desc="相關新聞"] a')
    output_json['related_news_url'] = []

    for one_news_elem in related_news_elem_list:
        related_news_info = {}
        related_news_info['url'] = one_news_elem['href']
        related_news_info['title'] = one_news_elem.find('p').string
        output_json['related_news_url'].append(related_news_info)

    return output_json

def fetch_url_and_print_info(url):
    response = requests.get(url)
    soup = BeautifulSoup(response.text, 'html.parser')

    json_data = get_info_from_soup(soup, url)

    pprint.pprint(json_data, indent=4)

def main():
    for url in urls:
        fetch_url_and_print_info(url)

if __name__ == "__main__":
    urls = [
        'https://news.ltn.com.tw/news/politics/breakingnews/3232759',
        'https://news.ltn.com.tw/news/politics/breakingnews/3232755',
        'https://news.ltn.com.tw/news/politics/breakingnews/3232813',
        'https://news.ltn.com.tw/news/politics/breakingnews/3232813',
        'https://news.ltn.com.tw/news/politics/breakingnews/3232741',
    ]

    main()
如果我對裡面的main function作一下計時,會發現大概會花2到5秒的時間:
import requests
import pprint
from bs4 import BeautifulSoup

import time # 計時器需要用到的模組
def timer(func): # 新加入的計時器decorator
    def time_count():
        ts = time.time()
        func()
        te = time.time()
        print ("花費時間: {0}秒".format(te-ts))

    return time_count

def get_info_from_soup(soup, url):
    ...

def fetch_url_and_print_info(url):
    ...

@timer # 安裝計時器到main()
def main():
    ...

if __name__ == "__main__":
    urls = [
        'https://news.ltn.com.tw/news/politics/breakingnews/3232759',
        'https://news.ltn.com.tw/news/politics/breakingnews/3232755',
        'https://news.ltn.com.tw/news/politics/breakingnews/3232813',
        'https://news.ltn.com.tw/news/politics/breakingnews/3232813',
        'https://news.ltn.com.tw/news/politics/breakingnews/3232741',
    ]

    main()

但如果我們可以用asyncio模組同時發佈10個request出去,同時等待10個response,想必能夠節省許多等待的時間。
import asyncio
import requests
import pprint
from bs4 import BeautifulSoup

import time
def timer(func):
    ...

def get_info_from_soup(soup, url):
    ...

async def async_fetch_url_and_print_info(url):
    response = await loop.run_in_executor(None, requests.get, url)
    soup = BeautifulSoup(response.text, 'html.parser')

    json_data = get_info_from_soup(soup, url)

    pprint.pprint(json_data, indent=4)

@timer
def async_main():
    tasks = []

    for url in urls:
        tasks.append(loop.create_task(async_fetch_url_and_print_info(url)))

    loop.run_until_complete(asyncio.wait(tasks))


if __name__ == "__main__":
    urls = [
        'https://news.ltn.com.tw/news/society/breakingnews/3233407',
        'https://news.ltn.com.tw/news/society/breakingnews/3233371',
        'https://news.ltn.com.tw/news/society/breakingnews/3233382',
        'https://news.ltn.com.tw/news/society/breakingnews/3233326',
        'https://news.ltn.com.tw/news/society/breakingnews/3233301',
        'https://news.ltn.com.tw/news/politics/breakingnews/3232759',
        'https://news.ltn.com.tw/news/politics/breakingnews/3232755',
        'https://news.ltn.com.tw/news/politics/breakingnews/3232813',
        'https://news.ltn.com.tw/news/politics/breakingnews/3232813',
        'https://news.ltn.com.tw/news/politics/breakingnews/3232741',
    ]

    loop = asyncio.get_event_loop()

    async_main()
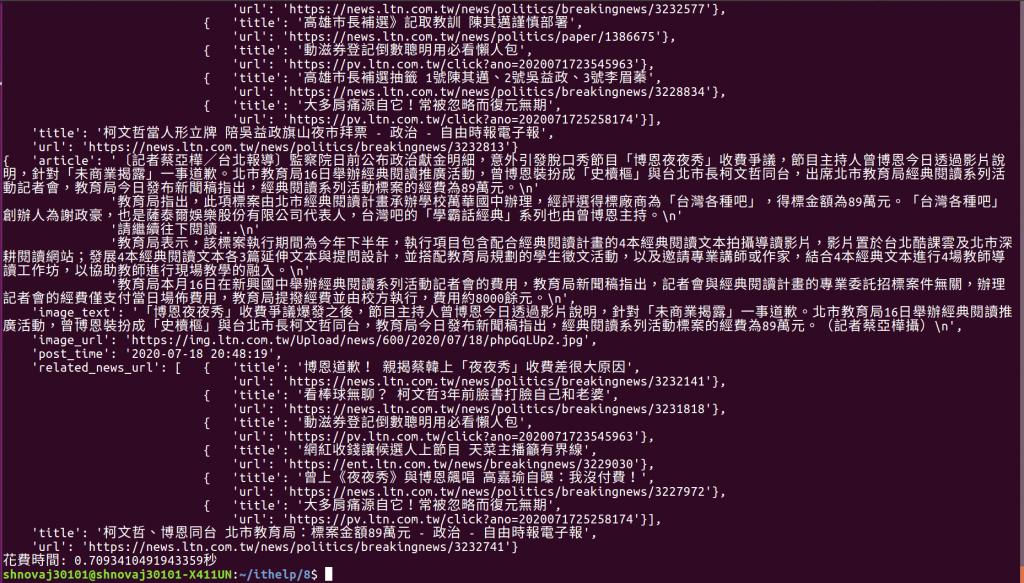
上面的程式重新用asyncio去封裝每一個任務,然後丟進event_loop下去跑,若用timer函數下去計時,大約花費時間會在0.5到2秒之間。

裏面最重要的核心是在async_fetch_url_and_print_info函數,他和原本的fetch_url_and_print_info,差別就在呼叫request.get的方式。
async_fetch_url_and_print_info使用loop.run_in_executor包裝了整個request.get,原因是request.get本身並不是一個Coroutine,我們不能用await來異步的等待一個request。
loop.run_in_executor簡單來說會把一般的非異步函數包裝成一個獨立的線程,若有用過python的threading模組就知道python雖然因為GIL,並不能用多核心來同時跑多個線程,但線程並不會被網路io所阻塞,所以loop.run_in_executor利用這個特性把request.get包裝成一個非阻塞的Future對象。
但其實線程的開銷還蠻大的,不然我們就直接使用線程來實現異步程式,而不用開發asyncio這個模組了,所以說loop.run_in_executor又相當於是繞回到原來的老路,所以之後我們會介紹aiohttp模組,這是以asyncio為基底開發的網路模組。
因為async_fetch_url_and_print_info需要去await一個Future對象,所以他本身要是一個Coroutine才能使用await關鍵字,然後async_main去包裝每一個async_fetch_url_and_print_info任務,並調用一個Event loop去執行這些任務。
執行任務的方式就是呼叫loop.run_until_complete,在之前的教學提過很多遍,就是命令Event loop執行已經註冊在loop裡面的任務,而且當放在參數的任務完成後就會立即停止loop。
因為我們必須要確定完成十個任務才能停止loop,所以我們用asyncio.wait把這十個任務包成一個大任務並放進loop.run_until_complete,這個函數在之前的教學也有提及。
最後這十個任務都會再response = await loop.run_in_executor(None, requests.get, url)這一行等待網路io回傳response,也就是說我們會快速的發出10個request並等待回傳。
我們用loop.run_in_executor把一個新聞爬蟲異步化,節省了等待response的時間,從我們計時的結果可以看出來。
下一篇我們會介紹更為細微的任務操作。
參考資料:
https://www.jianshu.com/p/b5e347b3a17c
https://www.dongwm.com/post/understand-asyncio-2/
