這個專案會有需要讓使用者進行儲值的動作,所以我們就要來設計一個選擇儲值金額的頁面,頁面上需要顯示目前的餘額、4種金額可以選取和前往付款的按鈕,今天我們會先從 UI 開始著手製作,下篇可以練習怎麼讓金額變成動態可以修改的。
今天要實作的儲值頁面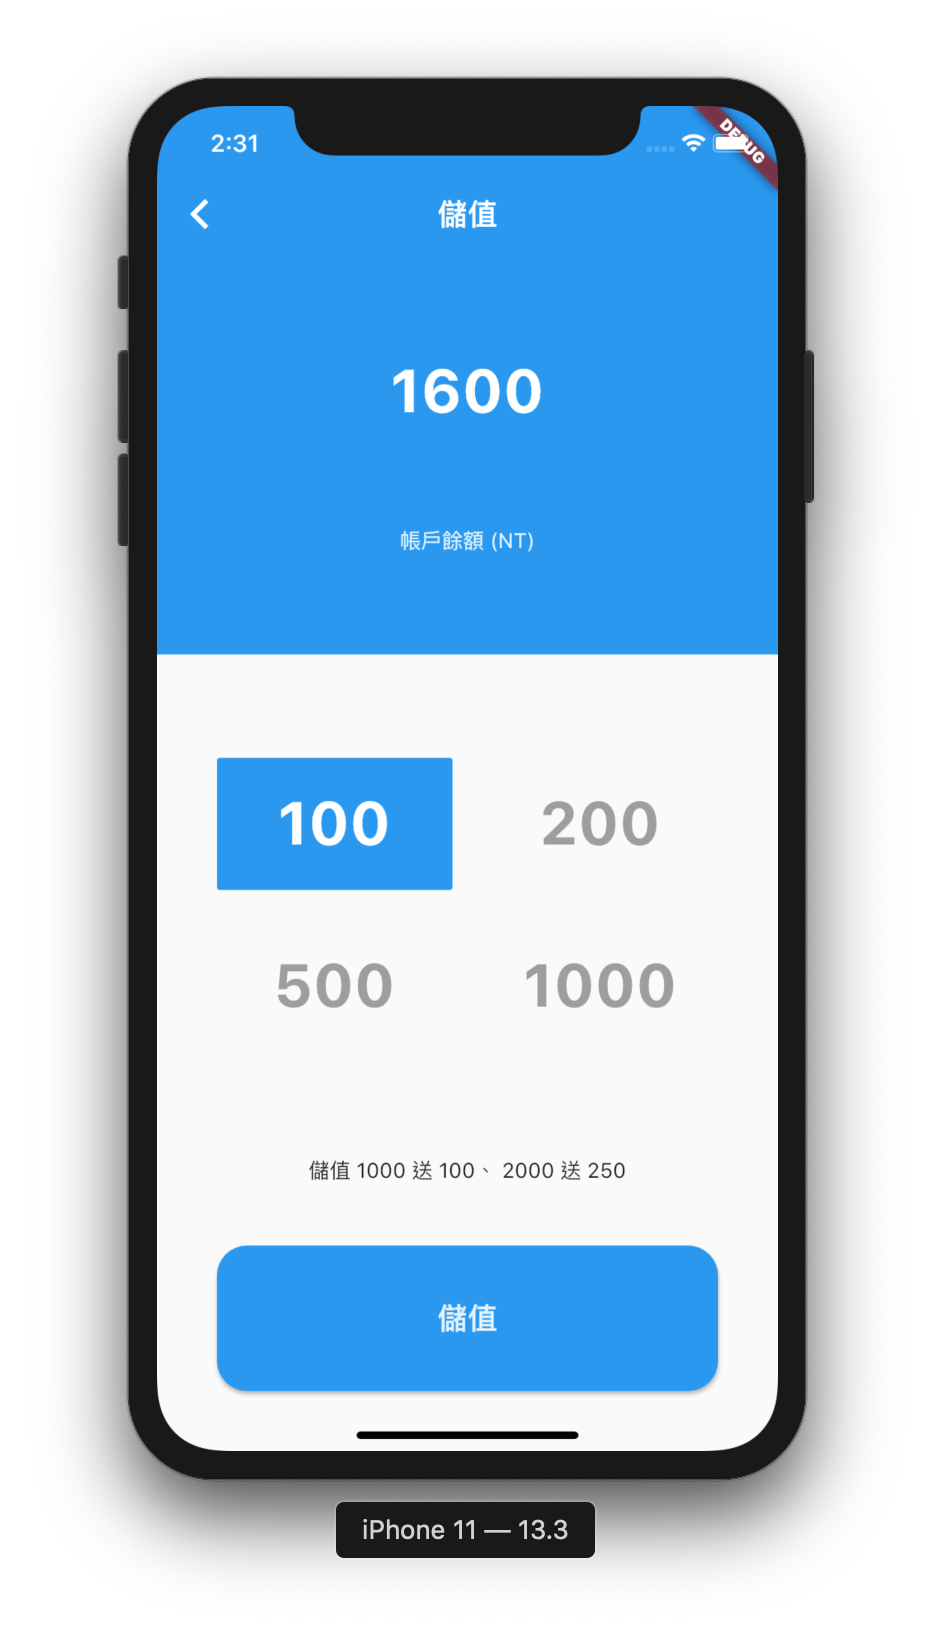
開新檔案 DepositPage.dart
class DepositPage extends StatefulWidget{

  @override
  State<StatefulWidget> createState() {
    return DepositPageState() ;
  }

}

class DepositPageState extends State<DepositPage>{
  //金額列表
  List<int> depositValues = [100 ,200 ,500 , 1000] ;
  //選中的按鈕
  List<bool> btnSelected = [true , false , false ,false] ;
  //點擊按鈕後執行的方法
  void chooseValue(int index){
    setState((){
      for (int i = 0 ; i<4 ;i++)
        btnSelected[i] = false;
      btnSelected[index] = true;
    });
  }

  @override
  Widget build(BuildContext context) {
    ...
  }

}
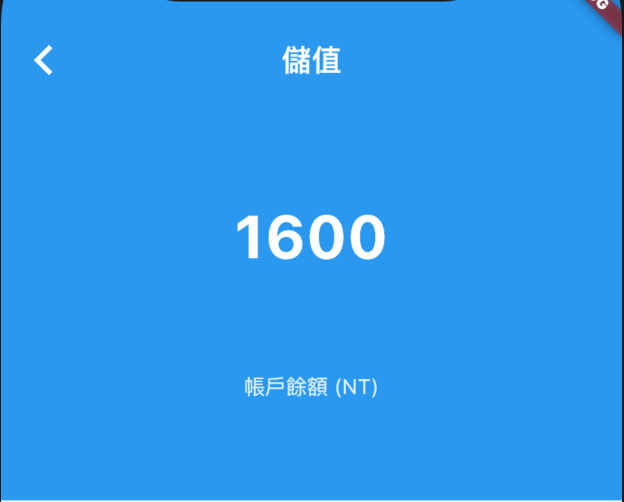
final headInfo = Container(
      color: Theme.of(context).primaryColor,
      child: Center(
        child: Column(children: <Widget>[
          Spacer(),
          Text("1600",style: TextStyle(fontWeight: FontWeight.bold,fontSize: 40 , color: Theme.of(context).cardColor),),
          Spacer(),
          Text("帳戶餘額 (NT)",style: TextStyle(color: Theme.of(context).secondaryHeaderColor),),
          Spacer()
        ],),
      ),
    );
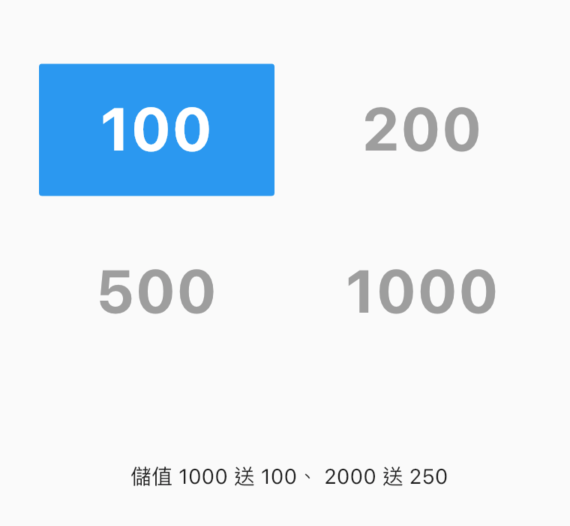
final buttonsGrid = GridView.count(
      crossAxisCount: 2,
      childAspectRatio: 1.8,
      padding: EdgeInsets.fromLTRB(40, 60, 40, 30),
      crossAxisSpacing: 30,
      mainAxisSpacing: 30,
      children: List.generate(4, (i){
        return FlatButton(color:btnSelected[i] == true ? theme.accentColor : Colors.white.withAlpha(0),
            onPressed: ()=>chooseValue(i),
            child: Text(depositValues[i].toString(),
              style: TextStyle(
                  color: btnSelected[i] == false ? Colors.grey : Colors.white,
                  fontSize: 40 ,
                  fontWeight: FontWeight.bold),
            )
        );
      }),
    );
final depositBtn = Container(
      width: window.physicalSize.width,
      margin: EdgeInsets.all(40),
      child: MaterialButton(onPressed: (){
        // tap btn
      } ,
        color:Theme.of(context).primaryColor ,
        textColor:Theme.of(context).secondaryHeaderColor ,
        child: Text("儲值",style: TextStyle(fontSize: 20 ),),
        shape: RoundedRectangleBorder(
            borderRadius: BorderRadius.all(
                Radius.circular(20.0)
            )
        ),
      ),
    );
return Scaffold(
      //elvation 去掉 AppBar 陰影
      appBar: AppBar(title: Text("儲值"),elevation: 0),
      body: Column(
        mainAxisAlignment: MainAxisAlignment.start ,
        children: <Widget>[
           // flex 讓 Expanded 的空間依照比例分配
          Expanded(
            flex: 3,
            child: headInfo,
          ),

          Expanded(
            flex: 4,
            child: buttonsGrid,
          ),

          Text("儲值 1000 立即送 100"),

          Expanded(
            flex: 2,
            child:depositBtn,
          )

        ],
      ),
    );
最後就完成今天的 UI Demo 囉


 iThome鐵人賽