iT邦幫忙

第 12 屆 iThome 鐵人賽

DAY 1
0
Mobile Development

想知道自己iOS具現化系能力有多強嗎?實作幾個App就知道了系列 第 1

Day1-實作To-Do-List之建立UI介面及AutoLayout

這次的鐵人賽之所以挑戰實作,並不是為了磨練技術,而是為了鍛鍊自己的表達能力以及訓練自己如何說出別人聽得懂的程式語言,在與其他人的交流之中發現,自己對於自己的問題表達以及想要傳遞給他人的技術資訊,明明自己知道,但是總是無法好好的表達,希望能透過鐵人賽將自己想表達的東西用文字也能好好的表達,並且當作自己的一種成長紀錄。


目標是實作出可以在手機上實機測試的一款待辦事項App,總共功能有左滑右滑、新增、刪除、修改、插入、分享、拖動排序、動畫以及存檔功能,以及為這個測試App加上Icon並能夠部署在實機上,最終結果就是GIF圖那樣。

完整Demo

首先將整個實作分成不同的部分,每天依序講不同的部分,直到完成實作。

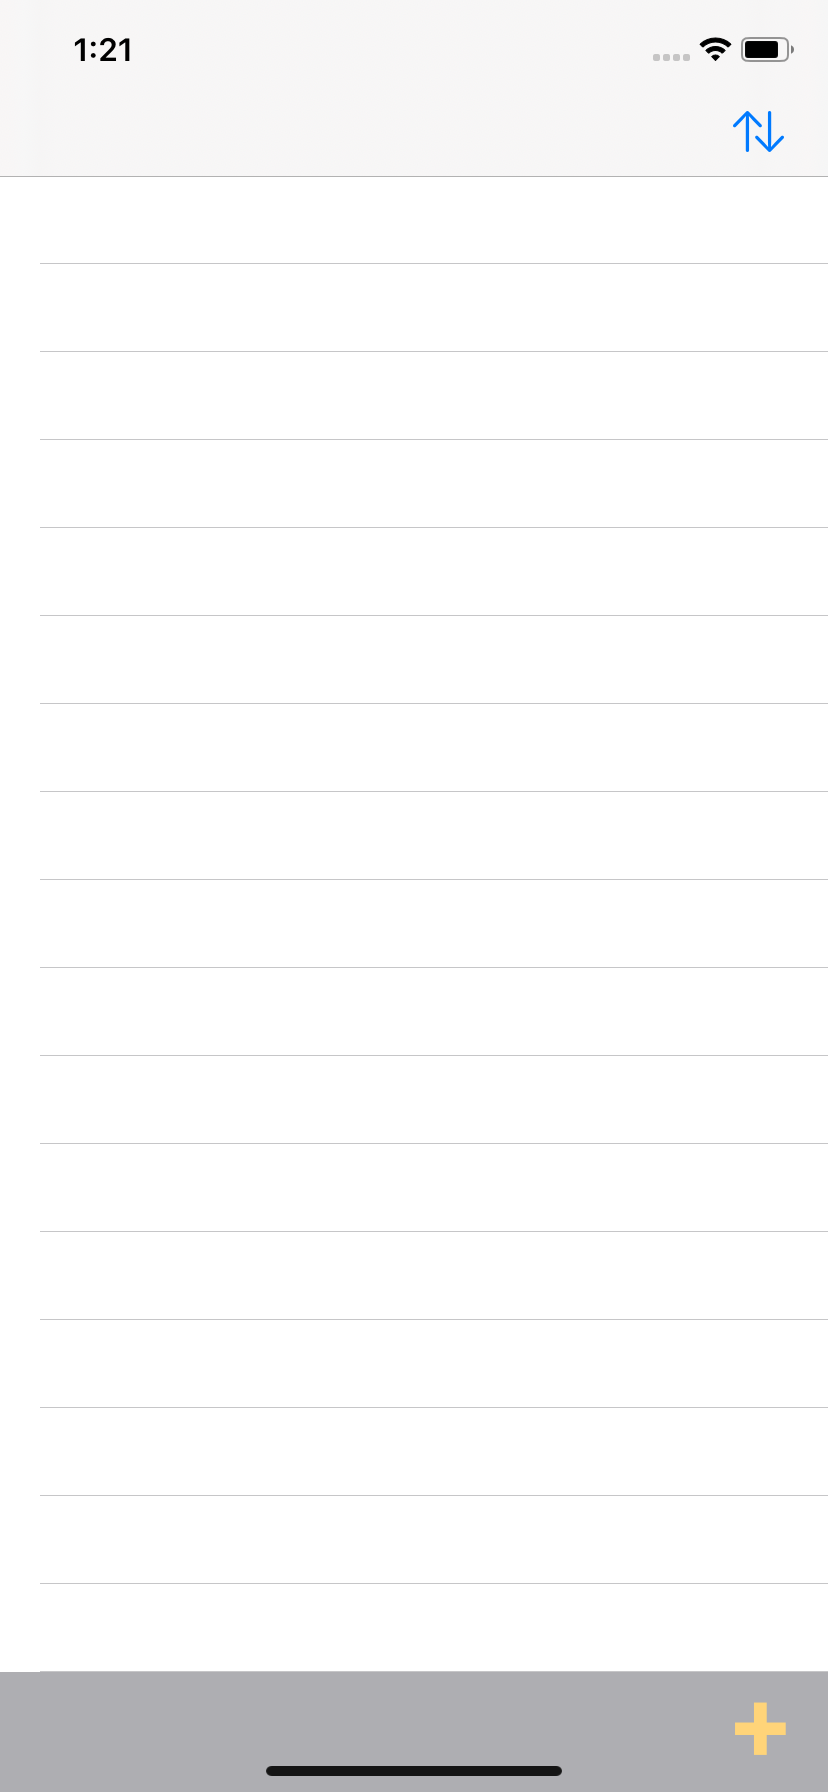
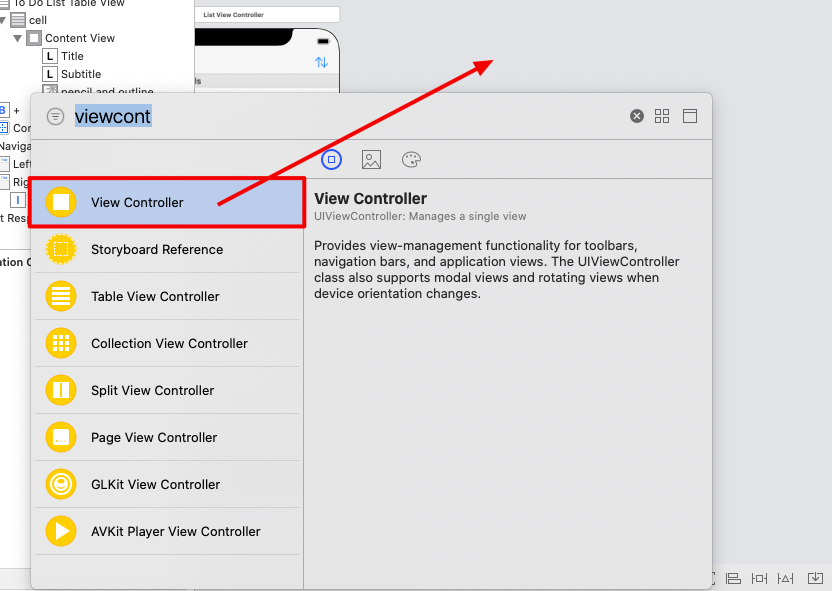
從建立UI介面以及資料模型開始,這次的介面相當單純,如下圖。

https://ithelp.ithome.com.tw/upload/images/20200808/20129144aAzTaapDvQ.png


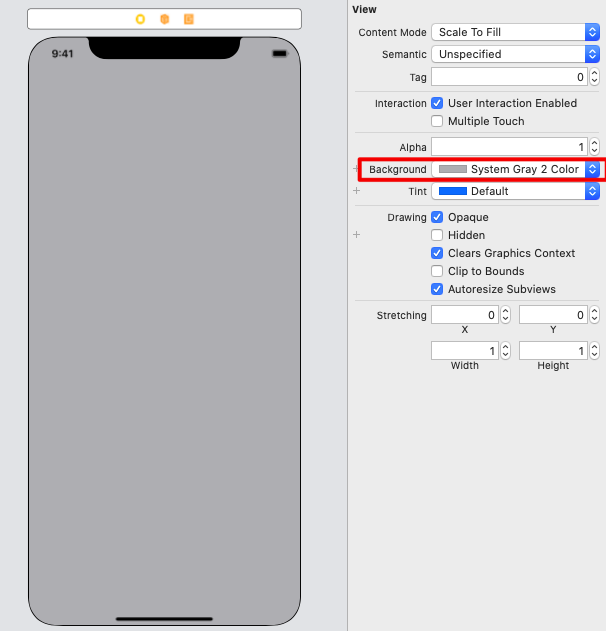
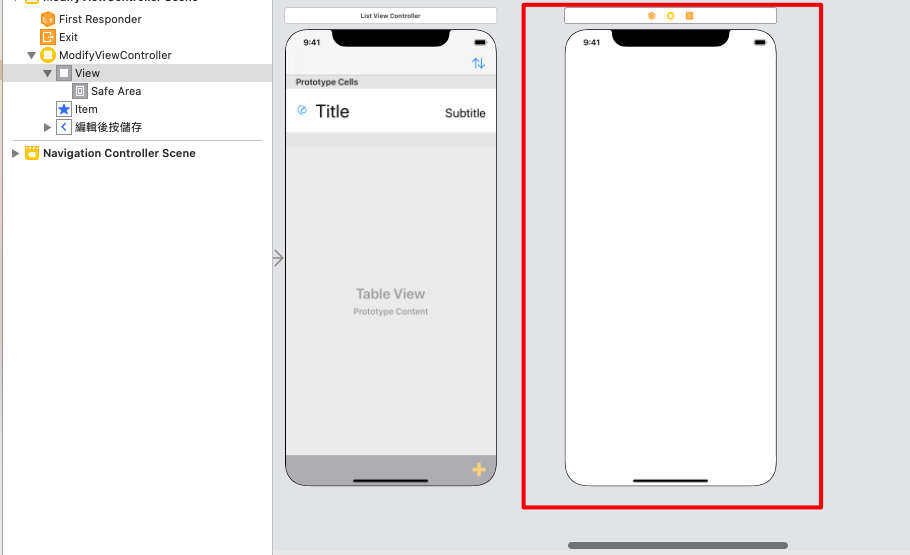
首先將Xcode預設給你的ViewController的View設為其他顏色,如圖。

https://ithelp.ithome.com.tw/upload/images/20200808/20129144WAV1Vh9O8r.png


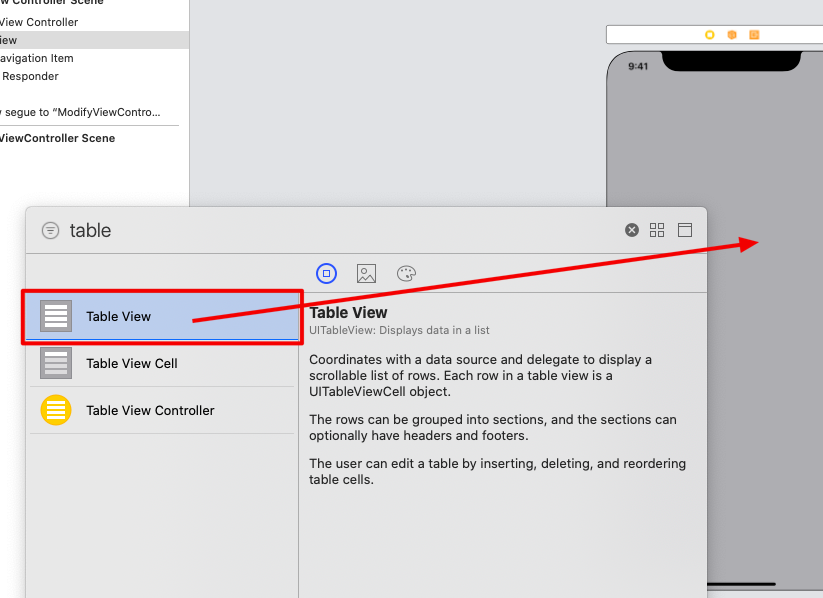
加入TableView,並且設定TableView的AutoLayout。

https://ithelp.ithome.com.tw/upload/images/20200808/20129144B5sZmUE5IL.png


https://ithelp.ithome.com.tw/upload/images/20200808/20129144DwA5UiTiLu.png


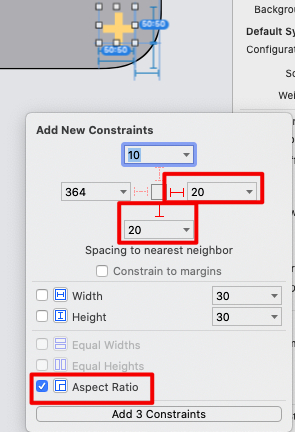
加入右下角的『增加』按鈕,並且設定AutoLayout。

https://ithelp.ithome.com.tw/upload/images/20200808/20129144NDqAFdLgIu.png


https://ithelp.ithome.com.tw/upload/images/20200808/20129144LoA8T9atTW.png


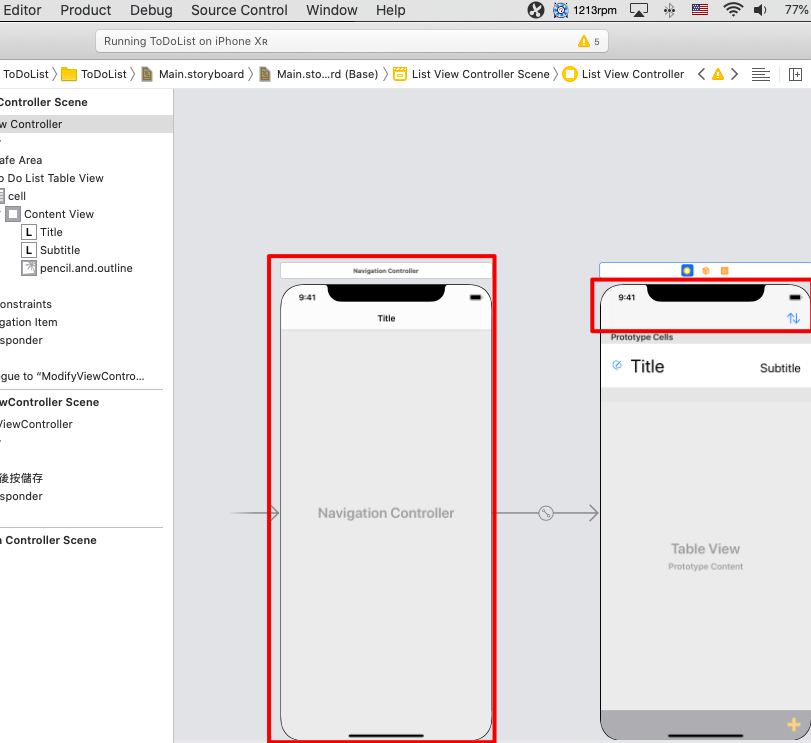
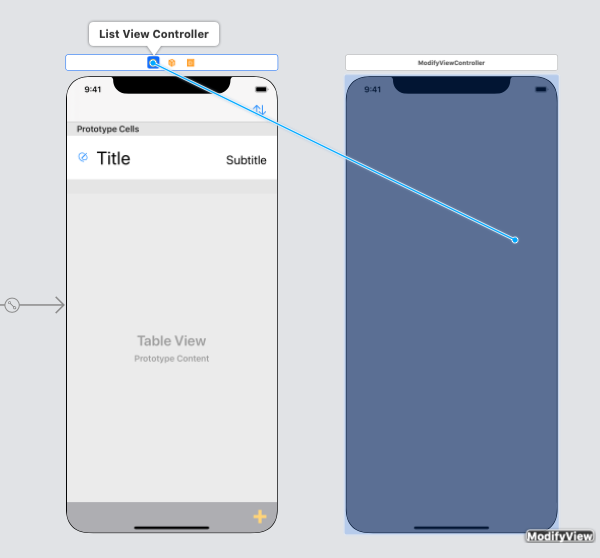
如此一來,第一個頁面就完成百分之九十的UI了,是不是很簡單,接下來由於要轉場到第二個畫面,所以需要添加導覽控制器,如圖。

https://ithelp.ithome.com.tw/upload/images/20200808/20129144KQ5V5iKl2U.png!


加入導覽控制器之後會發現多了一個NavigationController跟第一個ViewController的介面上方多了一欄,這欄稱為NavigationBar。

https://ithelp.ithome.com.tw/upload/images/20200808/20129144LtHCjjyMT7.png


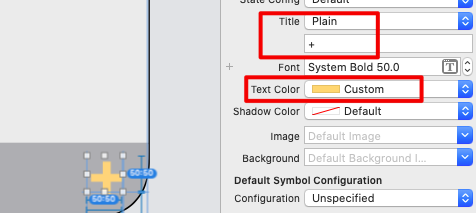
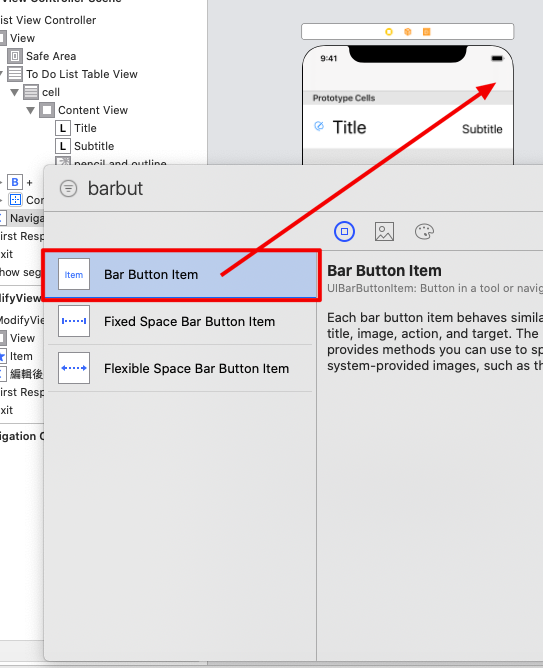
接著我們在NavigationBar右邊加入一個按鈕,這個按鈕作為之後要更改排序使用的,加入完之後設定按鈕圖案為排序的圖案。

https://ithelp.ithome.com.tw/upload/images/20200808/20129144K1CoaiFb3d.png


https://ithelp.ithome.com.tw/upload/images/20200808/20129144D87xfyUrYN.png


第一個頁面UI已經完整設定完,接著新增第二個ViewController。

https://ithelp.ithome.com.tw/upload/images/20200808/20129144QdRFoMbamU.png!


新增完會像這樣。

https://ithelp.ithome.com.tw/upload/images/20200808/20129144Gi0swWiYr2.png


一樣先把View改成其他顏色,並且由於需要第一個頁面切換到第二個頁面,所以第一個頁面與第二個頁面需要關聯,在第一個頁面的ViewController按鈕按右鍵拖曳到第二個頁面(筆電則是按control跟觸控板),拖曳完選取Show,有很多種轉場方式,這邊選擇Show就好。

https://ithelp.ithome.com.tw/upload/images/20200808/20129144Fvv9A3rbRi.png


https://ithelp.ithome.com.tw/upload/images/20200808/20129144XmOpTxqqnq.png


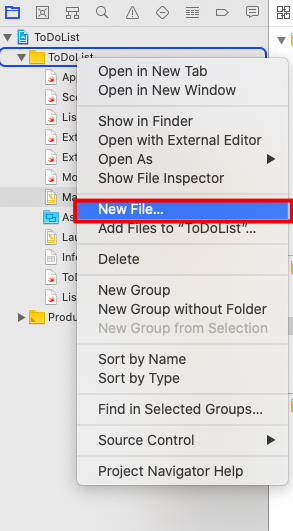
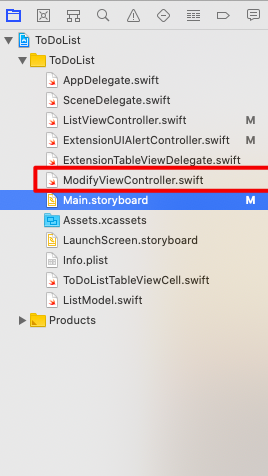
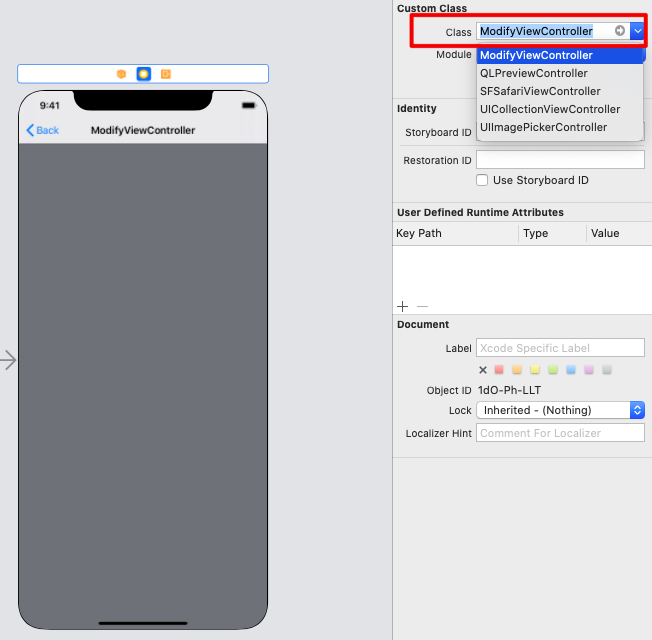
接著給第二個頁面一個類別,這樣介面才能與程式碼連結,在資料夾點右鍵並新增一個類別,新增完之後,為第二個ViewController選取我們新增的類別『ModifyViewController』

https://ithelp.ithome.com.tw/upload/images/20200808/201291447L4WHNweDS.png


https://ithelp.ithome.com.tw/upload/images/20200808/20129144WHGCqv3OvZ.png


https://ithelp.ithome.com.tw/upload/images/20200808/20129144wVjuBHk4us.png


https://ithelp.ithome.com.tw/upload/images/20200808/20129144EXbVwvYUmN.png


https://ithelp.ithome.com.tw/upload/images/20200808/2012914413iSGG2eJT.png


https://ithelp.ithome.com.tw/upload/images/20200808/20129144yjiG9BQCbR.png


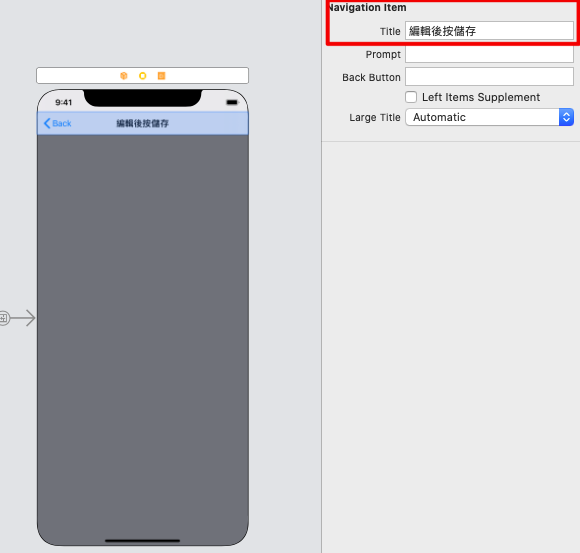
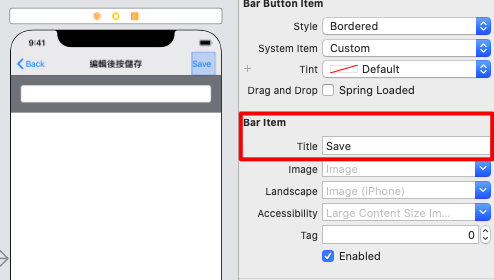
選取ModifyViewController的NavigationBar,將Item title改成"編輯後儲存"

https://ithelp.ithome.com.tw/upload/images/20200808/20129144sk4TNAOVpH.png


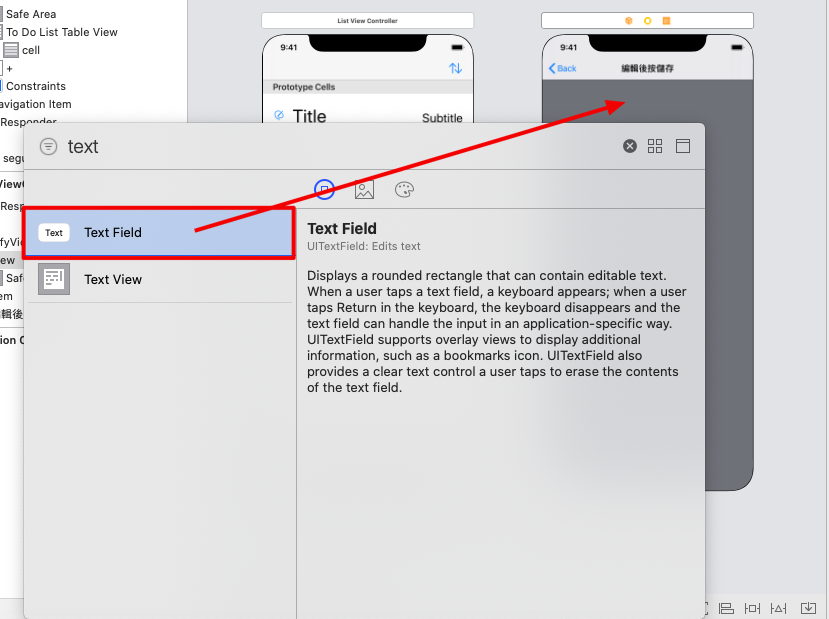
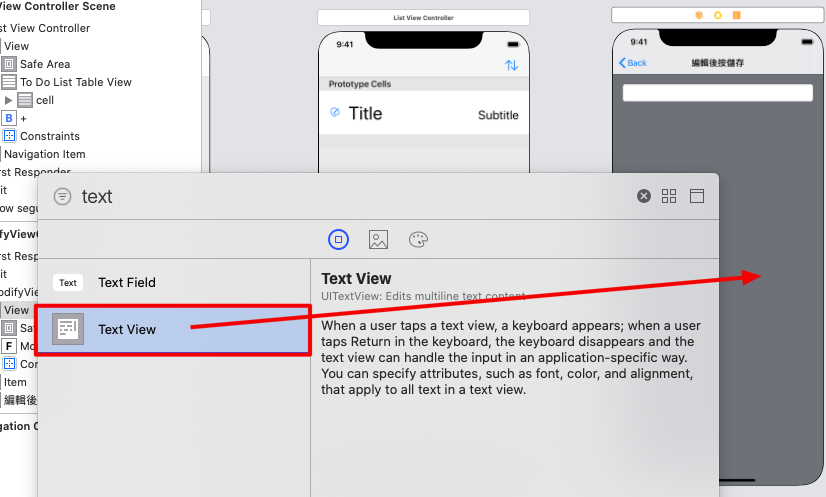
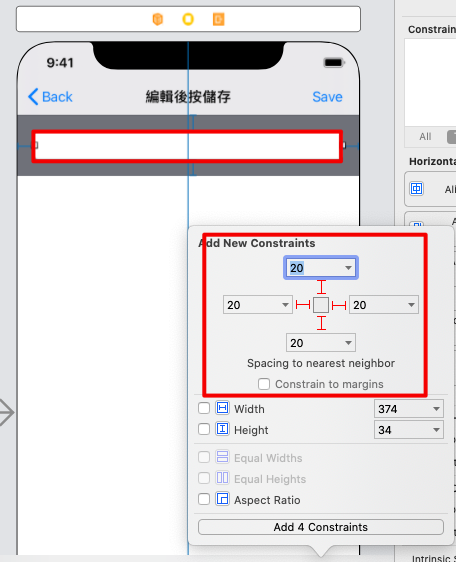
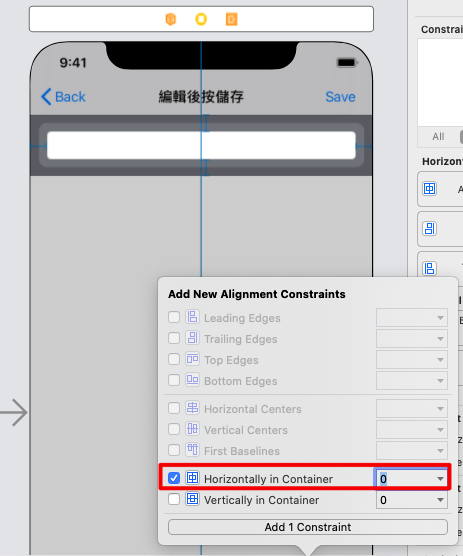
接著開始佈局ModifyViewcontroller,加入可以讓使用者輸入文字的TextField跟TextView。

https://ithelp.ithome.com.tw/upload/images/20200808/201291447Far4rKyVR.png


https://ithelp.ithome.com.tw/upload/images/20200808/20129144Pw6SrhlZK1.png


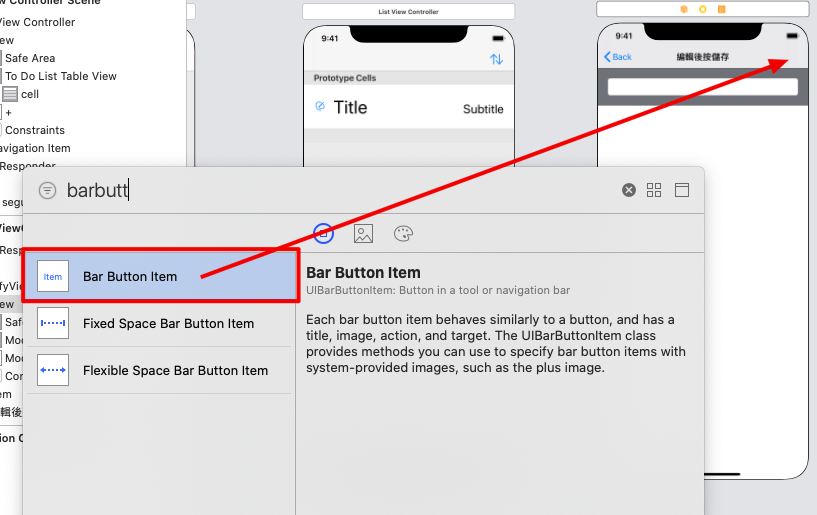
然後在NavigationBar右邊加入按鈕,並且Title改成"Save",這個按鈕是要儲存修改完的資料。

https://ithelp.ithome.com.tw/upload/images/20200808/20129144hgNLe1HAZO.png


https://ithelp.ithome.com.tw/upload/images/20200808/20129144u0hdiSuWfg.png

接下來開始針對ModifyViewController介面的AutoLayout。

https://ithelp.ithome.com.tw/upload/images/20200808/20129144XxoPJt98eI.png


https://ithelp.ithome.com.tw/upload/images/20200808/20129144PMRm603r8B.png


https://ithelp.ithome.com.tw/upload/images/20200808/20129144V7Fm4PQDyY.png

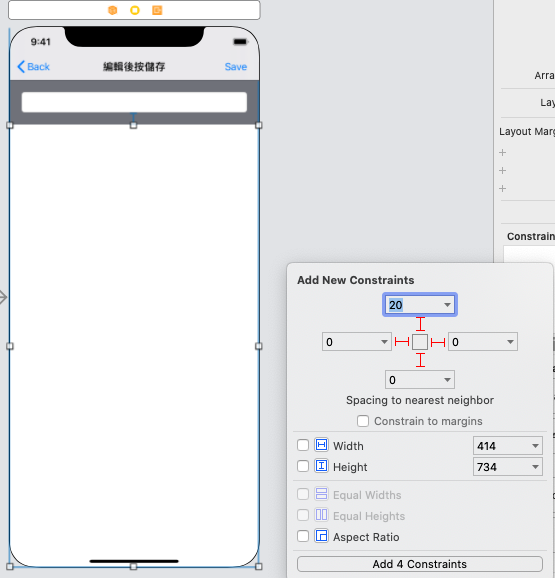
所有介面都佈局好啦~~撒花~~明天接著資料模型建立。


下一篇
Day2-建立資料模型並實作表格清單
系列文
想知道自己iOS具現化系能力有多強嗎?實作幾個App就知道了30
圖片
  直播研討會
圖片
{{ item.channelVendor }} {{ item.webinarstarted }} |
{{ formatDate(item.duration) }}
直播中

1 則留言

0
ytyubox
iT邦新手 5 級 ‧ 2020-09-17 09:35:51

加油加油,祝順利~

謝謝游諭哥~

我要留言

立即登入留言