[ Day4 ]
說明:
今天來使用http這個套件來搭個簡易的http server
建立幾個restful api來展示一下套件的使用效果
一、引入http套件
const http = require('http');
const port = 45001
二、建立server監聽路徑
使用createServer方法,匿名函數傳入request和response
判斷request的url路徑,判斷要進入哪一段response中
這裡的方法十分相似於在java servelt中的controller
另外透過request的method type可以決定是哪種類型的對應
const server = http.createServer((req, res) => {
console.log(req.method)
if (req.url == '/') {
res.writeHead(200, { 'Content-type': 'text/plain' });
res.end('mainPage')
} else if (req.url == '/user' && req.method == 'GET') {
res.writeHead(200, { 'Content-type': 'application/json' });
res.end('{"name":"John", "age": "12"}')
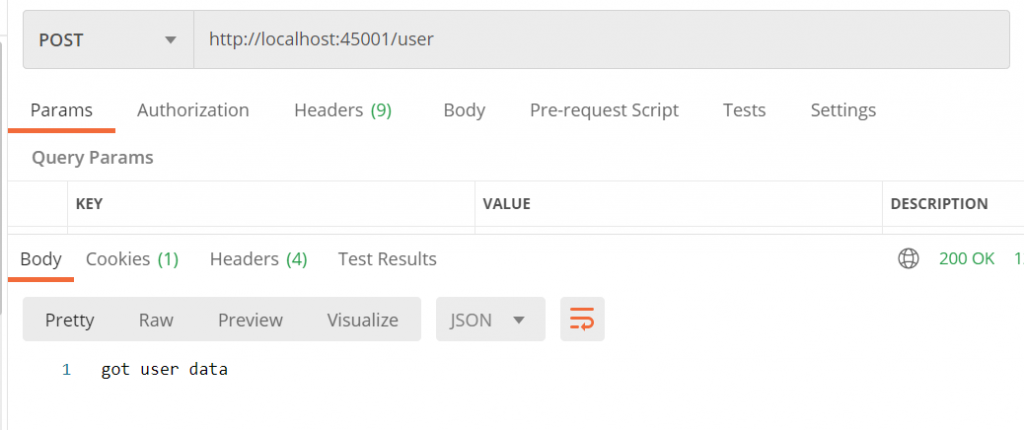
} else if (req.url == '/user' && req.method == 'POST') {
res.writeHead(200, { 'Content-type': 'application/json' });
res.end('got user data')
}
});
需要注意的是除了透過request.method屬性可以拿到request type外
另外可以接收request.headers屬性,拿到client端傳來的header參數,例如cookie,access-token等
三、回傳response
res.writeHead(200, { 'Content-type': 'text/plain' });
res.end('mainPage')
response可以執行writeHead方法傳回http-status以及header
一般正常未出錯的情況下,會回傳httpStatus200 OK 的訊息
在end方法中,傳回httpbody內容
client端在接收到body後可以根據header的content-type決定要將內容parse成何種形式顯示
四、server掛載在port上進行監聽
server.listen(port)
最後記得要呼叫listen方法指定port進行監聽
五、完整程式碼
const http = require('http');
const port = 45001
export function serv () {
const server = http.createServer((req, res) => {
console.log(req.headers)
if (req.url == '/') {
res.writeHead(200, { 'Content-type': 'text/plain' })
res.end('mainPage')
} else if (req.url == '/user' && req.method == 'GET') {
res.writeHead(200, { 'Content-type': 'application/json' })
res.end('{"name":"John", "age": "12"}')
} else if (req.url == '/user' && req.method == 'POST') {
res.writeHead(200, { 'Content-type': 'application/json' })
res.end('got user data')
} else if (req.url == '/user' && req.method == 'PUT') {
res.writeHead(200, { 'Content-type': 'application/json' })
res.end('user data updated')
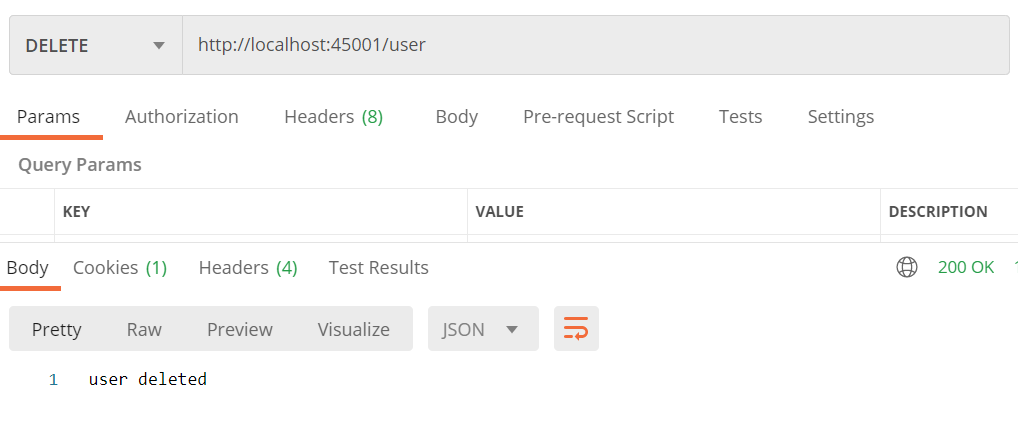
} else if (req.url == '/user' && req.method == 'DELETE') {
res.writeHead(200, { 'Content-type': 'application/json' })
res.end('user deleted')
}
});
server.listen(port)
}
再透過POSTMAN這個好用的工具來呼叫rest api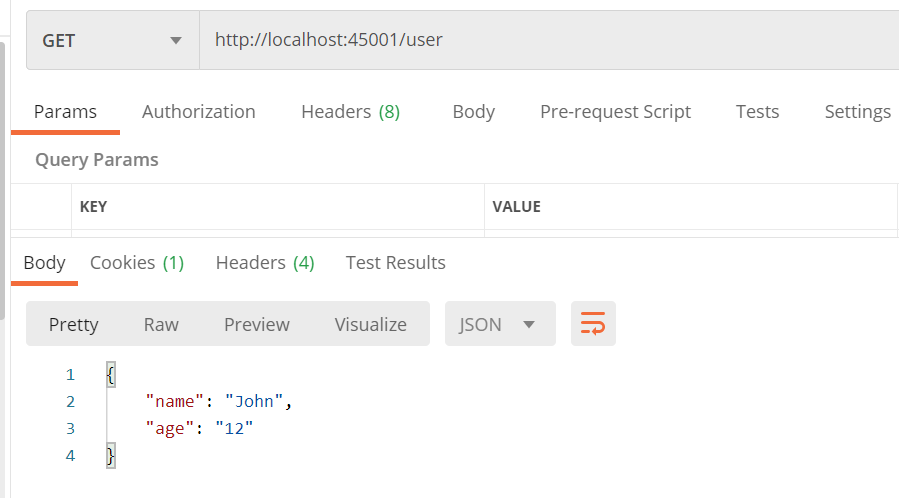
得提醒的是,此種將所有路徑映射都寫在同一方法同一個檔案裡的做法,在實際開發上很難維護運行
所以後續將使用其他套件將controller路徑對應到的方法拆開來
Day4結束


 iThome鐵人賽