本篇同步發文在個人Blog: 一袋.NET要扛幾樓?打造容器化的ASP.NET Core網站!系列文章 - (4) 建立商品服務的Api - 2
在CatalogApi專案新增資料夾Data,新增CatalogContext類別,並繼承DbContext,要與DB存取資料都是以此物件。
前述的CatalogType和CatalogItem兩個Entity加入至CatalogContext的DbSet,才能對這兩個做CRUD的功能。
在這使用Fluent API,可以宣告資料庫的表格規範,包含欄位的限制、Relation的設計等。
using CatalogApi.Domain;
using Microsoft.EntityFrameworkCore;

namespace CatalogApi.Data
{
    public class CatalogContext : DbContext
    {
        public CatalogContext(DbContextOptions options) : base(options)
        {

        }

        protected override void OnModelCreating(ModelBuilder builder)
        {
            builder.Entity<CatalogType>(x =>
            {
                x.ToTable("CatalogType");
                x.Property(c => c.Type)
                    .IsRequired()
                    .HasMaxLength(100);
            });

            builder.Entity<CatalogItem>(x =>
            {
                x.ToTable("Catalog");
                x.Property(c => c.Name)
                    .IsRequired()
                    .HasMaxLength(50);
                x.Property(c => c.Price)
                    .IsRequired();
                x.HasOne(c => c.CatalogType)
                    .WithMany()
                    .HasForeignKey(c => c.CatalogTypeId);
            });
        }

        public DbSet<CatalogType> CatalogTypes { get; set; }
        public DbSet<CatalogItem> CatalogItems { get; set; }
    }
}
在方案的根目錄,建立docker-compose.yml,並加入至方案。yml的內容如下,其中有幾個參數:
    version: "3.4"

    networks:
       backend:

    services:
       mssqlserver:
          image: "microsoft/mssql-server-linux:latest"
          ports:
             - "1445:1433"

          container_name: rpgmssqlcontainer
          environment:
             - ACCEPT_EULA=Y
             - SA_PASSWORD=JustTest!
          networks:
             - backend
在docker-compose.yml啟用cmd,並執行
docker-compose up
Docker將建立一個SQL Server的Container,此時開啟SSMS,登入的伺服器名稱為 localhost,1445 (要有逗號並串接port),如圖1,代表Docker Container的SQL Server可使用。
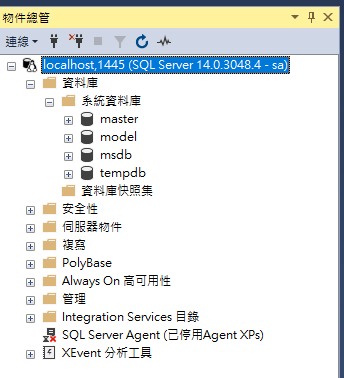
圖1
在appsettings.json增加4個屬性
"DatabaseServer": "localhost,1445",
"DatabaseName": "CatalogDb",
"DatabaseUser": "sa",
"DatabasePassword": "JustTest!"
將連線字串的主要參數拆解,可以區分用VS和Dokcer的測試參數。
在public void ConfigureServices(IServiceCollection services),添加註冊Sql Server的連線資訊和DbContext的Services:
    public void ConfigureServices(IServiceCollection services)
            {
                // other code...

                string server = Configuration["DatabaseServer"];
                string database = Configuration["DatabaseName"];
                string user = Configuration["DatabaseUser"];
                string password = Configuration["DatabasePassword"];
                string connectionString = string.Format("Server={0};Database={1};User={2};Password={3};", server, database, user, password);

                services.AddDbContext(options => options.UseSqlServer(connectionString));

                // other code...
            }
開啟cmd,將路徑切換到CatalogApi.csproj的目錄。假如尚未安裝dotnet ef的工具,在cmd執行
dotnet tool install --global dotnet-ef --version 3.1.7
接著輸入第一次遷移的指令:
dotnet ef migrations add Initialize
在專案內將產生Migrations的資料夾和遷移相關的.cs檔,如圖2。
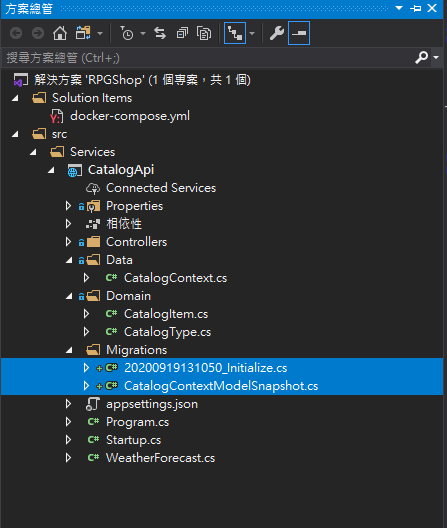
圖2
輸入此遷移的更新資料庫指令:
dotnet ef database update
成功的話,用SSMS檢查,可看見資料庫CatalogDb和2個表格Catalog和CatalogType,如圖3。
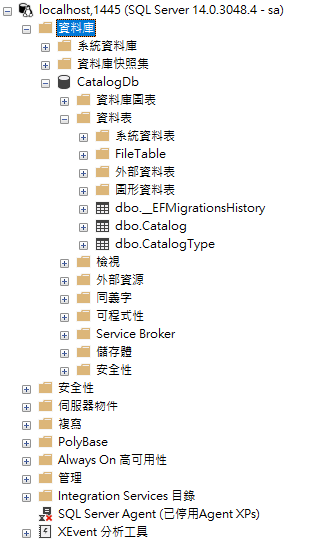
圖3
商品的類型與列表,在系統剛啟動時會先檢查資料庫是否有資料,如果沒有的話,建立一個Seed程式(或者是SQL腳本),將預設的資料寫進資料庫。
首先在Data資料夾建立CatalogSeed.cs,建立一個非同步的SeedAsync函式,先檢查CatalogItem和CatalogType是否有任何值,沒有的話則寫入預設的資料。
    using CatalogApi.Domain;
    using System.Collections.Generic;
    using System.Linq;
    using System.Threading.Tasks;

    namespace CatalogApi.Data
    {
        public class CatalogSeed
        {
            public static async Task SeedAsync(CatalogContext context)
            {
                if (!context.CatalogTypes.Any())
                {
                    context.CatalogTypes.AddRange(GetDefaultCatalogTypes());
                    await context.SaveChangesAsync();
                }

                if (!context.CatalogItems.Any())
                {
                    context.CatalogItems.AddRange(GetDefaultItems());
                    await context.SaveChangesAsync();
                }
            }

            static IEnumerable<CatalogType> GetDefaultCatalogTypes()
            {
                return new List<CatalogType>()
                {
                    new CatalogType() { Type = "Head"},
                    new CatalogType() { Type = "Chest" },
                    new CatalogType() { Type = "Hands" },
                    new CatalogType() { Type = "Legs" },
                    new CatalogType() { Type = "Feet" }
                };
            }
            static IEnumerable<CatalogItem> GetDefaultItems()
            {
                return new List<CatalogItem>()
                {
                    new CatalogItem() { CatalogTypeId=1, Description = "Normal Helmet", Name = "Normal Helmet", Price = 10M, PictureFileName = "1.png" },
                    new CatalogItem() { CatalogTypeId=1, Description = "Great Helmet", Name = "Great Helmet", Price= 50M, PictureFileName = "2.png" },
                    new CatalogItem() { CatalogTypeId=2, Description = "Normal Armor", Name = "Normal Armor", Price = 15M, PictureFileName = "3.png" },
                    new CatalogItem() { CatalogTypeId=2, Description = "Great Armor", Name = "Great Armor", Price = 42M, PictureFileName = "4.png" },
                    new CatalogItem() { CatalogTypeId=4, Description = "Normal Robe", Name = "Normal Robe", Price = 12M, PictureFileName = "5.png" },
                    new CatalogItem() { CatalogTypeId=4, Description = "Great Robe", Name = "Great Robe", Price = 44M, PictureFileName = "6.png" },
                    new CatalogItem() { CatalogTypeId=3, Description = "Normal Gloves", Name = "Normal Gloves", Price = 5M, PictureFileName = "7.png" },
                    new CatalogItem() { CatalogTypeId=3, Description = "Great Gloves", Name = "Great Gloves", Price = 69M, PictureFileName = "8.png" },
                    new CatalogItem() { CatalogTypeId=5, Description = "Normal Boots", Name = "Normal Boots", Price = 13M, PictureFileName = "9.png" },
                    new CatalogItem() { CatalogTypeId=5, Description = "Great Boots", Name = "Great Boots", Price = 55M, PictureFileName = "10.png" }
                };
            }
        }
    }
接著在Program.cs,使用GetRequiredService取的CatalogContext,並呼叫CatalogSeed做寫資料的功能:
    using CatalogApi.Data;
    using Microsoft.AspNetCore.Hosting;
    using Microsoft.Extensions.DependencyInjection;
    using Microsoft.Extensions.Hosting;
    using Microsoft.Extensions.Logging;
    using System;

    namespace CatalogApi
    {
        public class Program
        {
            public static void Main(string[] args)
            {
                var host = CreateHostBuilder(args).Build();
                using (var scope = host.Services.CreateScope())
                {
                    var services = scope.ServiceProvider;
                    try
                    {
                        var context = services.GetRequiredService<CatalogContext>();
                        CatalogSeed.SeedAsync(context).Wait();
                    }
                    catch (Exception ex)
                    {
                        var logger = services.GetRequiredService<ILogger<Program>>();
                        logger.LogError(ex, "An error occured while seeding the database");
                    }
                }

                host.Run();
            }

            public static IHostBuilder CreateHostBuilder(string[] args) =>
                Host.CreateDefaultBuilder(args)
                    .ConfigureWebHostDefaults(webBuilder =>
                    {
                        webBuilder.UseStartup<Startup>();
                    });
        }
    }
在VS啟用Debug,讓程式執行,再用SSMS確認有寫入預設資料,如圖4。
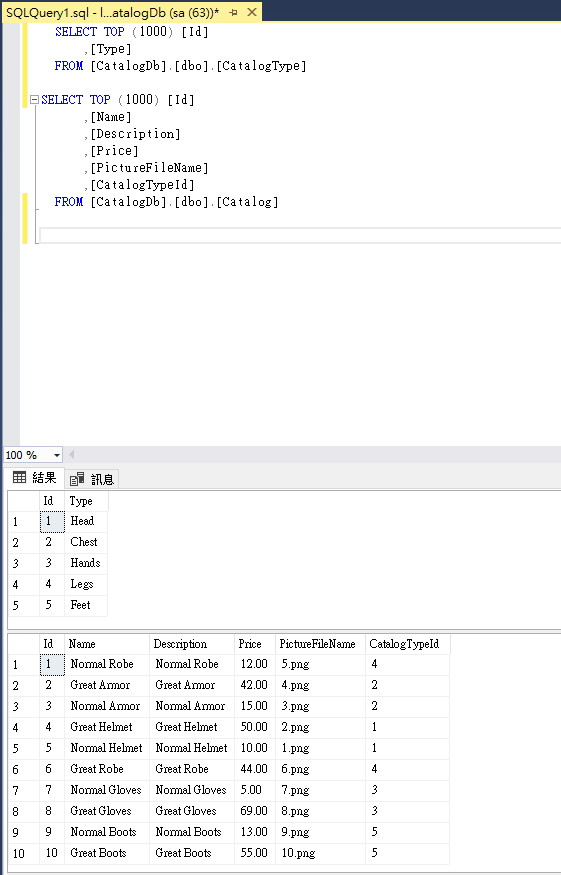
圖4
--------------------------------------------------------------
下一篇將撰寫ApiController對商品的CRUD功能設計。
請問一下 [在docker-compose.yml啟用cmd,並執行] 這段該如何執行,yml 檔案是放在方案的目錄下是嗎?等於跟方案底下的專案目錄同層,再來是在visual studio 的方案選擇加入yml檔案是不是會顯示 Solution Items 這樣的資料夾顯示
Hi , 可以參考我的github唷~
https://github.com/u8989332/RPGShopOnContainers