
上一篇介紹了如何使用DB First的方式搭配現有的資料庫使用EF Core
本篇將介紹,如何使用Code First的方式建立資料庫並對資料庫進行版本控管
首先一樣先建立一個新的webapi的專案dotnet new webapi -o CodeFirstDemo
安裝完進入目錄並安裝需要的套件dotnet add package Pomelo.EntityFrameworkCore.MySqldotnet add package Microsoft.EntityFrameworkCore.Design
首先我們得先創建Models資料夾並建立類別作為資料模型,定義出資料表所需的欄位Post.cs
public class Post
{
    public int Id { get; set; }
    public int UserId { get; set; }
    public string Title { get; set; }
    public string Content { get; set; }
    public int Read { get; set;}
    public virtual User User { get; set; }
}
User.cs
public class User
{
    public int Id { get; set; }
    public string UserName { get; set; }
    public ICollection<Post> Posts { get; set; }
}
接下來需要建立DBContext 作為主要溝通資料庫的類別
並加入定義好的資料模型及連線字串BlogContext.cs
public class BlogContext : DbContext
{

public BlogContext() { }

public BlogContext(DbContextOptions<BlogContext> options) : base(options) { }

protected override void OnConfiguring(DbContextOptionsBuilder optionsBuilder)
{
    optionsBuilder.UseMySql("server=localhost;port=3306;database=Blog;user=root;password=test1234");
}

public DbSet<Post> Posts { get; set; }
public DbSet<User> Users { get; set; }
}
定義完畢之後就要開始進行資料庫的Migration
首先,在目錄底下的命令列中輸入dotnet ef migrations add init --context BlogContext
接著將會出現migrations的資料夾並有剛剛所建立的migration的檔案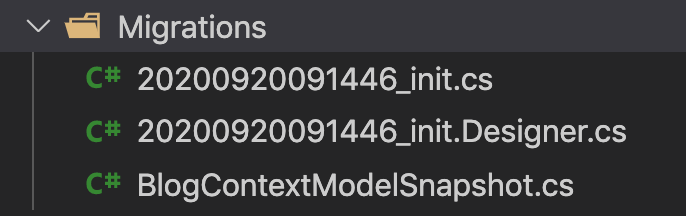
執行migrations會產生"時間_變更名稱.cs"與 "時間_變更名稱.Designer.cs"並更新"名稱ContextModelSnapshot.cs"
作用分別是:
20200920091446_init.cs
記錄版本遷移所需要的程式碼
protected override void Up(MigrationBuilder migrationBuilder)
{
    ...
}

protected override void Down(MigrationBuilder migrationBuilder)
{
    ...
}
up的部分是
升級到這個版本所需要的程式碼
down的部分表示
從這個版本降級到前一個版本所需要的程式碼
20200920091446_init.Designer.cs
紀錄這個版本Model定義實體的形狀,它們之間的關係以及它們如何對應到資料庫。
BlogContextModelSnapshot.cs
Model快照,用於記錄當前版本實體與資料庫的對應,每次進行migrations都會更新。
接著在命令列中輸入dotnet ef database update --context BlogContext
就可以看到由EF Core Code First所建立起來的資料庫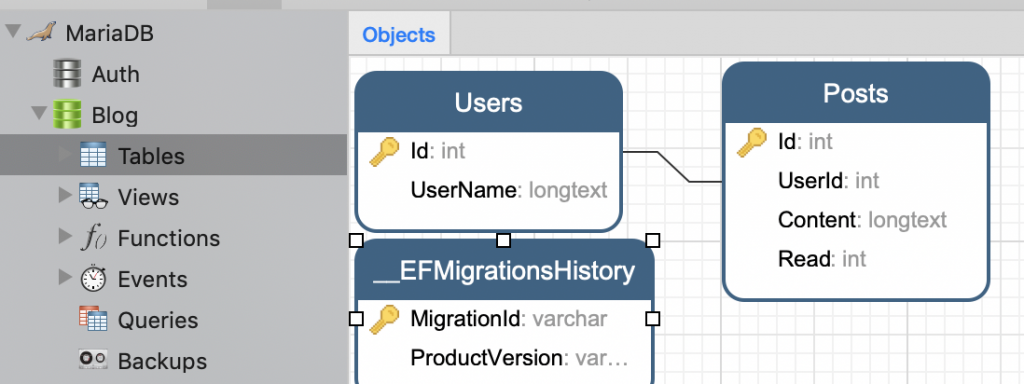
接著我們對資料模型的類別做更動
在Post.cs加上
public DateTime PostTime { get; set; }
加完後在目錄底下輸入指令dotnet ef migrations add Add_PostTime --context BlogContext
能在migrations資料夾中看到我們新建立的migration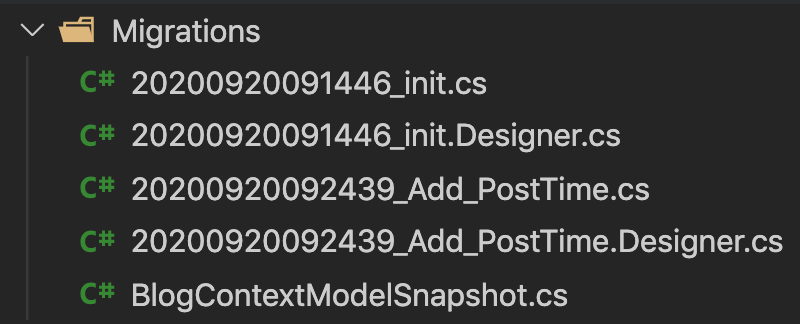
之後在目錄底下輸入指令dotnet ef database update --context BlogContext
便能在資料庫中看到資料表的變化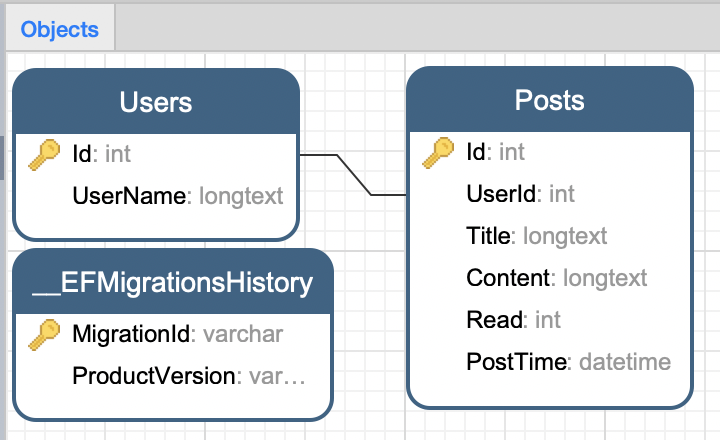
並能在history資料表中看到migrations 的歷程變化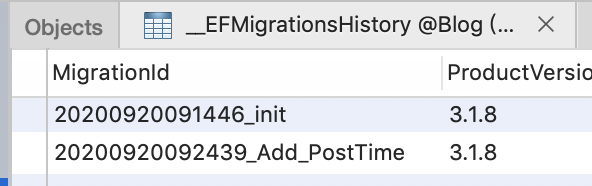
藉此便能對資料庫做到版本控管
以下再介紹幾個進行轉移的指令:
dotnet ef migrations remove
移除上一個migration版本
dotnet ef database update <版本名稱>
將資料庫更新至特定版本 例如:dotnet ef database update init
dotnet ef migrations script
從空白資料庫產生 SQL 腳本至最新的migration
dotnet ef migrations script <FROM> <TO>
從指定的遷移產生 SQL 腳本 from 至指定的 to 遷移。(FROM 不填的話會從第一個版本更新至指定版本)
dotnet ef database drop
刪除資料庫
有時候在開發過程中會常異動資料庫,尤其多人開發,每個人都使用本地資料庫時,就很容易出現每個人資料庫版本不一致的情況,透過Code First並使用migration進行資料庫移轉,更能有效同步每個開發者的資料庫版本,減少溝通與同步的時間成本。
有任何問題或是建議也都歡迎在下方留言提出。
參考資料
https://docs.microsoft.com/zh-tw/ef/core/managing-schemas/migrations/managing?tabs=dotnet-core-cli
https://docs.microsoft.com/zh-tw/ef/core/managing-schemas/migrations/applying?tabs=dotnet-core-cli
