最近因為疫情的關係線上會議系統需求性提高,大多公司也都有開放遠端上班,這一套開源的線上會議系統簡單又好用。
# 需先安裝必要套件
apt install gnupg2
# 設定 jitsi 來源庫
echo 'deb https://download.jitsi.org stable/' >> /etc/apt/sources.list.d/jitsi-stable.list
# 設定 jitsi key
wget -qO - https://download.jitsi.org/jitsi-key.gpg.key | apt-key add -
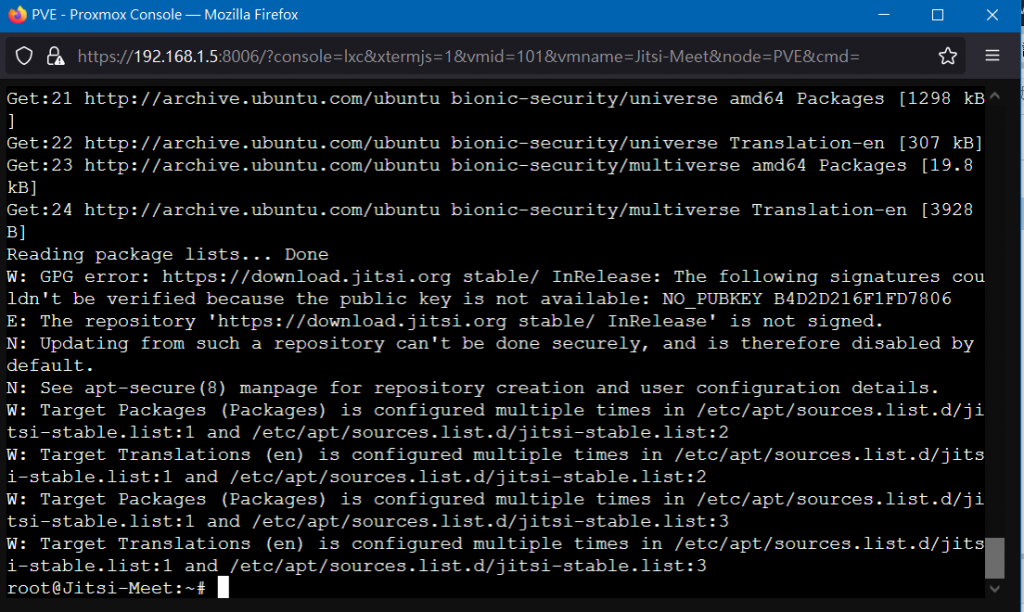
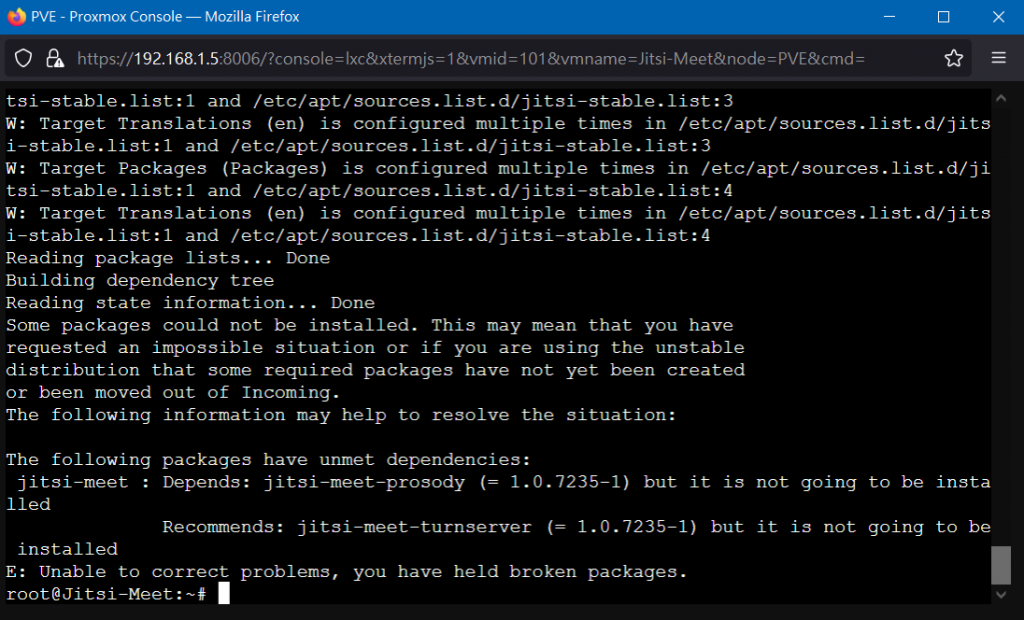
# 更新來源庫及安裝 jitsi meet 服務
apt update && apt install jitsi-meet -y
# 設定路徑
vim /etc/jitsi/videobridge/sip-communicator.properties

# 新增下面兩行參數,第一行指本機的 IP ,第二行指公網的 IP
org.ice4j.ice.harvest.NAT_HARVESTER_LOCAL_ADDRESS=<Local.IP.Address>
org.ice4j.ice.harvest.NAT_HARVESTER_PUBLIC_ADDRESS=<Public.IP.Address>
如果您前面有用 Nginx 代理服務的話,可以參考我的設定檔
server {
listen 80;
server_name 您的hostname或是IP;
rewrite ^(.*)$ https://${server_name}$1 permanent;
}
#
server {
# 使用 https 和 http/2 協定
listen 443 ssl http2;
# 上述的 IPv6 方式
listen [::]:443 ssl http2;
server_name 您的hostname或是IP;
#
# certs sent to the client in SERVER HELLO are concatenated in ssl_certificate
#
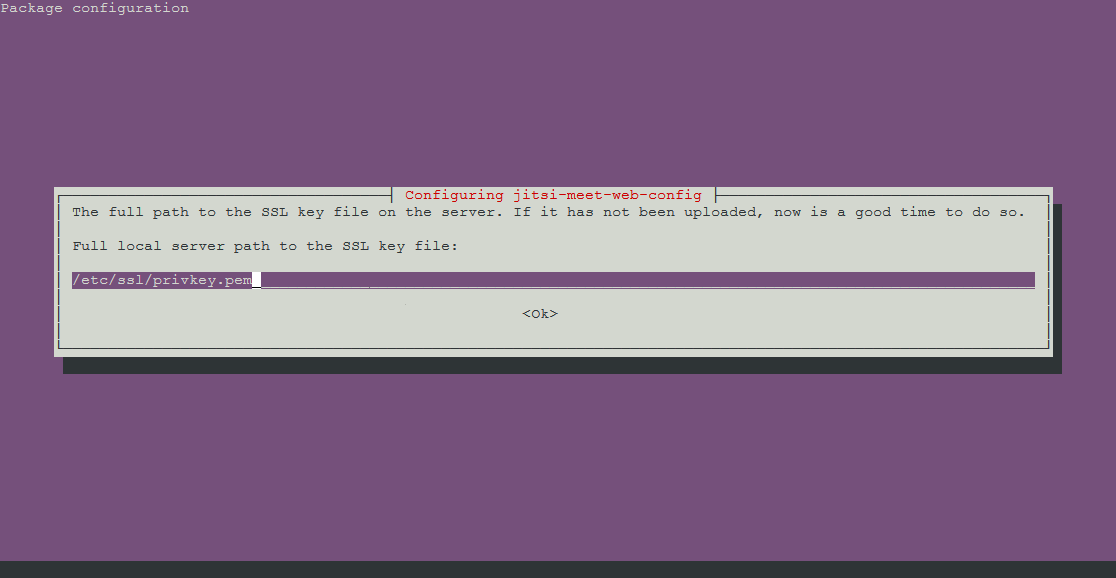
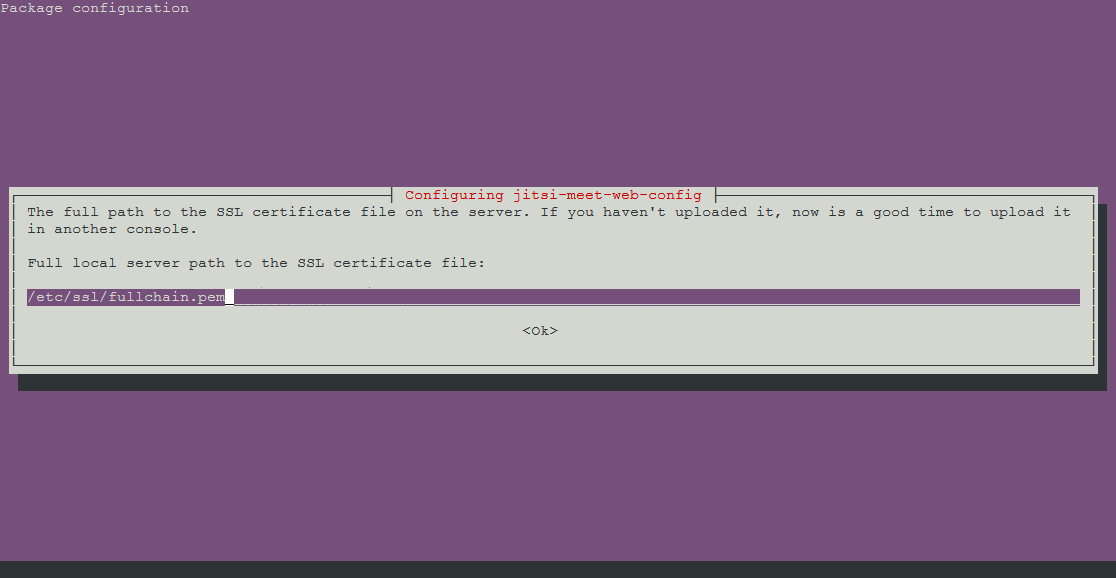
# SSL 憑證證書路徑
ssl_certificate /etc/nginx/ssl/fullchain.pem;
# 私鑰路徑
ssl_certificate_key /etc/nginx/ssl/privkey.pem;
# 緩存有效期
ssl_session_timeout 1d;
# 緩存憑證類型和大小
# ssl_session_cache shared:SSL:50m;
# about 40000 sessions
ssl_session_cache shared:MozSSL:50m;
ssl_stapling on;
ssl_stapling_verify on;
#
# intermediate configuration. tweak to your needs.
#
# 使用的加密協定
ssl_protocols TLSv1.1 TLSv1.2 TLSv1.3;
# 加密演算法,越前面的優先級越高
ssl_ciphers 'TLS13-AES-256-GCM-SHA384:TLS13-CHACHA20-POLY1305-SHA256:TLS13-AES-128-GCM-SHA256:TLS13-AES-128-CCM-8-SHA256:TLS13-AES-128-CCM-SHA256:EECDH+CHACHA20:EECDH+CHACHA20-draft:EECDH+ECDSA+AES128:EECDH+aRSA+AES128:RSA+AES128:EECDH+ECDSA+AES256:EECDH+aRSA+AES256:RSA+AES256:EECDH+ECDSA+3DES:EECDH+aRSA+3DES:RSA+3DES:!MD5';
# 交握過程使用 Server 的首選加演算法,這裡使用 Client 為首選
ssl_prefer_server_ciphers on;
#
access_log /var/log/nginx/jitsi_access.log;
error_log /var/log/nginx/jitsi_error.log;
#
# this are optional but recommended Security Headers
# thats the HSTS Header - it will enforce that all connections regarding this host and the subdomains will only used with encryption
add_header Strict-Transport-Security "max-age=63072000; includeSubDomains" always;
# this tells the browser that when click on links in the chat / pad, the referrer is only set when the link points to hosts site and encrypted
add_header Referrer-Policy strict-origin;
# this tells the browser that jitsi can't be embedded in a Frame
add_header X-Frame-Options "DENY";
add_header X-Content-Type-Options nosniff;
add_header X-XSS-Protection "1; mode=block";
add_header Content-Security-Policy "default-src 'self'; script-src 'self' 'unsafe-inline'; img-src 'self'; style-src 'self' 'unsafe-inline'; font-src 'self'; object-src 'none'; base-uri 'none'; frame-ancestors 'none'; form-action 'none'; block-all-mixed-content";
# List of Browser-Features which are allowed / denied for this Site
add_header Feature-Policy "geolocation 'none'; camera 'self'; microphone 'self'; speaker 'self'; autoplay 'none'; battery 'none'; accelerometer 'none'; autoplay 'none'; payment 'none';";
#
location / {
ssi on;
proxy_pass https://您的hostname或是IP:4444/;
proxy_set_header X-Forwarded-For $remote_addr;
proxy_set_header Host $http_host;
}
location ~ ^/(?!(http-bind|external_api\.|xmpp-websocket))([a-zA-Z0-9=_äÄöÖüÜß\?\-]+)$ {
rewrite ^/(.*)$ / break;
}
# BOSH
location /http-bind {
proxy_pass http://您的hostname或是IP:5280/http-bind;
proxy_set_header X-Forwarded-For $remote_addr;
proxy_set_header Host $http_host;
}
# xmpp websockets
location /xmpp-websocket {
proxy_pass http://您的hostname或是IP:5280/xmpp-websocket;
proxy_http_version 1.1;
proxy_set_header Upgrade $http_upgrade;
proxy_set_header Connection "upgrade";
proxy_set_header Host $host;
tcp_nodelay on;
}
}
設定完後記得要去防火牆開通 UDP 10000 port,讓 Jitsi Meet 服務使用,不然會無法正常運行
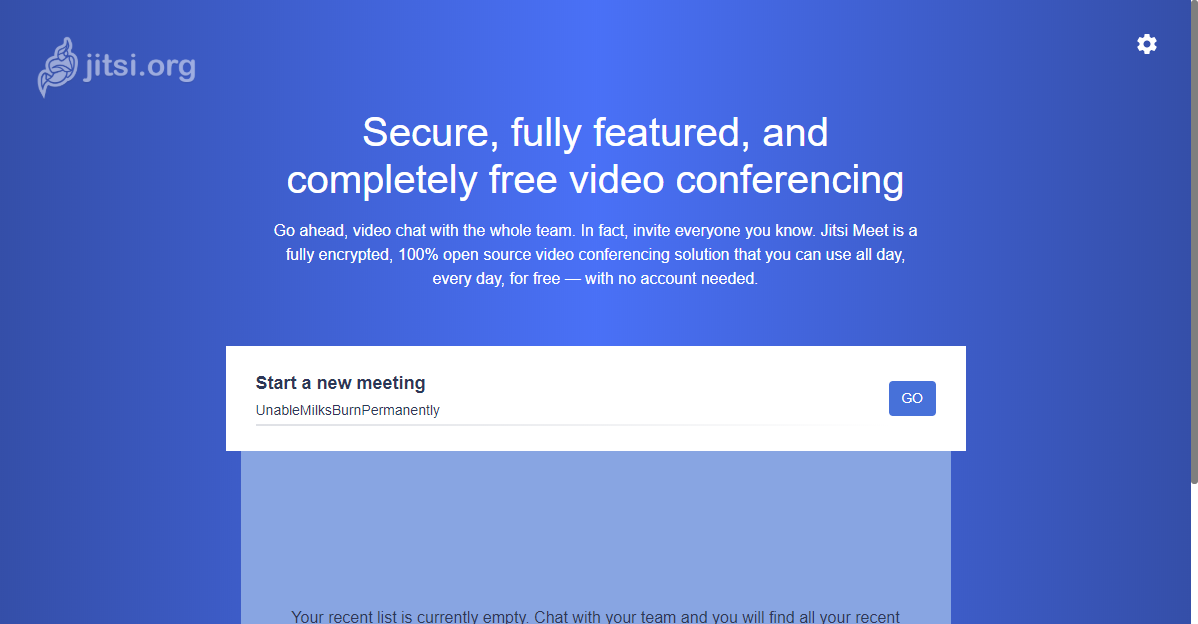
連線看看是否能夠正常連線上,如果有連線上的話就可以看到這樣子的畫面,要修改語系的話按下右上角的齒輪裡面有更多選擇可以選擇中文語系了。
會議中錄影的服務,需要另外啟用因還要花點時間去參考文件來測試,日後有測試成功會在寫一篇記錄下來。