今日關鍵字:Splash Screen
原本有在想都已經做了個模擬的幹嘛還要搞原生的
轉念一想,模擬的或許可以改成loading的畫面
總之還是來摸摸看吧
先來安裝react-native-splash-screen
yarn add react-native-splash-screen
cd ios && pod install && cd ..
然後可以在想要關掉初始畫面的元件中進行關閉:
...
import SplashScreen from 'react-native-splash-screen'
...
  useEffect(() => {
    SplashScreen.hide(
  }, [])
再來就是完成兩平台的SplashScreen了
1.用Xcode打開/ios/專案名.xcworkspace
2.在Images.xcassets新增image set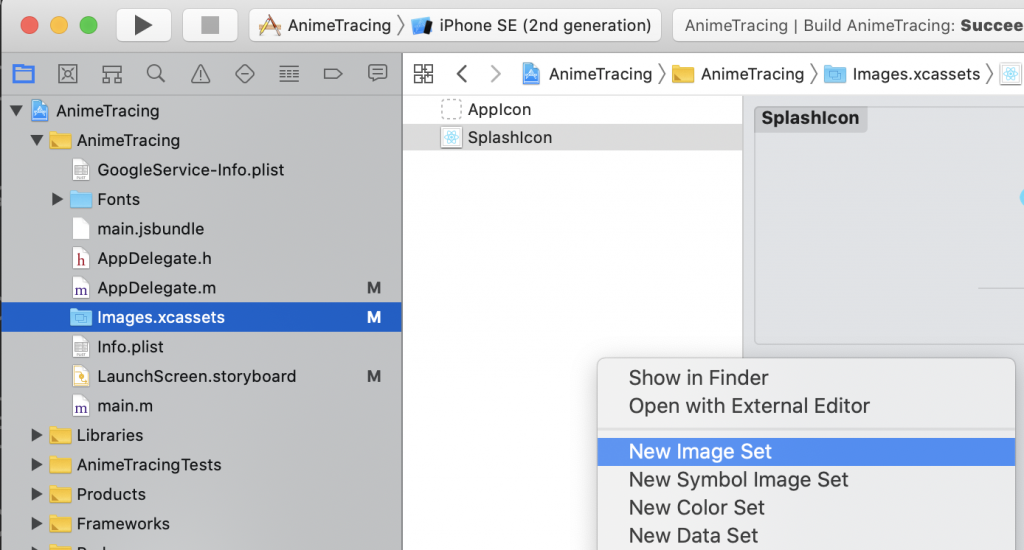
這裡要放入三種尺寸的圖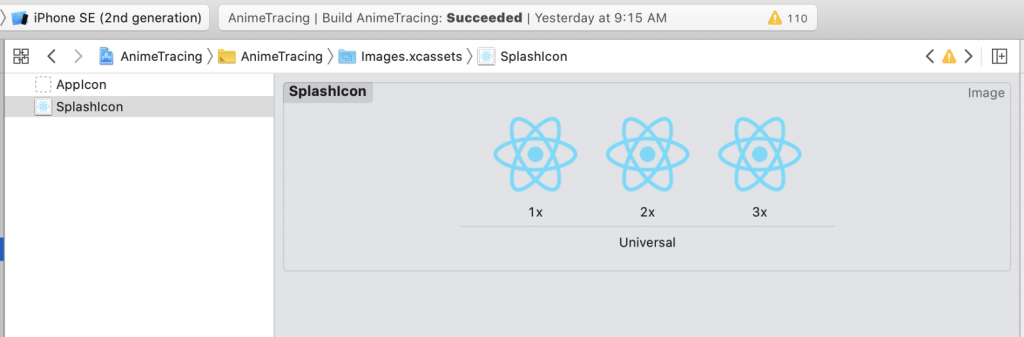
3.在launchScreen.storyboard新增image view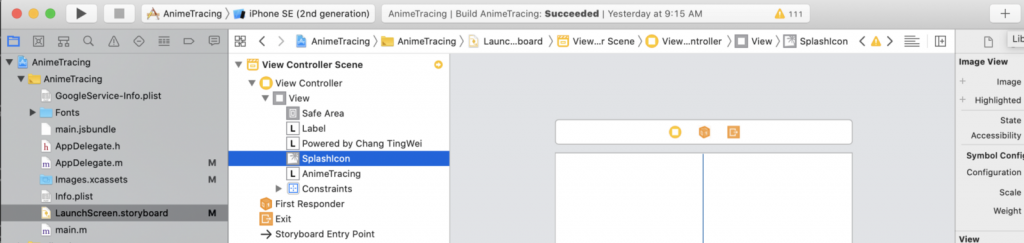
並且在Image選擇剛剛新增的image set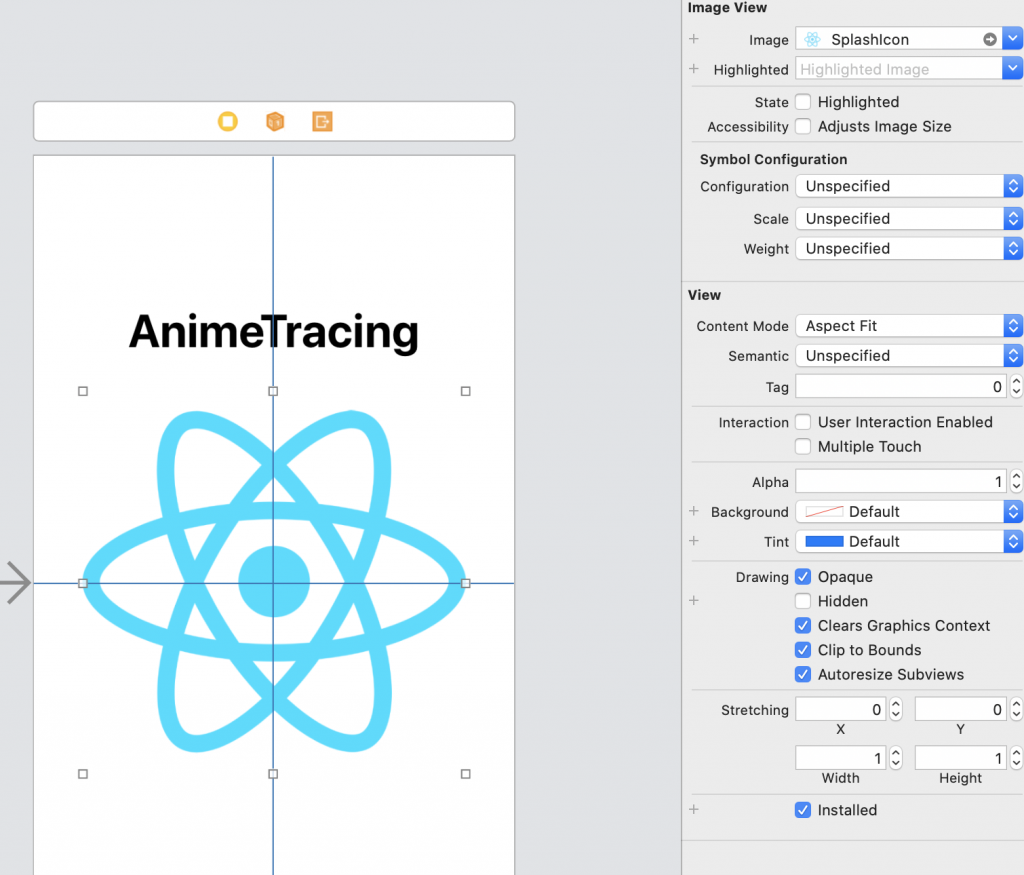
兩者勾選將其置中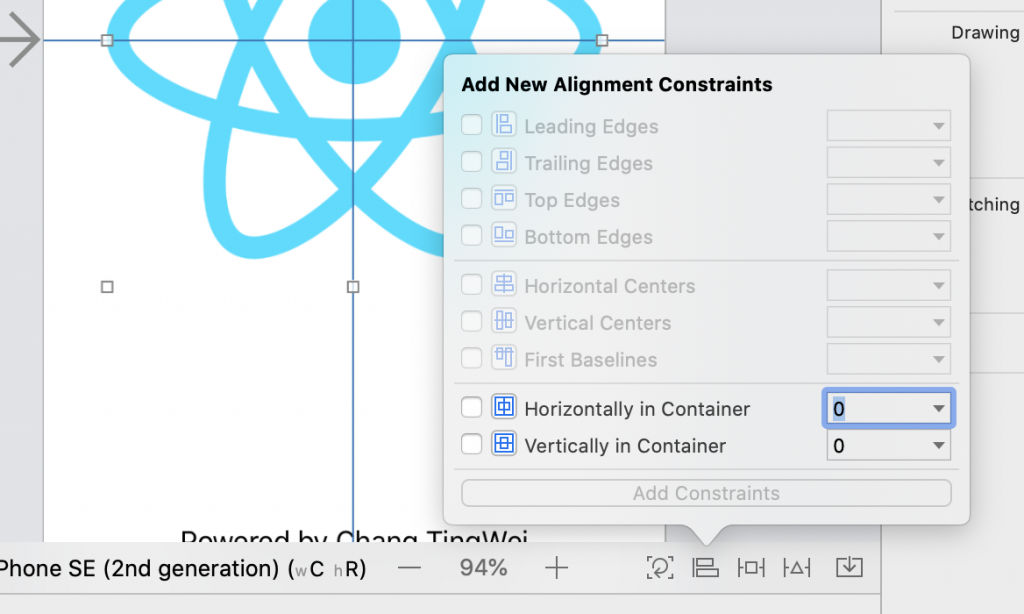
如果希望Splash Screen持續展示到需要的時機才消失
就需要用到剛剛安裝的套件了
4.修改ios/專案名/AppDelegate.m
新增
#import "RNSplashScreen.h"
修改在didFinishLaunchingWithOptions
- (BOOL)application:(UIApplication *)application
    didFinishLaunchingWithOptions:(NSDictionary *)launchOptions {
  ...

  [RNSplashScreen show];

  return YES;
}
...
iOS設定到此結束
1.將素材圖放入/android/app/src/main/res中mipmap-開頭的五個資料夾中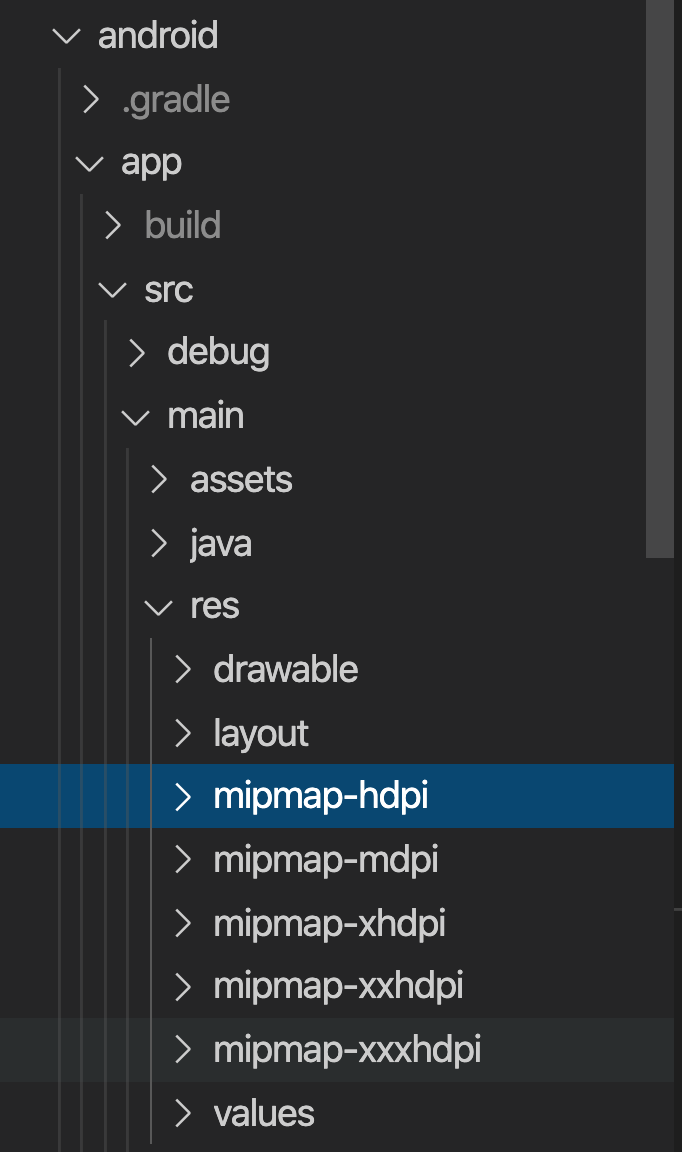
放進去的素材檔名記得要相同
2.在/android/app/src/main/res新增drawable資料夾並在其中新增background_splash.xml
放入圖片及設定背景色
<?xml version="1.0" encoding="utf-8"?>
<layer-list xmlns:android="http://schemas.android.com/apk/res/android">

    <item
        android:drawable="@color/splashscreen_bg"/>

    <item
        android:width="300dp"
        android:height="300dp"
        android:drawable="@mipmap/splash_icon"
        android:gravity="center" />

</layer-list>
並修改/android/app/src/main/res/values/color.xml
<resources>
    <color name="white">#FFF</color>
    <color name="splashscreen_bg">#FFF</color>
</resources>
表示設定背景為白色
修改同資料夾的styles.xml
<resources>

    <!-- Base application theme. -->
    <style name="AppTheme" parent="Theme.AppCompat.Light.NoActionBar">
        <!-- Customize your theme here. -->
        <item name="android:windowBackground">@color/white</item>
    </style>

    <!-- Adds the splash screen definition -->
    <style name="SplashTheme" parent="Theme.AppCompat.Light.NoActionBar">
        <item name="android:statusBarColor">@color/splashscreen_bg</item>
        <item name="android:background">@drawable/background_splash</item>
    </style>

</resources>
3.修改/android/app/src/main/AndroidManifest.xml
新增
        <!-- Add this SplashActivity -->
        <activity
          android:name=".SplashActivity"
          android:theme="@style/SplashTheme"
          android:label="@string/app_name">
          <intent-filter>
              <action android:name="android.intent.action.MAIN" />
              <category android:name="android.intent.category.LAUNCHER" />
          </intent-filter>
        </activity>
同時為.MainActivity增加android:exported="true"
      <activity
        android:name=".MainActivity"
        android:label="@string/app_name"
        android:screenOrientation="portrait"
        android:configChanges="keyboard|keyboardHidden|orientation|screenSize|uiMode"
        android:launchMode="singleTask"
        android:windowSoftInputMode="adjustResize"
        android:exported="true">
4.新增/android/app/src/main/java/專案名/SplashActivity.java
package com.animetracing;

import android.content.Intent;
import android.os.Bundle;
import androidx.appcompat.app.AppCompatActivity;

public class SplashActivity extends AppCompatActivity {
    @Override
    protected void onCreate(Bundle savedInstanceState) {
        super.onCreate(savedInstanceState);

        Intent intent = new Intent(this, MainActivity.class);

        startActivity(intent);
        finish();
    }
}
不過這時同樣會遇上跟iOS相同,SplashScreen沒有在想要的時間消失的問題
這裡需要利用上面的套件補上第二Splash Screen
4.修改/android/app/src/main/java/專案名/MainActivity.java
package com.專案名;
...
import org.devio.rn.splashscreen.SplashScreen;
import android.os.Bundle;
public class MainActivity extends ReactActivity {
...
@Override
 protected void onCreate(Bundle savedInstanceState) {
  SplashScreen.show(this);
 super.onCreate(savedInstanceState);
 }
}
5.新增第二Splash Screen
新增/android/app/src/main/res/layout/launch_screen.xml
<?xml version="1.0" encoding="utf-8"?>
<LinearLayout xmlns:android="http://schemas.android.com/apk/res/android"
    android:layout_width="match_parent"
    android:layout_height="match_parent"
    android:background="@drawable/background_splash"
    android:orientation="vertical"
    >
    <TextView
        android:id="@+id/text_view_id"
        android:layout_height="0dp"
        android:layout_width="match_parent"
        android:text="@string/app_name"
        android:textSize="40sp"
        android:layout_weight="1"
        android:textStyle="bold"
        android:gravity="center"/>
    <LinearLayout
        android:layout_height="0dp"
        android:layout_width="match_parent"
        android:orientation="vertical"
        android:layout_weight="1" >
    </LinearLayout>
</LinearLayout>
這裡比照iOS版面補上App的名字,並調整位置到不會壓到字的程度
正當我以為再補個icon就結束時,又有地方出問題了
明天預計來修正一下
參考:
其實本篇的內容99.87%都是從這裡來的,更詳細的請點進這篇慢慢看


 iThome鐵人賽