模型繫結(Model Binding)主要是Http Request與Action之間的橋樑。
以往不用框架處理來自HTTP Request的做法,就是要一個欄位一個欄位取得內容並轉型後塞入自己定義的類別中,但是這些動作相當繁瑣且容易發生錯誤。ASP.NET Core就透過了模型繫結的方式自動化這個流程。
關於模型繫結:
接著我們來以API的Controller來介紹Model Binding
首先在API Controller中預設都會套用[ApiController]這個屬性,那套用這個屬性對於Model Binding有什麼影響呢?
套用了[ApiController]會有下列影響
Model Binding也有以下來源屬性可以設定
以上的預設情況都是在套用[ApiController]的情境之下。
接著我們就來做個範例,測試一下以上幾種來源吧
首先重新建立一個SampleController,並加入以下內容
[ApiController]
Route("api/[controller]")]
public class SampleController : ControllerBase
{
    [HttpGet("{id}")]
    public ActionResult<string> Get([FromRoute] int id,
                                    [FromQuery] int query,
                                    [FromHeader] string header1)
    {
        return $"query: {query}, route: {route}, header: {header1}";
    }

    [HttpPost]
    //public ActionResult<Demo> Post([FromBody]Demo demo)
    public ActionResult<DemoUser> Post(DemoUser demo)
    {
        return demo;
    }

    public class DemoUser
    {
        public string Name { get; set; }
        public int Age { get; set; }
    }
}
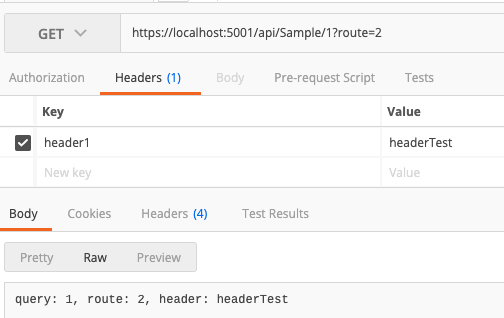
首先呼叫Get的Action,看呼叫完的輸出結果
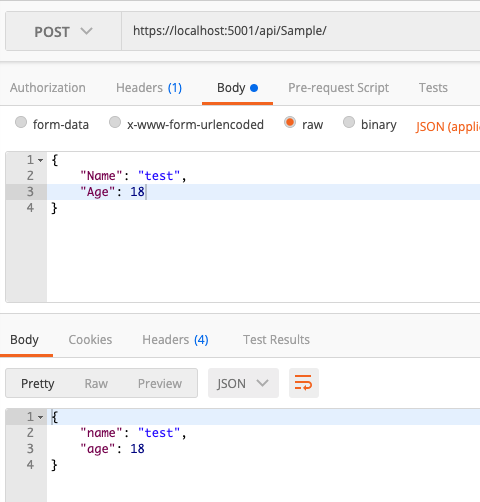
接著看到Post的Action,因為預設就套用了[FromBody],所以不管有沒有在參數上加上[FromBody]都會有一樣的結果
在Model Binding的過程中,也可以透過對每個屬性的設定進行驗證
我們使用剛才的範例,並稍微改動一下DemoUser這個類別
using System.ComponentModel.DataAnnotations;
...
public class DemoUser
{
    [Required]
    [StringLength(6, ErrorMessage = "名字長度必須介於 {2} 到 {1}個字", MinimumLength = 2)]
    public string Name { get; set; }
    [Range(5,50)]
    public int Age { get; set; }
    [Required(ErrorMessage = "Email 為必填")]
    [EmailAddress]
    public string Email { get; set; }
    public string Password { get; set; }
    [Compare("Password")]
    public string ConfirmPassword { get; set; }
}
上述的範例我們加上了幾個欄位,並為這些欄位加上驗證屬性(Validate Attribute),驗證屬性可以讓使用者指定模型屬性的驗證規則。
(使用前記得 using System.ComponentModel.DataAnnotations;System.ComponentModel.DataAnnotations;)
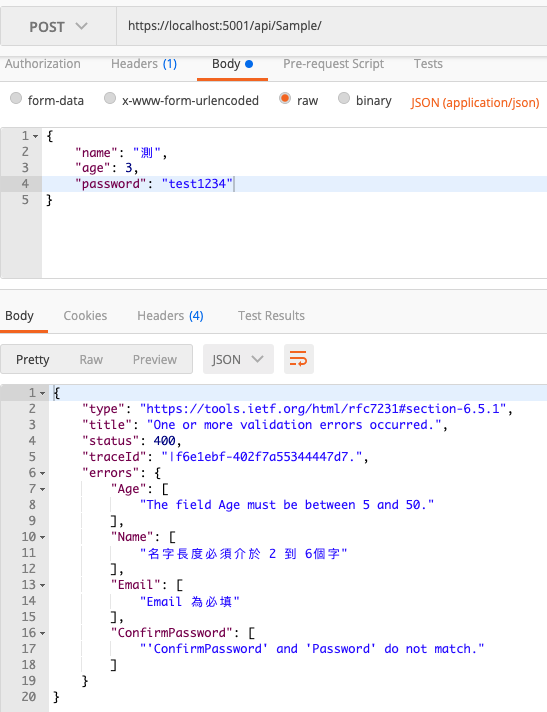
接著用Postman呼叫觀看結果
利用模型驗證可以更方便地達到資料格式的驗證,而且在套用[ApiController]之後,Request的資料如果沒有通過模型驗證,就會直接回傳Http 400,並搭配錯誤訊息回應給用戶端。
以下是比較常用的內建驗證屬性:
ASP.NET Core 中的資料繫結
Model validation in ASP.NET Core MVC and Razor Pages
