昨天我們將獲取資料的網頁部分給完成了,今天就讓我們繼續將操作資料的網頁部分給完成吧!
在操作資料的部分,很常會使用到一些 <input> 輸入框的標籤以及 <textarea> 文字框的標籤,而這些標籤都會有一些預設樣式會套用上去,故我們可以將這兩組標籤與樣式利用 React 形成一個可以重複使用的元件,底下分別是 FormInputComponent 和 FormTextAreaComponent 的程式碼:
// FormInputComponent.kt
import kotlinx.html.*
import kotlinx.html.js.onChangeFunction
import org.w3c.dom.events.Event
import react.*
import react.dom.*

external interface FormInputComponentProps: RProps {
    var id: String
    var name: String
    var currentValue: String
    var inputType: InputType
    var onChange: (Event) -> Unit
}

class FormInputComponent: RComponent<FormInputComponentProps, RState>() {
    override fun RBuilder.render() {
        div {
            attrs.classes = setOf("form-group")

            label {
                attrs.htmlFor = props.id
                +props.name
            }

            input {
                attrs.type = props.inputType
                attrs.id = props.id
                attrs.classes = setOf("form-control")
                attrs.value = props.currentValue
                attrs.onChangeFunction = props.onChange
            }
        }
    }
}

fun RBuilder.formInputComponent(handler: RElementBuilder<FormInputComponentProps>.() -> Unit): ReactElement =
    child(FormInputComponent::class, handler)

// FormTextAreaComponent.kt
import kotlinx.html.*
import kotlinx.html.js.onChangeFunction
import org.w3c.dom.events.Event
import react.*
import react.dom.*

external interface FormTextAreaComponentProps: RProps {
    var id: String
    var name: String
    var currentValue: String
    var onChange: (Event) -> Unit
}

class FormTextAreaComponent: RComponent<FormTextAreaComponentProps, RState>() {
    override fun RBuilder.render() {
        div {
            attrs.classes = setOf("form-group")

            label {
                attrs.htmlFor = props.id
                +props.name
            }

            textArea {
                attrs.id = props.id
                attrs.classes = setOf("form-control")
                attrs.value = props.currentValue
                attrs.onChangeFunction = props.onChange
            }
        }
    }
}

fun RBuilder.formTextAreaComponent(handler: RElementBuilder<FormTextAreaComponentProps>.() -> Unit): ReactElement =
    child(FormTextAreaComponent::class, handler)
基本上這兩個元件都只要讓你分別代入元件 ID、元件標題名稱、元件目前的值以及元件變更時要呼叫的函式這四個值即可使用。有了這兩個元件以後,我們就可以利用這兩個元件來組裝接下來會需要製作的表單。
首先,就先讓我們來製作題目的表單吧!題目的表單會運用在「新增題目」和「編輯題目」的兩個功能上,分辨的方式就是看看在使用表單的時候是否已經有給預設的問題編號,所以其表單的 props 就是持有一個 problemId 這個變數去記錄這件事情,如下程式碼所示:
external interface ProblemFormProps: RProps {
    var problemId: Int?
}
而 state 的部分則是要紀錄目前的表單內容、是否已經遞交表單、是否已經得到遞交表單後的結果,以及在「編輯題目」的時候,要能先從資料管理系統拿到原本的題目資料用的函式,共這四個不同的狀態值,定義如下程式碼所示:
external interface ProblemFormState: RState {
    var problemFormData: ProblemFormData
    var isSubmitted: Boolean
    var isResultGet: Boolean
    var onLoad: (Int) -> Unit
}
而 state 初始化的部分就依照上面的定義進行初始化的工作,如下程式碼所示:
class ProblemForm: RComponent<ProblemFormProps, ProblemFormState>() {
    override fun ProblemFormState.init() {
        isSubmitted = false
        isResultGet = false
        problemFormData = ProblemFormData(
            null,
            "",
            "",
            mutableListOf()
        )

        onLoad = /* ...... 獲取題目資料的程式碼 ...... */
    /* ...... 其餘的程式碼 ...... */
}
其中,onLoad 的部分會需要先獲得原本題目的資料,還記得昨天我們將資料管理系統中,原本用來獲取題目資料的 API GET /problems/{id},改到了 GET /problems/{id}/all 嗎?現在就是要拿來使用的時候了,將這個 API 改成如下所示的樣子:
authenticate(SUPER_USER_AUTHENTICATION_NAME) {
    get("/all") {
        val requestId =
            call.parameters["id"]?.toInt() ?: throw BadRequestException("The type of Id is wrong.")
        var responseData: Problem? = null

        transaction {
            val requestProblem = ProblemTable.select {
                ProblemTable.id.eq(requestId)
            }.first()

            val requestTestCases = TestCaseTable.select {
                TestCaseTable.problemId.eq(requestId)
            }.map {
                TestCase(
                    id = it[TestCaseTable.id].toString(),
                    input = it[TestCaseTable.input],
                    expectedOutput = it[TestCaseTable.expectedOutput],
                    comment = it[TestCaseTable.comment],
                    score = it[TestCaseTable.score],
                    timeOutSeconds = it[TestCaseTable.timeOutSeconds]
                )
            }.toList()

            responseData = Problem(
                id = requestProblem[ProblemTable.id].toString(),
                title = requestProblem[ProblemTable.title],
                description = requestProblem[ProblemTable.description],
                testCases = requestTestCases
            )
        }

        call.respond(mapOf("data" to responseData))
    }
}
與之前不同的地方大概在於這次要獲取資料前,必須先通過超級管理員的認證,不然的話一般的使用者就可以把題目的測資看光光了。回到網頁專案的部分,我們建立一個 Fetcher 以及資料型態可以用來對應這個 API,如下程式碼所示:
fun createProblemAllFetcher(id: Int) = Fetcher<ProblemFormWrapperData>("$DATA_URL/problems/$id/all")

data class ProblemFormWrapperData(
    val data: ProblemFormArrayData
)

data class ProblemFormArrayData(
    var id: String?,
    var title: String,
    var description: String,
    var testCases: Array<TestCaseData>
)

data class ProblemFormData(
    var id: String?,
    var title: String,
    var description: String,
    var testCases: MutableList<TestCaseData>
)

data class TestCaseData(
    var id: String?,
    var input: String,
    var expectedOutput: String,
    var comment: String,
    var score: Int,
    var timeOutSeconds: Double
)
這裡我們定義了 ProblemFormWrapperData 用來獲取 API 傳來的資料,比較麻煩的地方是在於我們獲取題目的測資 TestCaseData 的部分得用 Array 來接,但在使用的時候會比較希望能夠用 MutableList 來做處理,所以這裡定義了 ProblemFormArrayData 來接 API 的資料,但使用的時候會轉成 ProblemFormData 以作為後續處理時的資料型態。
有了這個 Fetcher 後,我們的 ProblemFormState.onLoad 就可以做初始化了,如下程式碼所示:
onLoad = {
    val mainScope = MainScope()
    mainScope.launch {
        val remoteProblemFormData = Fetcher.createProblemAllFetcher(it).fetch()
        setState {
            problemFormData = remoteProblemFormData.data.let {
                ProblemFormData(
                    it.id,
                    it.title,
                    it.description,
                    it.testCases.toMutableList()
                )
            }
        }
    }
}
再來是表單內容的部分,首先我們先根據目前 state 的狀態來確定現在要做什麼事情,如下所示:
override fun RBuilder.render() {
    styledDiv {
        css {
            width = LinearDimension("80%")
            margin = "30px auto"
        }

        val problemId = props.problemId
        if (state.isResultGet) {
            redirect(to = if (problemId != null) "/problems/$problemId" else "/problems")
        } else {
            if (problemId != null && state.problemFormData.id == null) {
                state.onLoad(problemId)
            } else {
                /* ...... 表單內容 ...... */
            }
        }
    }
}

fun RBuilder.problemForm(handler: RElementBuilder<ProblemFormProps>.() -> Unit): ReactElement =
    child(ProblemForm::class, handler)
先根據 state.isResultGet 來判斷表單是否已經遞送且獲得結果了。如果已經得到結果了,就直接跳轉到相對應的網頁,「編輯題目」就跳轉到剛編輯的題目的詳細頁面,而「新增題目」則跳轉到題目總列表的頁面。如果題目表單尚未遞交的話,則再判斷是否為「編輯題目」的狀況但還尚未拿到該題的資料,如果是的話就呼叫 state.onLoad() 函式去獲得資料;如果是「新增題目」或是已經獲得題目資料的話,就顯示表單內容。表單內容的部分如下程式碼所示:
h1 { +"題目表單" }
form {
    attrs.onSubmitFunction = /* ...... 遞交表單的動作 ...... */

    formInputComponent {
        attrs.inputType = InputType.text
        attrs.id = "titleInput"
        attrs.name = "題目標題"
        attrs.currentValue = state.problemFormData.title
        attrs.onChange = {
            val target = it.target as HTMLInputElement
            setState {
                problemFormData.title = target.value
            }
        }
    }

    formTextAreaComponent {
        attrs.id = "descriptionInput"
        attrs.name = "題目描述"
        attrs.currentValue = state.problemFormData.description
        attrs.onChange = {
            val target = it.target as HTMLTextAreaElement
            setState {
                problemFormData.description = target.value
            }
        }
    }

    /* ...... 測資表單內容 ...... */

    button {
        attrs.type = ButtonType.submit
        attrs.classes = setOf("btn", "btn-primary")

        +"完成"
    }
}
基本上就是根據題目的欄位去選用我們在最開始定義的輸入框或是文字框來使用。至於測資表單內容的部分,由於會有不定數量的測資需要填入,這裡除了測資欄位以外,還會需要有「新增測資」以及「刪除測資」的按鈕,程式碼如下所示:
div {
    attrs.classes = setOf("form-group")

    div {
        attrs.classes = setOf("row")
        h2 {
            attrs.classes = setOf("col")
            +"測試資料編輯"
        }
        div {
            attrs.classes = setOf("col-md-2")
            button {
                attrs.type = ButtonType.button
                attrs.classes = setOf("btn", "btn-primary")
                attrs.onClickFunction = {
                    setState {
                        state.problemFormData.testCases.add(
                            TestCaseData(
                                null,
                                "",
                                "",
                                "",
                                0,
                                10.0
                            )
                        )
                    }
                }

                +"新增一筆測資"
            }
        }
    }

    for ((index, testCase) in state.problemFormData.testCases.withIndex()) {
        styledDiv {
            css {
                padding = "20px"
                margin = "10px auto"
                borderWidth = LinearDimension("1px")
                borderStyle = BorderStyle.solid
                borderColor = Color.aliceBlue
                backgroundColor = Color.antiqueWhite
            }

            attrs.classes = setOf("container", "form-group")

            div {
                attrs.classes = setOf("row")
                h3 {
                    attrs.classes = setOf("col")
                    +"測試資料 ${index + 1}"
                }

                div {
                    attrs.classes = setOf("col-md-2")
                    button {
                        attrs.type = ButtonType.button
                        attrs.classes = setOf("btn", "btn-danger")
                        attrs.onClickFunction = {
                            if (window.confirm("確定要刪除這筆測試資料嗎?")) {
                                setState {
                                    state.problemFormData.testCases.removeAt(index)
                                }
                            }
                        }

                        +"刪除這筆測資"
                    }
                }
            }

            formTextAreaComponent {
                attrs.id = "inputInput"
                attrs.name = "測資輸入"
                attrs.currentValue = testCase.input
                attrs.onChange = {
                    val target = it.target as HTMLTextAreaElement
                    setState {
                        testCase.input = target.value
                    }
                }
            }

            formTextAreaComponent {
                attrs.id = "expectedOutputInput"
                attrs.name = "預期測資輸出"
                attrs.currentValue = testCase.expectedOutput
                attrs.onChange = {
                    val target = it.target as HTMLTextAreaElement
                    setState {
                        testCase.expectedOutput = target.value
                    }
                }
            }

            formTextAreaComponent {
                attrs.id = "commentInput"
                attrs.name = "註解"
                attrs.currentValue = testCase.comment
                attrs.onChange = {
                    val target = it.target as HTMLTextAreaElement
                    setState {
                        testCase.comment = target.value
                    }
                }
            }

            formInputComponent {
                attrs.inputType = InputType.number
                attrs.id = "scoreInput"
                attrs.name = "分數"
                attrs.currentValue = testCase.score.toString()
                attrs.onChange = {
                    val target = it.target as HTMLInputElement
                    setState {
                        testCase.score = target.value.toIntOrNull() ?: 0
                    }
                }
            }

            formInputComponent {
                attrs.inputType = InputType.number
                attrs.id = "timeOutSecondsInput"
                attrs.name = "最高執行時間限制(秒)"
                attrs.currentValue = testCase.timeOutSeconds.toString()
                attrs.onChange = {
                    val target = it.target as HTMLInputElement
                    setState {
                        testCase.timeOutSeconds = target.value.toDoubleOrNull() ?: 10.0
                    }
                }
            }
        }
    }
}
程式碼由於欄位比較多的關係,所以稍微長了一點。幾個跟前面比較不一樣的地方就是它是利用 for 迴圈一筆一筆加進來的,並且有兩個按鈕分別用來做「新增測資」與「刪除測資」的部分,然後每一筆測資的編輯區塊我在這裡有用一些 CSS 樣式去將它們給一塊一塊區分出來,這樣編輯的時候就會比較好看一點。另外就是在「刪除測資」的部分,這裡有利用 window.confirm("確定要刪除這筆測試資料嗎?") 去跳出確認視窗,讓使用者在確認過後才會進行刪除的動作,做一個防呆的效果,避免使用者誤觸後直接刪除了測資。
最後是要能進行遞交表單的動作,會需要先有編輯和新增題目資料的 Fetcher 和資料型態,程式碼如下所示:
fun createProblemEditFetcher(id: Int) = Fetcher<JustFetch>("$DATA_URL/problems/$id")
fun createProblemDeleteFetcher(id: Int) = Fetcher<JustFetch>("$DATA_URL/problems/$id")

fun createHeaders(method: String): Headers {
    val headers = Headers()
    if (method == "POST" || method == "PUT") { // 記得加上 "PUT"
        headers.append("Content-Type", "application/json")
    }
    return headers
}

data class ProblemPostDTO(
    val title: String,
    val description: String,
    val testCases: List<TestCasePostDTO>
)

data class ProblemPutDTO(
    val id: String,
    val title: String,
    val description: String,
    val testCases: List<TestCasePutDTO>
)

data class TestCasePostDTO(
    val input: String,
    val expectedOutput: String,
    val comment: String,
    val score: Int,
    val timeOutSeconds: Double
)

data class TestCasePutDTO(
    val id: String?,
    val input: String,
    val expectedOutput: String,
    val comment: String,
    val score: Int,
    val timeOutSeconds: Double
)

class JustFetch
這裡由於我目前還不想處理回傳回來的錯誤,所以就先用一個空類別 JustFetch 來接回回傳的結果。
有了「新增題目」與「編輯題目」的兩個 Fetcher,基本上遞交表單的部分就利用這兩個 Fetcher 實作即可,程式碼如下所示:
attrs.onSubmitFunction = onSubmitFunction@{
    it.preventDefault()
    if (state.isSubmitted) return@onSubmitFunction

    if (problemId != null) {
        val mainScope = MainScope()
        mainScope.launch {
            Fetcher.createProblemEditFetcher(problemId).fetch(
                "PUT",
                ProblemPutDTO(
                    state.problemFormData.id.toString(),
                    state.problemFormData.title,
                    state.problemFormData.description,
                    state.problemFormData.testCases.map {
                        TestCasePutDTO(
                            it.id,
                            it.input,
                            it.expectedOutput,
                            it.comment,
                            it.score,
                            it.timeOutSeconds
                        )
                    }
                )
            )
            setState {
                isResultGet = true
            }
        }
    } else {
        val mainScope = MainScope()
        mainScope.launch {
            Fetcher.createProblemCreateFetcher().fetch(
                "POST",
                ProblemPostDTO(
                    state.problemFormData.title,
                    state.problemFormData.description,
                    state.problemFormData.testCases.map {
                        TestCasePostDTO(
                            it.input,
                            it.expectedOutput,
                            it.comment,
                            it.score,
                            it.timeOutSeconds
                        )
                    }
                )
            )
            setState {
                isResultGet = true
            }
        }
    }
}
表單實作完後,接著就是在題目總列表中加上新增與編輯的按鈕。為了要能夠辨識現在的用戶是否有權限可以進行新增與編輯,你可以用兩種方式來進行判斷:一種是利用 Redux 中的使用者登入狀態來進行判斷,另外一種則是趁得到總列表表單的時候,順便獲得是否具有能夠編輯的權限資訊。這裡我就試著修改資料管理系統去回傳是否可以編輯的資訊吧!
首先是在資料管理系統 GET /problems 的地方,根據 Session 的內容值去回傳一個 isEditable 的資訊去告知網頁專案是否此使用者具有可編輯的權限,如下所示:
call.respond(
    mapOf(
        "data" to problems,
        "isEditable" to ((userIdAuthorityPrincipal?.authority?.toInt() ?: 0) > 1)
    )
)
有了這個值之後,在前端網頁專案的部分就先讓資料能夠獲取這個值的資訊,如下所示:
data class ProblemsData(
    val data: Array<ProblemData>,
    val isEditable: Boolean
)
接著就是在 ProblemsArticle 中,設置一個狀態值來記錄這件事情,並在抓取完資料後更新它。
external interface ProblemsArticleState: RState {
    var problemsData: List<ProblemData>
    var isEditable: Boolean
}

class ProblemsArticle: RComponent<RProps, ProblemsArticleState>() {
    override fun ProblemsArticleState.init() {
        problemsData = listOf()
        // 初始化
        isEditable = false

        val mainScope = MainScope()
        mainScope.launch {
            val remoteProblemData = Fetcher.createProblemsFetcher().fetch()
            setState {
                problemsData = remoteProblemData.data.toList()
                // 更新其值
                isEditable = remoteProblemData.isEditable
            }
        }
    }

    /* ...... 其餘的內容 ...... */
}
最後就是在內容中,增加「新增題目」與「編輯題目」的兩個按鈕,這裡我們也先將「刪除題目」的按鈕給加上去,如下所示:
override fun RBuilder.render() {
    mainArticle {
        div {
            attrs.classes = setOf("row")
            h1 {
                attrs.classes = setOf("col")
                +"題目列表"
            }

            // 「新增題目」的按鈕
            if (state.isEditable) {
                div {
                    attrs.classes = setOf("col-md-2")

                    routeLink("/problems/new", className = "btn btn-primary") {
                        +"新增題目"
                    }
                }
            }
        }

        table {
            attrs.classes = setOf("table", "table-bordered", "table-striped")

            thead {
                attrs.classes = setOf("thead-dark")

                tr {
                    th { +"編號" }
                    th { +"標題" }

                    // 「編輯題目」與「刪除題目」按鈕的欄位
                    if (state.isEditable) {
                        th { +"操作" }
                    }
                }
            }
            tbody {
                for (item in state.problemsData) {
                    tr {
                        if (item.isAccepted == "true") {
                            attrs.classes = setOf("table-success")
                        } else if (item.isSubmitted == "true") {
                            attrs.classes = setOf("table-danger")
                        }

                        td { +item.id }
                        td {
                            routeLink("/problems/${item.id}") {
                                +item.title
                            }
                        }

                        // 「編輯題目」與「刪除題目」按鈕的欄位
                        if (state.isEditable) {
                            td {
                                routeLink("/problems/${item.id}/edit", className = "btn btn-primary") {
                                    +"編輯"
                                }

                                routeLink("/problems/${item.id}/delete", className = "btn btn-danger") {
                                    +"刪除"
                                }
                            }
                        }
                    }
                }
            }
        }
    }
}
我們讓「新增按鈕」會路由到 /problems/new,「編輯按鈕」會路由到 problems/:id/edit,「刪除按鈕」會路由到 problems/:id/delete。關於「新增題目」和「編輯題目」的路由設定部分如下所示:
route("/problems", exact = true) { problemsArticle {  } }
route("/problems/new", exact = true) { problemForm { } }
route<IdProps>("/problems/:id", exact = true) { problemDetailArticle {
    attrs.problemId = it.match.params.id
}}
route<IdProps>("/problems/:id/edit") {
    problemForm {
        attrs.problemId = it.match.params.id
    }
}
要注意一下這個順序,如果將 /problems/:id 放在 /problems/new 前面的話,你的 new 就會被 :id 吃成參數,就會輸出錯誤的內容,所以要記得將 /problems/new 放在 /problems/:id 路由的前面。
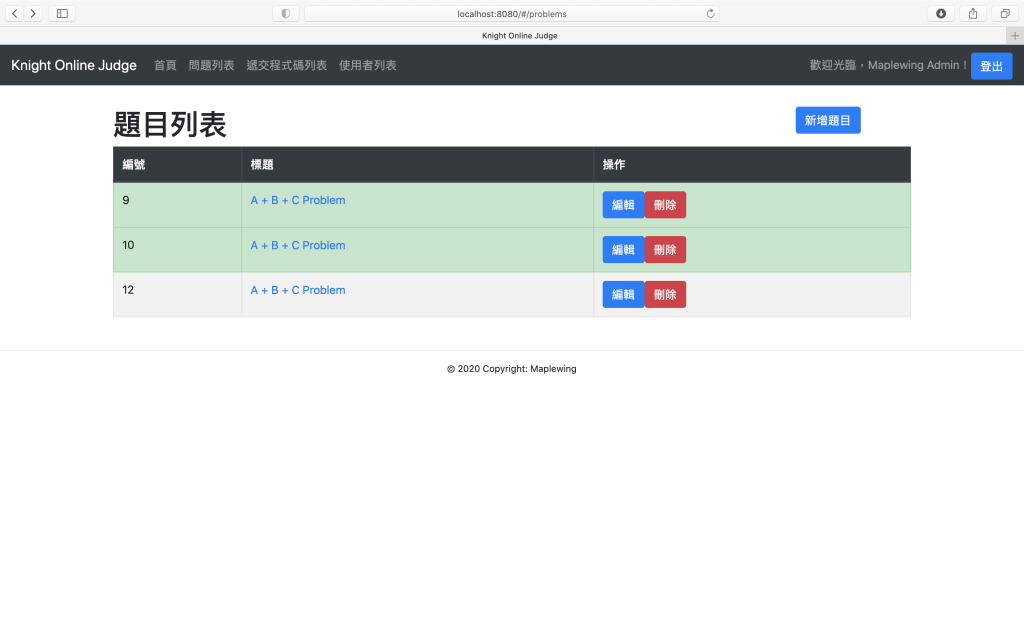
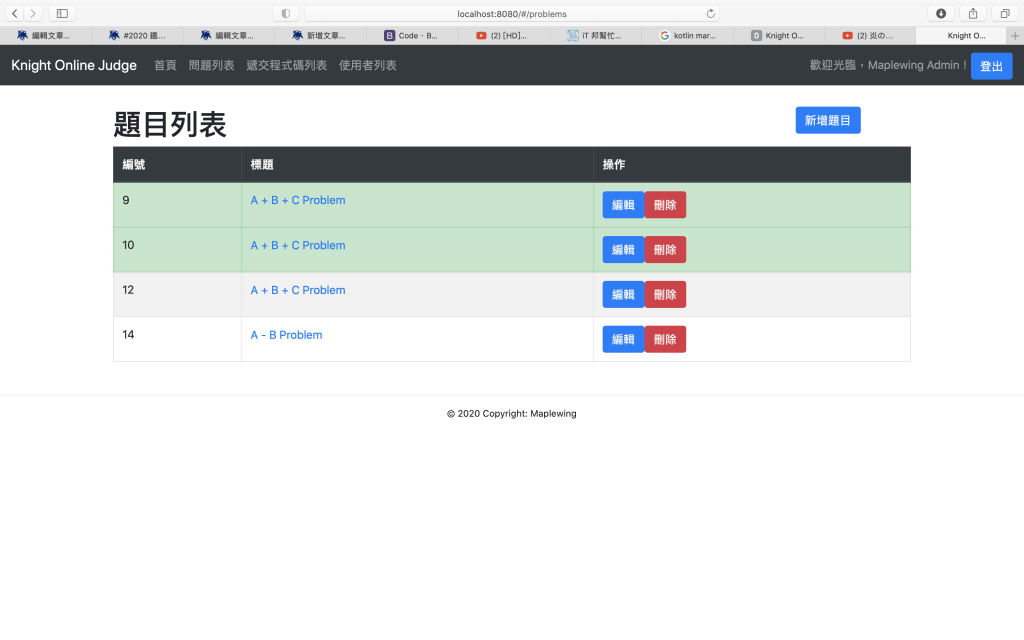
那接著就可以嘗試執行看看了!首先先進入題目總列表的地方,登入我們之前測試用的高級使用者,應該就會看到剛剛加的這些按鈕,如下圖所示:
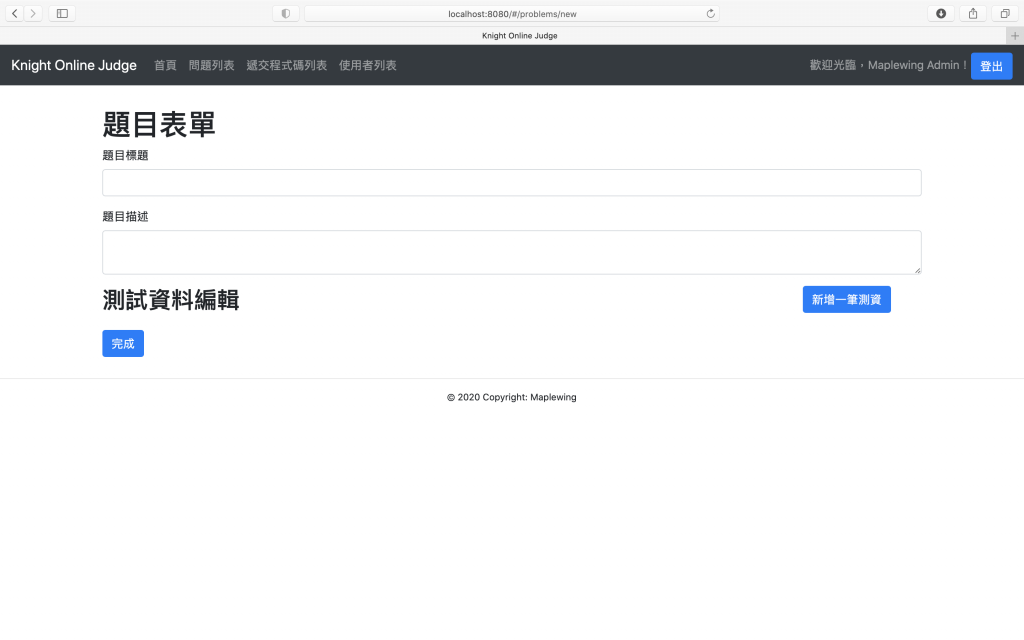
點選「新增題目」後,可以看到一個全空的題目表單頁面,如下圖所示:
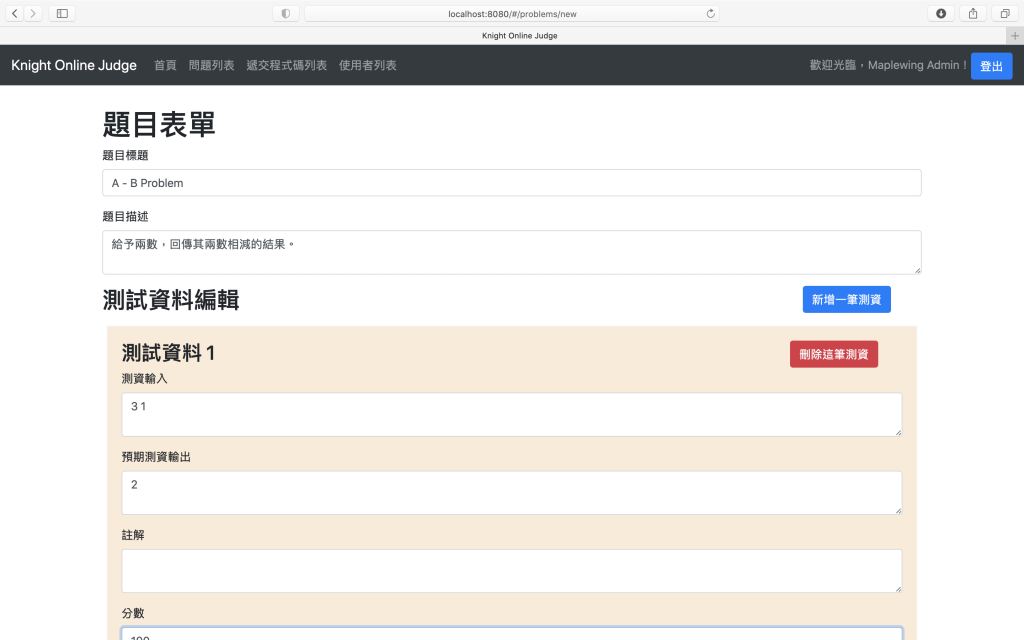
可以嘗試輸入一份題目的資料,如下圖所示:
按下完成後,應該就可以在總列表中看到該題目出現了。
那接著可以嘗試按下「編輯」按鈕,應該就可以看到剛剛新增的資料直接被填在表格上,可以嘗試編輯完後再存入一次,這次應該就會直接跳到題目內文,看看剛剛修改的內容是否有呈現在上面了。
在剛才處理「新增題目」與「編輯題目」的功能時,我們已經先將「刪除題目」的按鈕做好了,所以現在只要來做刪除題目的 component 即可,底下是 ProblemDeleteComponent 的內容:
import kotlinx.coroutines.*
import kotlinx.html.classes
import react.*
import react.dom.*
import react.redux.rConnect
import react.router.dom.redirect
import react.router.dom.routeLink
import redux.RAction
import redux.WrapperAction

external interface ProblemDeleteComponentProps: RProps {
    var problemId: Int
}

external interface ProblemDeleteComponentState: RState {
    var isDelete: Boolean
    var onDelete: (Int) -> Unit
}

class ProblemDeleteComponent: RComponent<ProblemDeleteComponentProps, ProblemDeleteComponentState>() {
    override fun ProblemDeleteComponentState.init() {
        isDelete = false;

        onDelete = {
            val mainScope = MainScope()
            mainScope.launch {
                Fetcher.createProblemDeleteFetcher(it).fetch("DELETE")
                setState {
                    isDelete = true
                }
            }
        }
    }

    override fun RBuilder.render() {
        if (!state.isDelete) {
            state.onDelete(props.problemId)
        } else {
            redirect(to = "/problems")
        }
    }
}

fun RBuilder.problemDeleteComponent(handler: RElementBuilder<ProblemDeleteComponentProps>.() -> Unit): ReactElement =
    child(ProblemDeleteComponent::class, handler)
基本上與登出的部分相同,看到尚未開始進行刪除的動作就執行刪除用的 state.onDelete() 函式,做完後就會回到總題目列表的頁面。接著在 App 的路由處,讓 /problems/:id/delete 會導向到這個 component 去吧!
route<IdProps>("/problems/:id/delete") {
    problemDeleteComponent {
        attrs.problemId = it.match.params.id
    }
}
做完後就可以嘗試按按看總列表的「刪除」按鈕,你會發現它按下去之後就直接將題目刪掉了,感覺有點可怕。我們可以將原本「刪除按鈕」的部分,改成與之前「刪除測資」的按鈕一樣,利用 window.confirm() 函式做一個防呆的效果,如下程式碼所示:
external interface ProblemsArticleState: RState {
    /* ...... 其餘的資料 ...... */

    // 增加要導向刪除的題目編號
    var redirectToProblemId: Int?
}

class ProblemsArticle: RComponent<RProps, ProblemsArticleState>() {
    override fun ProblemsArticleState.init() {
        // 先設定為 null
        redirectToProblemId = null

        /* ...... 其餘的程式碼 ...... */
    }

    override fun RBuilder.render() {
        mainArticle {
            // 如果有要刪除題目的話,導向到刪除題目的路由
            if (state.redirectToProblemId != null) {
                redirect(to = "problems/${state.redirectToProblemId}/delete")
            } else {
                /* ...... 其餘的程式碼 ...... */

                // 從 routeLink 換成 button
                button {
                    attrs.type = ButtonType.button
                    attrs.classes = setOf("btn", "btn-danger")
                    // 做防呆確認
                    attrs.onClickFunction = {
                        if (window.confirm("確定要刪除這筆題目嗎?")) {
                            setState {
                                redirectToProblemId = item.id.toInt()
                            }
                        }
                    }

                    +"刪除"
                }
            }
        }
    }
}
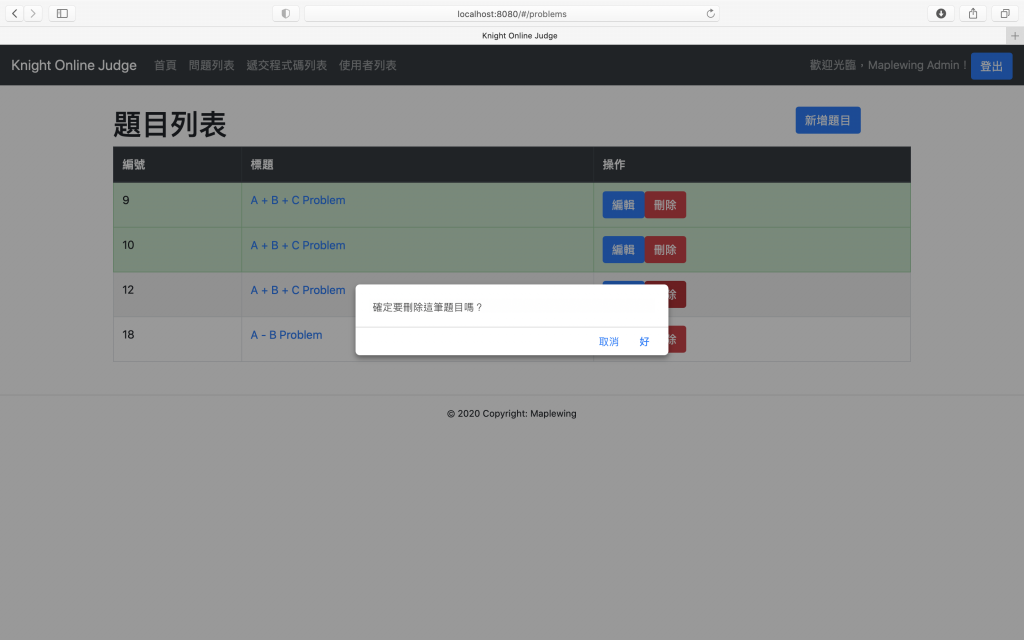
完成後,在刪除題目的時候就會跳出防呆提示了:
剩下的會員資料與遞交程式碼資料的部分,在目前的情況來說,可以只做新增的部分即可,能夠編輯會員、刪除會員、編輯遞交的程式碼或是刪除遞交的程式碼在目前的系統設計中比較沒什麼用,當然如果要讓會員可以修改密碼或是要讓超級管理員可以修改某個會員的權限的話,當然可以在編輯會員的部分進行處理,但這裡我們就先不管這些情況,就先來製作能夠註冊會員的功能吧!先建立能夠註冊會員用的 Fetcher 以及承裝資料的類別,如下程式碼所示:
fun createUserRegisterFetcher() = Fetcher<JustFetch>("$DATA_URL/users")

data class UserPostDTO (
    val username: String,
    val password: String,
    val name: String,
    val email: String
)
接著建立表單的 componet UserRegisterForm,如下所示:
import kotlinx.browser.window
import kotlinx.coroutines.MainScope
import kotlinx.coroutines.launch
import kotlinx.css.*
import kotlinx.html.*
import kotlinx.html.js.onChangeFunction
import kotlinx.html.js.onClickFunction
import kotlinx.html.js.onSubmitFunction
import org.w3c.dom.HTMLInputElement
import org.w3c.dom.HTMLTextAreaElement
import react.*
import react.dom.*
import react.router.dom.redirect
import styled.css
import styled.styledDiv

external interface UserRegisterFormState: RState {
    var userPostDTO: UserPostDTO
    var isSubmitted: Boolean
    var isResultGet: Boolean
}

class UserRegisterForm: RComponent<RProps, UserRegisterFormState>() {
    override fun UserRegisterFormState.init() {
        isSubmitted = false
        isResultGet = false
        userPostDTO = UserPostDTO(
            "",
            "",
            "",
            ""
        )
    }

    override fun RBuilder.render() {
        styledDiv {
            css {
                width = LinearDimension("80%")
                margin = "30px auto"
            }

            if (state.isResultGet) {
                redirect(to = "/")
            } else {
                h1 { +"註冊會員" }

                form {
                    attrs.onSubmitFunction = onSubmitFunction@{
                        it.preventDefault()
                        if (state.isSubmitted) return@onSubmitFunction

                        val mainScope = MainScope()
                        mainScope.launch {
                            Fetcher.createUserRegisterFetcher().fetch(
                                "POST",
                                state.userPostDTO
                            )
                            setState {
                                isResultGet = true
                            }
                        }
                    }

                    formInputComponent {
                        attrs.inputType = InputType.text
                        attrs.id = "usernameInput"
                        attrs.name = "帳號"
                        attrs.currentValue = state.userPostDTO.username
                        attrs.onChange = {
                            val target = it.target as HTMLInputElement
                            setState {
                                userPostDTO.username = target.value
                            }
                        }
                    }

                    formInputComponent {
                        attrs.inputType = InputType.password
                        attrs.id = "passwordInput"
                        attrs.name = "密碼"
                        attrs.currentValue = state.userPostDTO.password
                        attrs.onChange = {
                            val target = it.target as HTMLInputElement
                            setState {
                                userPostDTO.password = target.value
                            }
                        }
                    }

                    formInputComponent {
                        attrs.inputType = InputType.text
                        attrs.id = "nameInput"
                        attrs.name = "顯示名稱"
                        attrs.currentValue = state.userPostDTO.name
                        attrs.onChange = {
                            val target = it.target as HTMLInputElement
                            setState {
                                userPostDTO.name = target.value
                            }
                        }
                    }

                    formInputComponent {
                        attrs.inputType = InputType.text
                        attrs.id = "emailInput"
                        attrs.name = "電子郵件信箱"
                        attrs.currentValue = state.userPostDTO.email
                        attrs.onChange = {
                            val target = it.target as HTMLInputElement
                            setState {
                                userPostDTO.email = target.value
                            }
                        }
                    }

                    button {
                        attrs.type = ButtonType.submit
                        attrs.classes = setOf("btn", "btn-primary")

                        +"註冊"
                    }
                }
            }
        }
    }
}

fun RBuilder.userRegisterForm(handler: RElementBuilder<RProps>.() -> Unit): ReactElement =
    child(UserRegisterForm::class, handler)
依照其需要的資料,我們可以在表單中建立四個輸入欄位,分別是帳號、密碼、顯示名稱和電子郵件信箱,並讓註冊後可以利用 Fetcher 將資料傳上資料管理系統。
最後,就是在 LoginStatus 中,當使用者未登入的時候,增加一個進入註冊表單的按鈕,並在 App 裡面將路由掛上去,如下所示:
// LoginStatus.kt
routeLink("/register", className = "btn btn-primary") {
    +"註冊"
}

// App.kt
route("/register") { userRegisterForm { } }
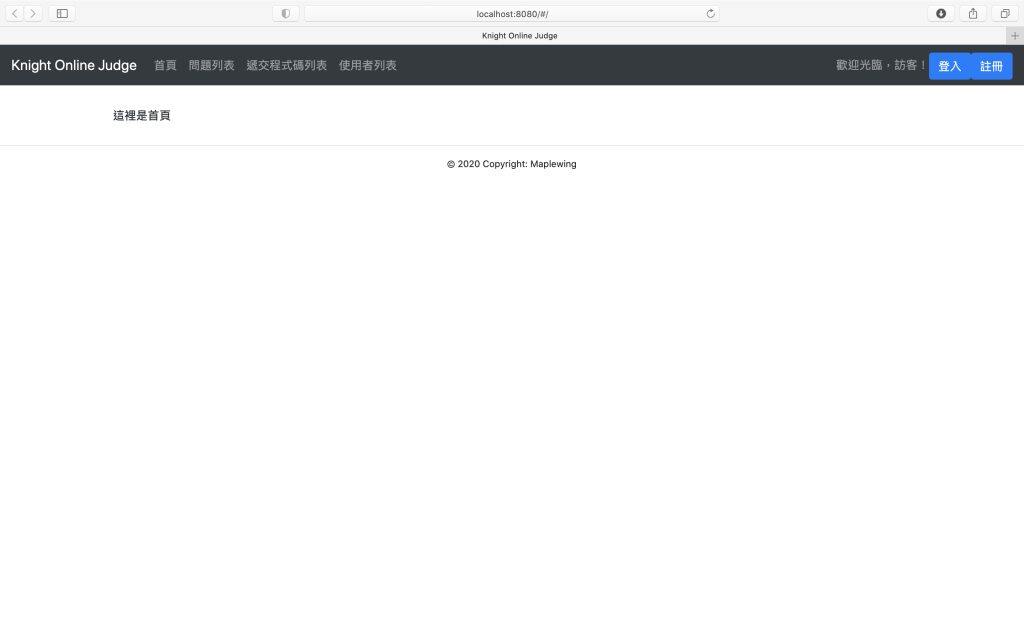
實作完後就可以嘗試執行看看,登出原本的帳號後,就可以看到「註冊」按鈕在上面了。
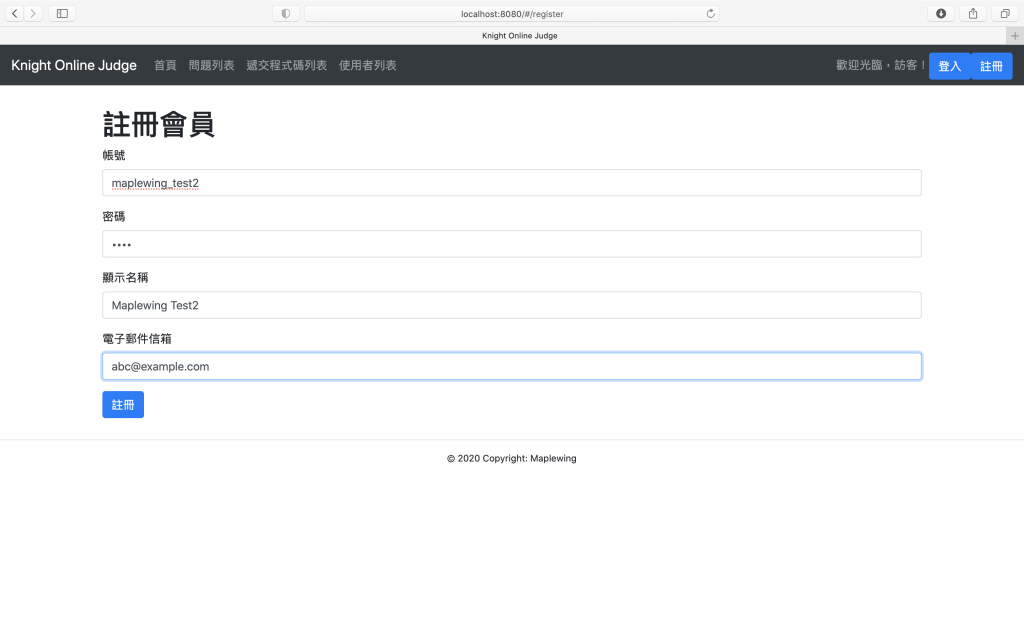
接著點進「註冊」按鈕,就會看到會員註冊的表單,可以試著註冊一個新會員試試看。
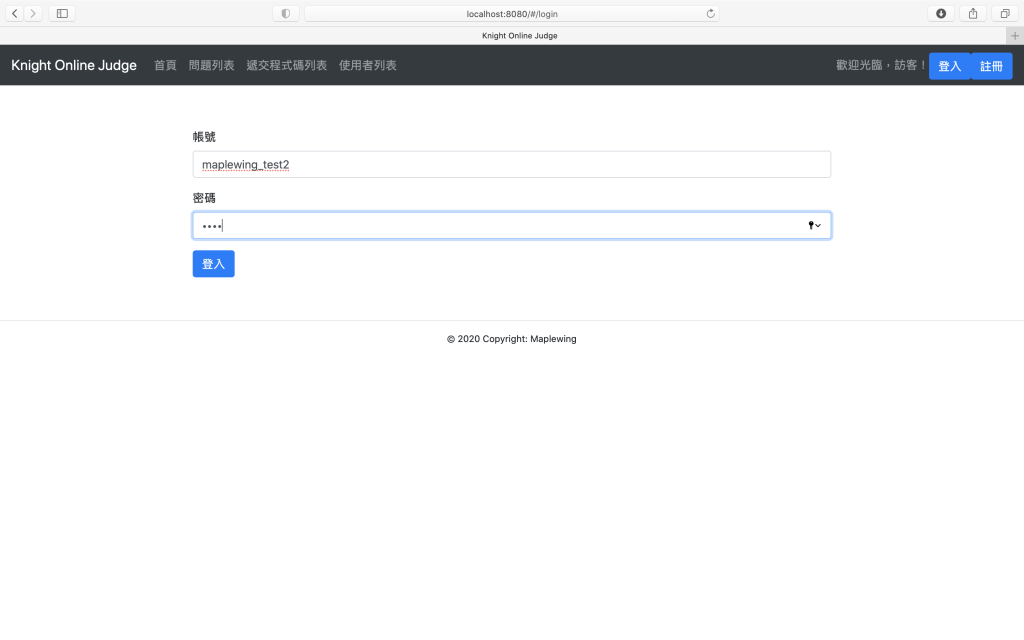
註冊完後會回到首頁,接著試著登入看看。
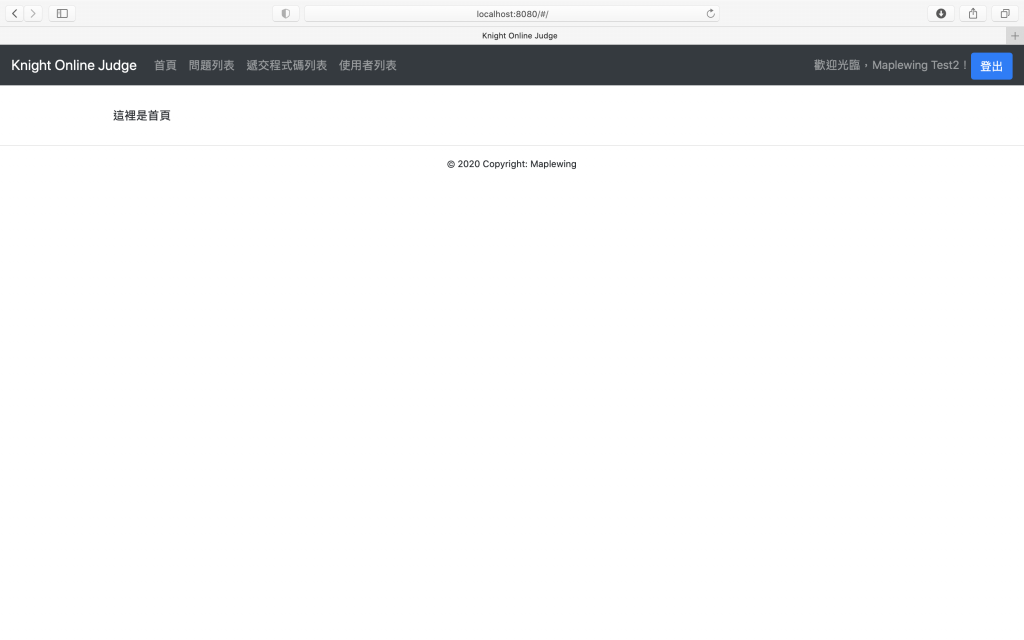
最後就會看到登入成功的結果了。
在使用表單製作的功能中,最後一個就是來做上傳程式碼的表單部分了。與之前的步驟相同,先將 Fetcher 與承裝資料的類型給設計出來,如下所示:
fun createSubmitCodeFetcher() = Fetcher<JustFetch>("$DATA_URL/submissions")

data class SubmissionPostDTO(
    var language: String,
    var code: String,
    var problemId: Int
)
接下來就是實作能填寫程式碼的表單元件 SubmissionForm,如下所示:
import kotlinx.browser.window
import kotlinx.coroutines.MainScope
import kotlinx.coroutines.launch
import kotlinx.css.*
import kotlinx.html.*
import kotlinx.html.js.onChangeFunction
import kotlinx.html.js.onClickFunction
import kotlinx.html.js.onSubmitFunction
import org.w3c.dom.HTMLInputElement
import org.w3c.dom.HTMLSelectElement
import org.w3c.dom.HTMLTextAreaElement
import react.*
import react.dom.*
import react.router.dom.redirect
import styled.css
import styled.styledDiv

external interface SubmissionFormProps: RProps {
    var problemId: Int
}

external interface SubmissionFormState: RState {
    var submissionPostDTO: SubmissionPostDTO
    var isSubmitted: Boolean
    var isResultGet: Boolean
}

class SubmissionForm: RComponent<SubmissionFormProps, SubmissionFormState>() {
    override fun SubmissionFormState.init() {
        isSubmitted = false
        isResultGet = false
        submissionPostDTO = SubmissionPostDTO(
            "kotlin",
            "",
            -1 // 會在送出時填入
        )
    }

    override fun RBuilder.render() {
        styledDiv {
            css {
                width = LinearDimension("80%")
                margin = "30px auto"
            }

            if (state.isResultGet) {
                redirect(to = "/submissions")
            } else {
                h2 { +"上傳程式碼" }

                form {
                    attrs.onSubmitFunction = onSubmitFunction@{
                        it.preventDefault()
                        if (state.isSubmitted) return@onSubmitFunction

                        val mainScope = MainScope()
                        mainScope.launch {
                            Fetcher.createSubmitCodeFetcher().fetch(
                                "POST",
                                state.submissionPostDTO.apply {
                                    problemId = props.problemId
                                }
                            )
                            setState {
                                isResultGet = true
                            }
                        }
                    }

                    div {
                        attrs.classes = setOf("form-group")

                        label {
                            attrs.htmlFor = "languageInput"
                            +"使用的程式語言"
                        }

                        select {
                            attrs.classes = setOf("form-control")
                            attrs.id = "languageInput"
                            attrs.value = state.submissionPostDTO.language
                            attrs.onChangeFunction = {
                                val target = it.target as HTMLSelectElement
                                setState {
                                    submissionPostDTO.language = target.value
                                }
                            }

                            option {
                                attrs.value = "kotlin"
                                +"Kotlin"
                            }

                            option {
                                attrs.value = "c"
                                +"C"
                            }

                            option {
                                attrs.value = "java"
                                +"Java"
                            }

                            option {
                                attrs.value = "python"
                                +"Python"
                            }
                        }
                    }

                    formTextAreaComponent {
                        attrs.id = "codeInput"
                        attrs.name = "程式碼"
                        attrs.currentValue = state.submissionPostDTO.code
                        attrs.onChange = {
                            val target = it.target as HTMLTextAreaElement
                            setState {
                                submissionPostDTO.code = target.value
                            }
                        }
                    }

                    button {
                        attrs.type = ButtonType.submit
                        attrs.classes = setOf("btn", "btn-primary")

                        +"遞交程式碼"
                    }
                }
            }
        }
    }
}

fun RBuilder.submissionForm(handler: RElementBuilder<SubmissionFormProps>.() -> Unit): ReactElement =
    child(SubmissionForm::class, handler)
這個表單中有幾處是與之前表單不同的地方,主要是選擇「使用程式語言」的部分從輸入框變成利用 <select> 與 <option> 建立一個下拉式選單以避免使用者填錯資料,以及傳入要解哪一題的 SubmissionFormProps.problemId 會在要傳送的時候再利用 apply() 這個函式附加進資料內。其餘的部分都和之前差不多。
建立了上傳程式碼的表單後,就可以在題目詳細資料頁面 ProblemDetailArticle 的下方加上這個表單,以方便使用者去遞交程式碼了。
h1 {
    +"${problemDetailData.id}. ${problemDetailData.title}"
}

pre {
    +problemDetailData.description
}

// 增加此行
submissionForm { attrs.problemId = props.problemId }
實作完後,就讓我們測試看看吧!首先先進題目的詳細頁面,就會看到遞交程式碼的表單在下方出現,如下圖所示:
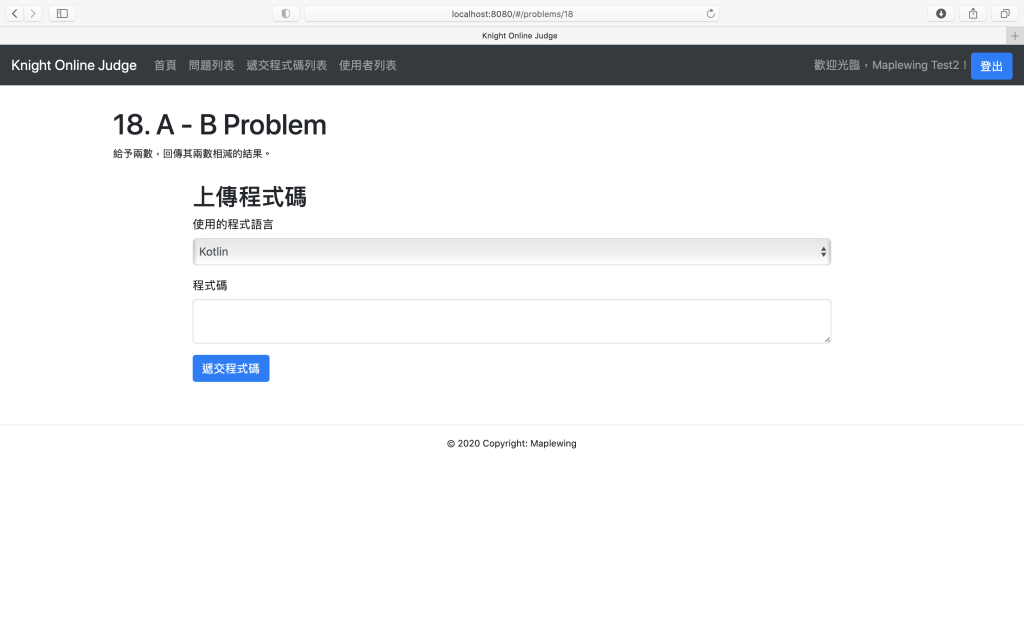
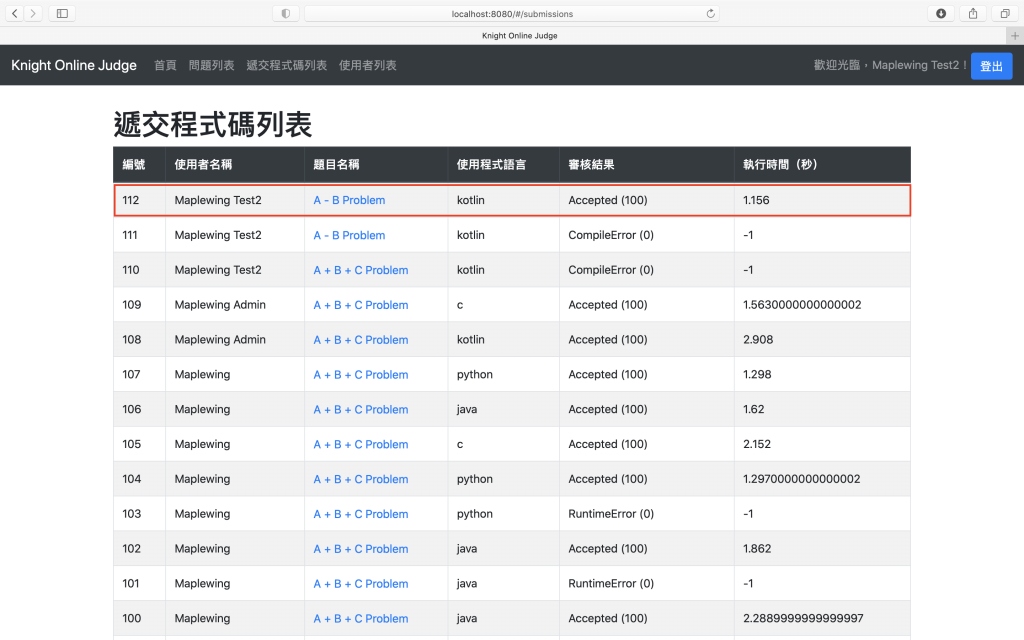
試著解題試試看,接著送出你的程式碼後,就會進入遞交程式碼列表的頁面。
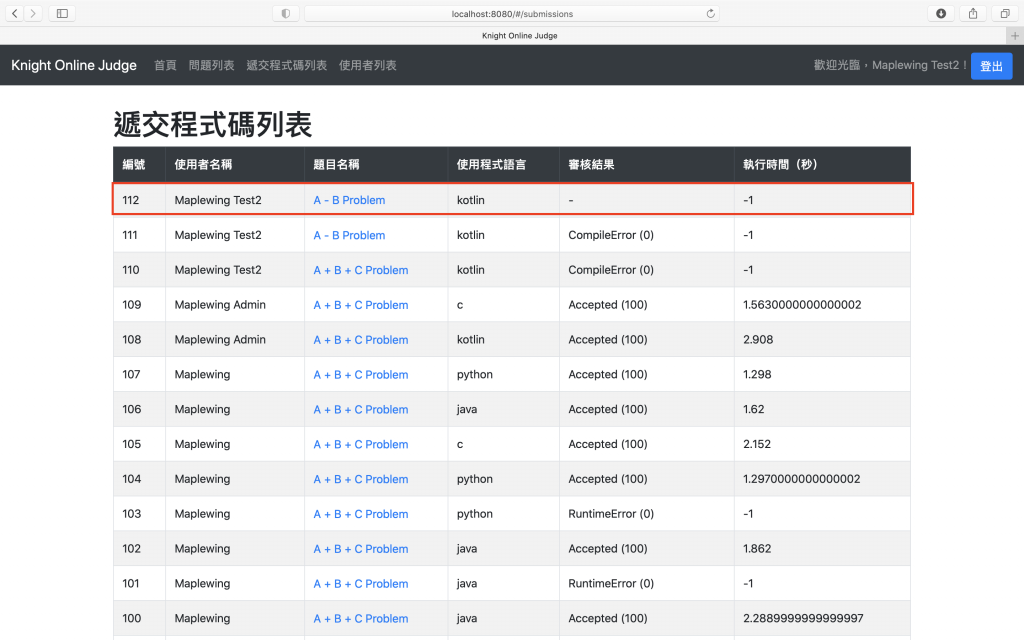
如果你的審核程式與 Redis 資料庫是有開啟的話,隔個幾分鐘後再重整一下網頁,應該就可以看到結果了。
在今天總算可以說是將整套 Online Judge 系統給完成了!如果你也跟著一起完成到這裡的話,給自己一個掌聲,慰勞自己一下吧!明天我們會再重新審視網頁專案,將一些尚未實作的部分(例如:錯誤處理、重新審核程式碼......等等)給補足,今天就先到這邊吧!