首先設定我們的專案
使用Google 登入,照步驟設定我們的專案
使用Facebook 登入,照步驟設定我們的專案
打開我們之前完成Onboarding、Login、Sign Up 畫面的專案,現在我們試著用Bloc 完成它登入的功能 ( 之後會用另一個狀態管理方式 Provider 完成登入功能,可以照之前專案再建一個Onboarding、Login、Sign Up 畫面的專案 給之後provider 使用 )
Creating packages,Using packages,使用packages 的目的是為了達到模組化,創建出可被複用和共享的程式碼,這和大多數程式語言中的模組、包的概念相同,創建出來的package 可以在pubspec.yaml中直接依賴
優點有:
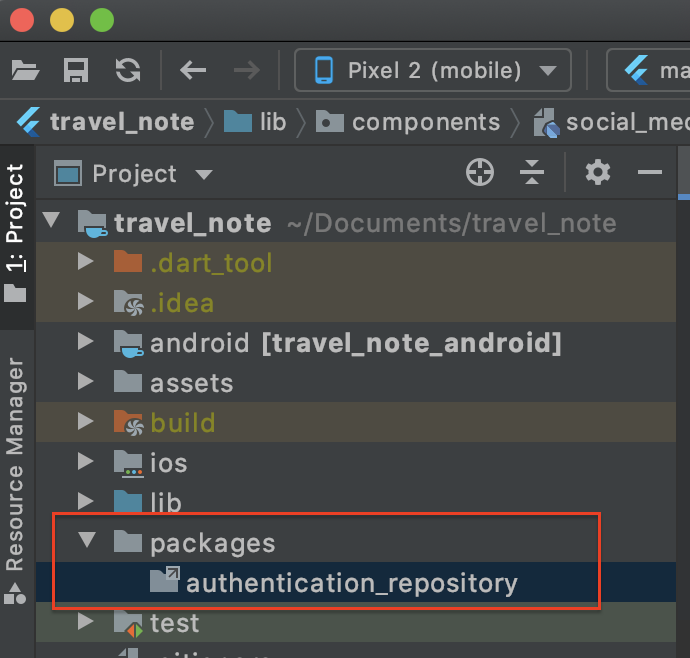
對專案新增資料夾 packages,並在資料夾內再新增 authentication_repository 資料夾
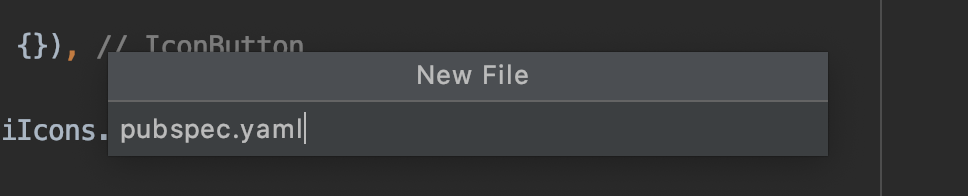
在 authentication_repository 資料夾新增pubspec.yaml

下載所需要的依賴,pubspec.yaml :
記得再pub get
name: authentication_repository
description: Dart package which manages the authentication domain.
version: 1.0.0

environment:
  sdk: ">=2.7.0 <3.0.0"

dependencies:
  flutter:
    sdk: flutter
  equatable: ^1.2.3
  firebase_auth: ^0.18.0+1
  firebase_core: ^0.5.0
  google_sign_in: ^4.5.4
  meta: ^1.1.8

dev_dependencies:
  flutter_test:
    sdk: flutter
  mockito: ^4.0.0
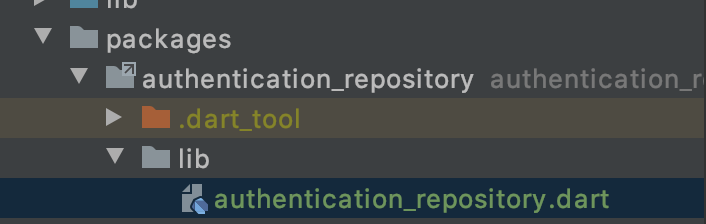
再建立 lib 資料夾並在其資料夾再新增 authentication_repository.dart,用來將authentication_repository package,提供給其他模組能透過它們的 pubspec.yaml 將authentication_repository package 添入依賴來引用
authentication_repository.dart:
library authentication_repository;
之後我們要在專案使用packages,需在專案的pubspec.yaml 添加依賴
pubspec.yaml:
name: travel_note
description: A new Flutter application.
version: 1.0.0+1

environment:
  sdk: ">=2.7.0 <3.0.0"

dependencies:
  flutter:
    sdk: flutter

  material_design_icons_flutter: ^4.0.5655
  cupertino_icons: ^1.0.0

  authentication_repository:
    path: packages/authentication_repository

dev_dependencies:
  flutter_test:
    sdk: flutter

flutter:
  uses-material-design: true
  assets:
    - assets/images/
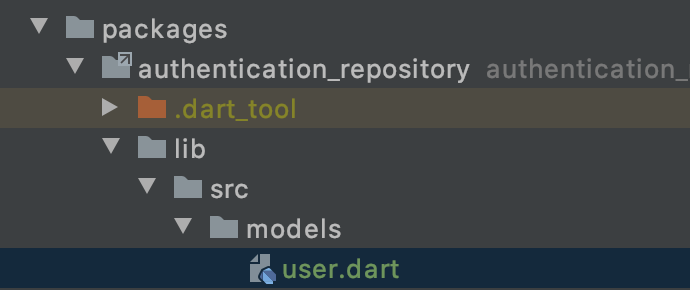
建立lib/src作為authentication_repository package 所提供使用的資源,建立之後要用到的Model 類:User,用來描述使用者的資訊,包含 email、 id、name、 與 photo
user.dart:
import 'package:equatable/equatable.dart';
import 'package:meta/meta.dart';

//為了 override == 運算子,為了能比較兩個物件是否相同
//繼承 Equatable (https://medium.com/flutter-community/dart-equatable-package-simplify-equality-comparisons-1a96a3fc4864)
class User extends Equatable {
  const User({
    @required this.email,
    @required this.id,
    @required this.name,
    @required this.photo,
  })  : assert(email != null),
        assert(id != null);

  final String email;

  final String id;

  final String name;

  // 使用者照片的 Url
  final String photo;

  // empty:代表未經認證的使用者
  static const empty = User(email: '', id: '', name: null, photo: null);

  @override
  List<Object> get props => [email, id, name, photo];
}
創建 models.dart,統一管理要用的model
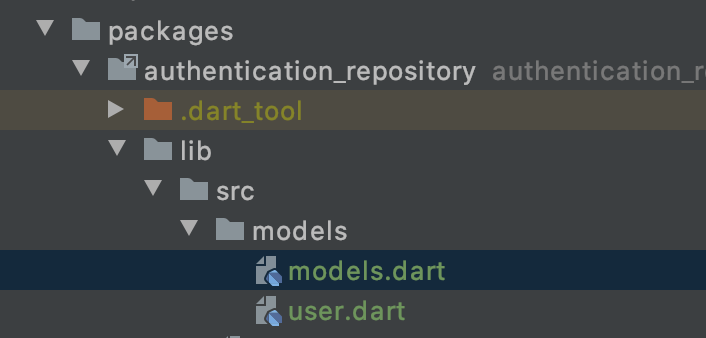
models.dart:
export 'user.dart';
並更新lib的authentication_repository.dart所提供的資源
library authentication_repository;

export 'src/models/models.dart';
接下來建立 Repository,負責處理如何驗證用戶以及如何取得用戶資料等等
在 lib/src (此package 所提供使用的資源) 建立authentication_repository.dart:
import 'dart:async';

import 'package:firebase_auth/firebase_auth.dart' as firebase_auth;
import 'package:flutter/material.dart';
import 'package:flutter_facebook_auth/flutter_facebook_auth.dart';
import 'package:google_sign_in/google_sign_in.dart';
import 'package:meta/meta.dart';

import 'models/models.dart';

class AuthenticationRepository {
  AuthenticationRepository({
    firebase_auth.FirebaseAuth firebaseAuth,
    GoogleSignIn googleSignIn,
    FacebookAuth facebookAuth,
  })  : _firebaseAuth = firebaseAuth ?? firebase_auth.FirebaseAuth.instance,
        _googleSignIn = googleSignIn ?? GoogleSignIn.standard(),
        _facebookAuth = facebookAuth ?? FacebookAuth.instance;

  final firebase_auth.FirebaseAuth _firebaseAuth;
  final GoogleSignIn _googleSignIn;
  final FacebookAuth _facebookAuth;

  // 當 firebase authentication state 改變時,會發送Stream<User>
  // 當使用者沒有被認證 (為null),改發送Stream<User.empty>
  Stream<User> get user {
    return _firebaseAuth.authStateChanges().map((firebaseUser) {
      return firebaseUser == null ? User.empty : firebaseUser.toUser;
    });
  }

  Future<void> signUp({
    @required String email,
    @required String password,
  }) async {
    assert(email != null && password != null);
    try {
      await _firebaseAuth.createUserWithEmailAndPassword(
        email: email,
        password: password,
      );
    } on Exception {
      throw SignUpFailure();
    }
  }

  Future<void> logInWithGoogle() async {
    try {
      final googleUser = await _googleSignIn.signIn();
      final googleAuth = await googleUser.authentication;
      final credential = firebase_auth.GoogleAuthProvider.credential(
        accessToken: googleAuth.accessToken,
        idToken: googleAuth.idToken,
      );
      await _firebaseAuth.signInWithCredential(credential);
    } on Exception {
      throw LogInWithGoogleFailure();
    }
  }

  Future<void> logInWithFacebook() async {
    try {
      final LoginResult loginResult = await _facebookAuth.login();
      final credential = firebase_auth.FacebookAuthProvider.credential(
          loginResult.accessToken.token);
      await _firebaseAuth.signInWithCredential(credential);
    } on Exception {
      throw LogInWithFacebookFailure();
    }
  }

  Future<void> logInWithEmailAndPassword({
    @required String email,
    @required String password,
  }) async {
    assert(email != null && password != null);
    try {
      await _firebaseAuth.signInWithEmailAndPassword(
        email: email,
        password: password,
      );
    } on Exception {
      throw LogInWithEmailAndPasswordFailure();
    }
  }

  Future<void> logInWithMobile({@required String mobile}) async {
    assert(mobile != null);
    try {
      _firebaseAuth.verifyPhoneNumber(
          phoneNumber: mobile,
          timeout: Duration(seconds: 60),
          verificationCompleted: null,
          verificationFailed: null,
          codeSent: null,
          codeAutoRetrievalTimeout: null);
    } on Exception {
      throw LogInWithMobileFailure();
    }
  }

  Future<void> resetPassword(String email) async {
    assert(email != null);
    try {
      _firebaseAuth.sendPasswordResetEmail(email: email);
    } on Exception {
      throw ResetPasswordFailure();
    }
  }

  Future<void> logOut() async {
    try {
      await Future.wait([
        _firebaseAuth.signOut(),
        _googleSignIn.signOut(),
        _facebookAuth.logOut(),
      ]);
    } on Exception {
      throw LogOutFailure();
    }
  }
}

// 當註冊失敗時,所要拋出的異常
class SignUpFailure implements Exception {}

// 當登入失敗時,所要拋出的異常
class LogInWithEmailAndPasswordFailure implements Exception {}

// 當登入Google 失敗時,所要拋出的異常
class LogInWithGoogleFailure implements Exception {}

// 當登入Facebook 失敗時,所要拋出的異常
class LogInWithFacebookFailure implements Exception {}

// 當用電話登入失敗時,所要拋出的異常
class LogInWithMobileFailure implements Exception {}

// 當登出失敗時,所要拋出的異常
class LogOutFailure implements Exception {}

// 當重設密碼失敗時,所要拋出的異常
class ResetPasswordFailure implements Exception {}

// 新增一個 firebase_auth 的 Extension methods,建立我們的 User Model
extension on firebase_auth.User {
  User get toUser {
    return User(id: uid, email: email, name: displayName, photo: photoURL);
  }
}
並更新lib的authentication_repository.dart所提供的資源
library authentication_repository;

export 'src/authentication_repository.dart';
export 'src/models/models.dart';
接下來要創建我們的Bloc 了
我們在專案下的lib新增authentication資料夾,之後將在此實現身份驗證的功能,在lib/authentication新增我們bloc 的資源
之後可以在Android Studio → Preference → Plugin 安裝Bloc,可便利我們建立Bloc

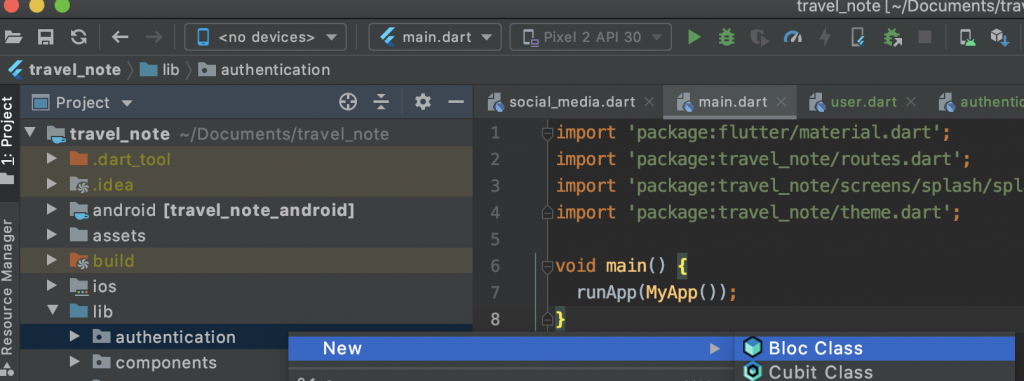
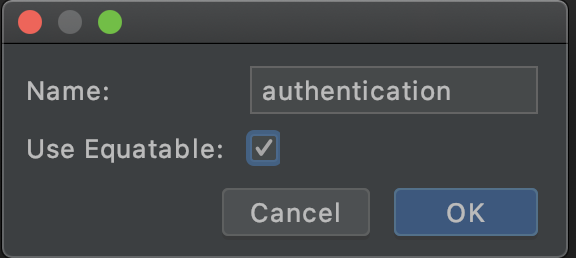
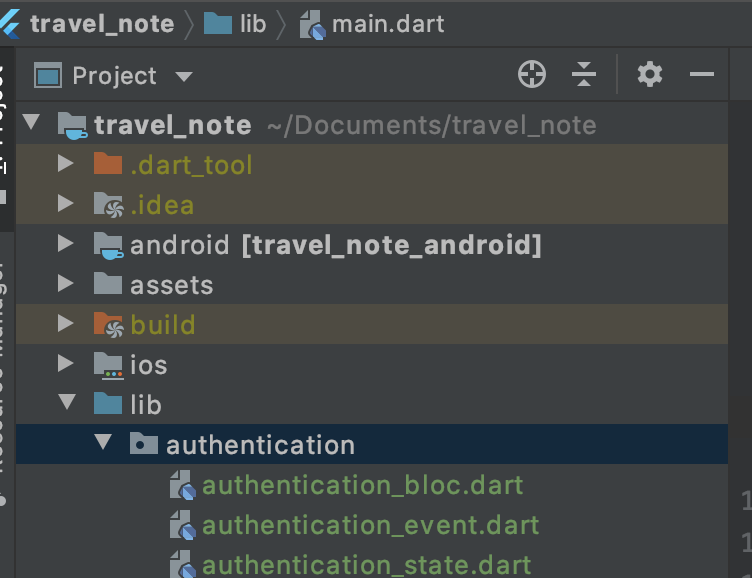
簡單操作就新增了我們的Bloc,接下來先從Event開始設計
我們主要把事件分為兩種:
part of 'authentication_bloc.dart';

abstract class AuthenticationEvent extends Equatable {
  const AuthenticationEvent();

  @override
  List<Object> get props => [];
}

class AuthenticationUserChanged extends AuthenticationEvent {
  const AuthenticationUserChanged(this.user);

  final User user;

  @override
  List<Object> get props => [user];
}

class AuthenticationLogoutRequested extends AuthenticationEvent {}
接下來狀態分為unknown、unauthenticated、authenticated:
part of 'authentication_bloc.dart';

enum AuthenticationStatus { authenticated, unauthenticated, unknown }

class AuthenticationState extends Equatable {
  const AuthenticationState._({
    this.status = AuthenticationStatus.unknown,
    this.user = User.empty,
  });

  const AuthenticationState.unknown()
      : this._(status: AuthenticationStatus.unknown);

  const AuthenticationState.authenticated(User user)
      : this._(status: AuthenticationStatus.authenticated, user: user);

  const AuthenticationState.unauthenticated()
      : this._(status: AuthenticationStatus.unauthenticated);

  final AuthenticationStatus status;
  final User user;

  @override
  List<Object> get props => [status, user];
}
最後 authentication_bloc.dart
import 'dart:async';

import 'package:authentication_repository/authentication_repository.dart';
import 'package:bloc/bloc.dart';
import 'package:equatable/equatable.dart';
import 'package:meta/meta.dart';
import 'package:pedantic/pedantic.dart';

part 'authentication_event.dart';
part 'authentication_state.dart';

class AuthenticationBloc
    extends Bloc<AuthenticationEvent, AuthenticationState> {
  AuthenticationBloc({
    @required AuthenticationRepository authenticationRepository,
  })  : assert(authenticationRepository != null),
        _authenticationRepository = authenticationRepository,
        super(const AuthenticationState.unknown()) {
    _userSubscription = _authenticationRepository.user.listen(
      (user) => add(AuthenticationUserChanged(user)),
    );
  }

  final AuthenticationRepository _authenticationRepository;
  StreamSubscription<User> _userSubscription;

  @override
  Stream<AuthenticationState> mapEventToState(
    AuthenticationEvent event,
  ) async* {
    if (event is AuthenticationUserChanged) {
      yield _mapAuthenticationUserChangedToState(event);
    } else if (event is AuthenticationLogoutRequested) {
      unawaited(_authenticationRepository.logOut());
    }
  }

  @override
  Future<void> close() {
    _userSubscription?.cancel();
    return super.close();
  }

  AuthenticationState _mapAuthenticationUserChangedToState(
    AuthenticationUserChanged event,
  ) {
    return event.user != User.empty
        ? AuthenticationState.authenticated(event.user)
        : const AuthenticationState.unauthenticated();
  }
}
接下來我們需要修改我們的 UI,加入我們的登入功能


 iThome鐵人賽