這篇是延續上一篇設計好的Bottom Navigation畫面繼續的教學哦
1.主要是讓它多了FrameLayout 用來放置切換的畫面
<?xml version="1.0" encoding="utf-8"?>
<androidx.constraintlayout.widget.ConstraintLayout xmlns:android="http://schemas.android.com/apk/res/android"
    xmlns:app="http://schemas.android.com/apk/res-auto"
    xmlns:tools="http://schemas.android.com/tools"
    android:layout_width="match_parent"
    android:layout_height="match_parent">
    <FrameLayout
        android:id="@+id/frameLayout"
        android:layout_width="match_parent"
        android:layout_height="match_parent"
        android:orientation="horizontal"
        app:layout_constraintBottom_toBottomOf="parent"
        app:layout_constraintEnd_toEndOf="parent"
        app:layout_constraintHorizontal_bias="1.0"
        app:layout_constraintStart_toStartOf="parent"
        app:layout_constraintTop_toTopOf="parent"
        app:layout_constraintVertical_bias="0.0"
        tools:ignore="MissingConstraints" />
    <com.google.android.material.bottomnavigation.BottomNavigationView
        android:id="@+id/navigation"
        android:layout_width="match_parent"
        android:layout_height="wrap_content"
        android:background="#ffffff"
        app:labelVisibilityMode="labeled"
        app:layout_constraintBottom_toBottomOf="parent"
        app:layout_constraintEnd_toEndOf="parent"
        app:layout_constraintStart_toStartOf="parent"
        app:menu="@menu/menu"/>
</androidx.constraintlayout.widget.ConstraintLayout>
到目前為止它的布局會長這個樣子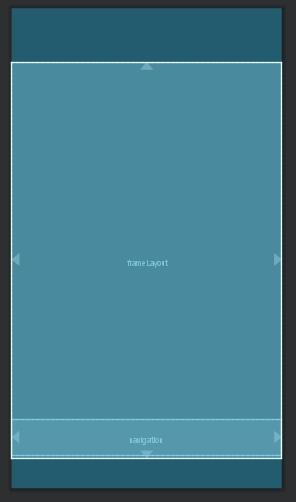
2.因為我設置三個可以切換的畫面所以除了目前的這一頁用來寫切換的class(Main)以外要在新增三個java檔,我是拿之前已經寫好的Activity來改寫Fragment給底部導覽做切換(如何改寫有發一篇哦),總共會有四個java檔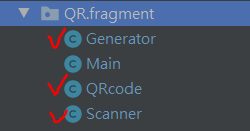
3.回到這個畫面(Main.class)相對應的java檔部分,來寫它的切換功能囉
public class Main extends AppCompatActivity {

    private BottomNavigationView.OnNavigationItemSelectedListener mOnNavigationItemSelectedListener
            = new BottomNavigationView.OnNavigationItemSelectedListener() {

        @Override
        public boolean onNavigationItemSelected(@NonNull MenuItem item) {
            switch (item.getItemId()) {
                case R.id.scanner:  //我上一篇的menu裡面設的id
                    getSupportFragmentManager().beginTransaction().replace(R.id.frameLayout,new Scanner()).commit();  //切換fragment
                    return true;
                case R.id.produce:
                    getSupportFragmentManager().beginTransaction().replace(R.id.frameLayout,new Generator()).commit();
                    return true;
                case R.id.open:
                    getSupportFragmentManager().beginTransaction().replace(R.id.frameLayout,new QRcode()).commit();
                    return true;
            }
            return false;
        }
    };

        @Override
    protected void onCreate(Bundle savedInstanceState) {
        super.onCreate(savedInstanceState);
        setContentView(R.layout.qrcode);

            setMain();

            BottomNavigationView navigation = findViewById(R.id.navigation);
            navigation.setOnNavigationItemSelectedListener(mOnNavigationItemSelectedListener);
        }


private void setMain() {  //這個副程式用來設置顯示剛進來的第一個主畫面

    this.getSupportFragmentManager().beginTransaction().add(R.id.frameLayout,new Scanner()).commit();
}

}
4.其他三個java檔要注意的是記得改成繼承fragment,改寫的方法有發一篇教學囉,我拿其中一頁的來當範例
public class QRcode extends Fragment {

    public View onCreateView(LayoutInflater inflater, @Nullable ViewGroup container, Bundle savedInstanceState) {
        View view=inflater.inflate(R.layout.showqr,container,false);

...
...
...

        return view;
    }
}
這些步驟都有成功的話就可以成功執行了


 iThome鐵人賽