今天要介紹的底部導覽是個很實用的功能
像我們日常使用的Line就用這種功能來選擇畫面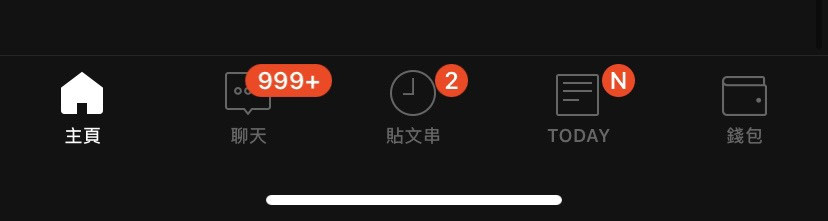
那就開始使用看看囉
1.首先到build.gradle(Module:app)新增一下模組~
implementation 'com.google.android.material:material:1.1.0-alpha10' //底部導覽模組
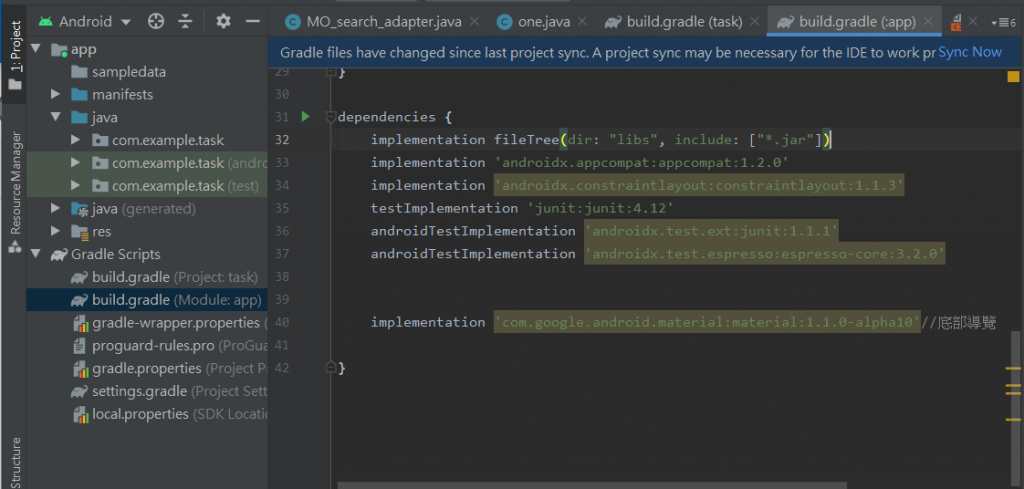
並且按下右上角的Sync Now (一定要按!)
2.新增一個menu資料夾並且在資料夾底下新增menu resource來創一個菜單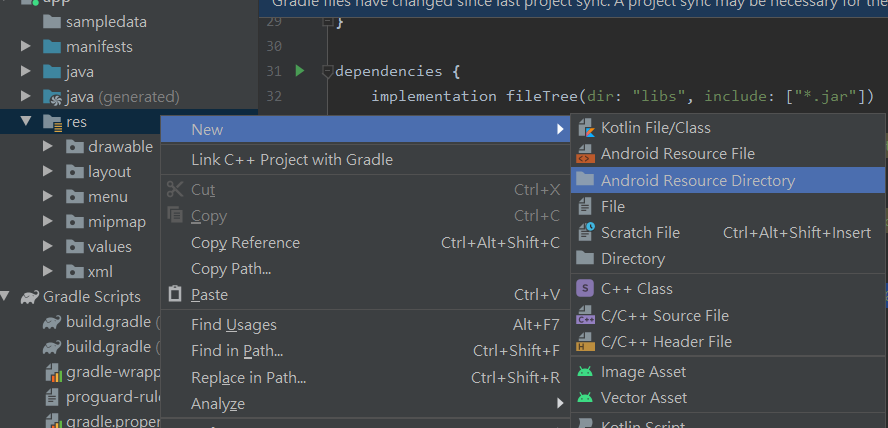

3.menu resource的xml檔的格式碼如下
<?xml version="1.0" encoding="utf-8"?>
<menu xmlns:android="http://schemas.android.com/apk/res/android">
    <item
        android:id="@+id/scanner"  //命名個ID
        android:title="掃描" />    //設置他選項的名字
    <item
        android:id="@+id/produce"
        android:title="產生器"/>
    <item
        android:id="@+id/open"
        android:title="開啟條碼"/>
</menu>
這樣就成功做好菜單囉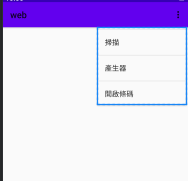
但當然這還不是我們要的底部導覽
4.回到你想用底部導覽的那個Layout
並且加入app:menu="@menu/menu"引用設計好的菜單
<?xml version="1.0" encoding="utf-8"?>
<androidx.constraintlayout.widget.ConstraintLayout
//我這一頁習慣用constraint layout
xmlns:android="http://schemas.android.com/apk/res/android"
    xmlns:app="http://schemas.android.com/apk/res-auto"
    xmlns:tools="http://schemas.android.com/tools"
    android:layout_width="match_parent"
    android:layout_height="match_parent">

    <com.google.android.material.bottomnavigation.BottomNavigationView
    //若剛剛模組有裝成功就可以使用囉
        android:id="@+id/navigation"
        android:layout_width="match_parent"
        android:layout_height="wrap_content"
        android:background="#ffffff"
        app:labelVisibilityMode="labeled"
        app:layout_constraintBottom_toBottomOf="parent"
        app:layout_constraintEnd_toEndOf="parent"
        app:layout_constraintStart_toStartOf="parent"
        app:menu="@menu/menu"/>
</androidx.constraintlayout.widget.ConstraintLayout>
我將它放在底部,成功後長這樣!
切換fragment的部分下一篇再發哦~~


 iThome鐵人賽