昨天,我們刻好了home頁面能引導使用者到登入或註冊
也簡單做了個註冊的頁面(昨天打錯成login,已作修正)。
其實登入頁面也差不多。login.php的內容:
<!DOCTYPE html>
<html>
    <head>
        <meta charset="utf-8">
        <title>Home</title>
    </head>
    <body>
        <form action="" method="post">
            <fieldset >
                <legend>登入帳密</legend>
                    <label>帳號:<input type="text" name="username" placeholder="帳號"><br></label>
                    <label>密碼:<input type="password" name="password" placeholder="密碼"><br></label>
            </fieldset>
            <button type="submit">送出</button>
        </form>
    </body>
</html>
現在我們到首頁測試重新導向的功能,打開http://localhost/ci/index.php/
點選註冊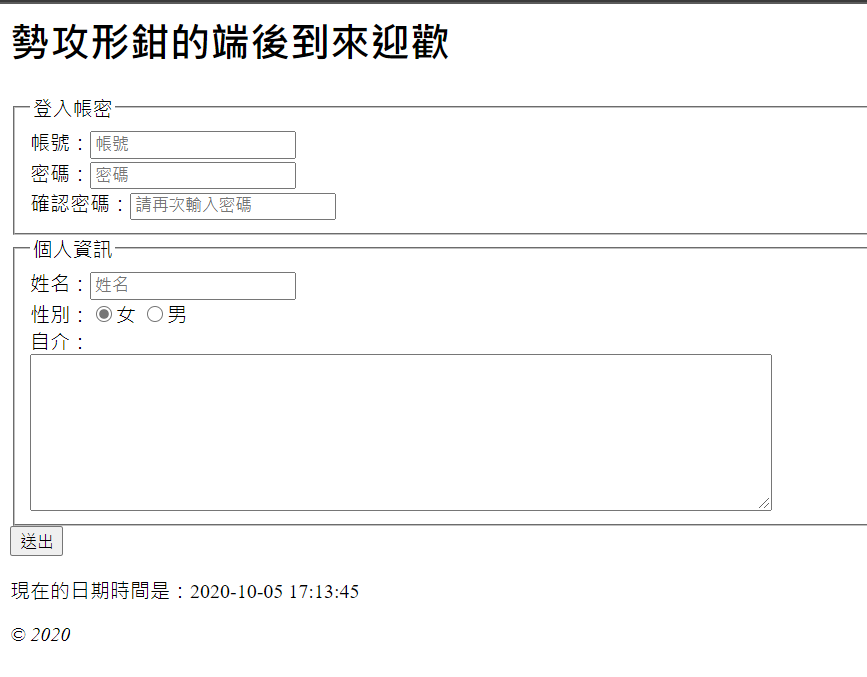
回首頁點選登入
Okay,表面工夫已經完成,接著呢我們要做的事情有哪些?
首先,我們要建立資料庫。
但這次我們透過Codeigniter的Migration功能。
首先到config/migration中修改以下項目:
$config['migration_enabled'] = TRUE;
$config['migration_type'] = 'sequential';
$config['migration_auto_latest'] = TRUE;
$config['migration_version'] = 1;
migration_enabled把migration功能打開,
migration_type有兩種type,sequential定義檔案的命名方式為Sequential migration naming (例如001_add_blog.php)
migration_auto_latest打開自動migration
migration_version migration的版本,可以讓開發者像git版本控制一樣修改資料庫
接著為了確保每次都是最新的migration且一定會開啟,
我們到開啟首頁的controller,也就是controller/Pages.php/view()裡新增以下內容:
    $this->load->library('migration');

    if ($this->migration->current() === FALSE)
    {
            show_error($this->migration->error_string());
    }
    else{
            echo 'migration success!';
    }
    //load->view...
接著我們在application下新增資料夾migrations並建立001_add_user.php檔案,
然後參考官方手冊建立以下內容:
<?php

defined('BASEPATH') OR exit('No direct script access allowed');

class Migration_add_user extends CI_Migration {

        public function up()
        {
                $this->dbforge->add_field(array(
                         'id' => array(
                                'type' => 'INT',
                                'constraint' => 5,
                                'unsigned' => TRUE,
                                'auto_increment' => TRUE
                        ),
                        'username' => array(
                                'type' => 'VARCHAR',
                                'constraint' => '100',
                        ),
                        'password' => array(
                                'type' => 'VARCHAR',
                                'constraint' => '100',
                        ),
                        'name' => array(
                                'type' => 'VARCHAR',
                                'constraint' => '100',
                        ),
                        'gender' => array(
                                'type' => 'TINYINT',
                        ),
                        'about' => array(
                                'type' => 'TEXT',
                                'null' => TRUE,
                        ),
                ));
                $this->dbforge->add_key('id', TRUE);
                $this->dbforge->create_table('user');
        }

        public function down()
        {
                $this->dbforge->drop_table('user');
        }
}
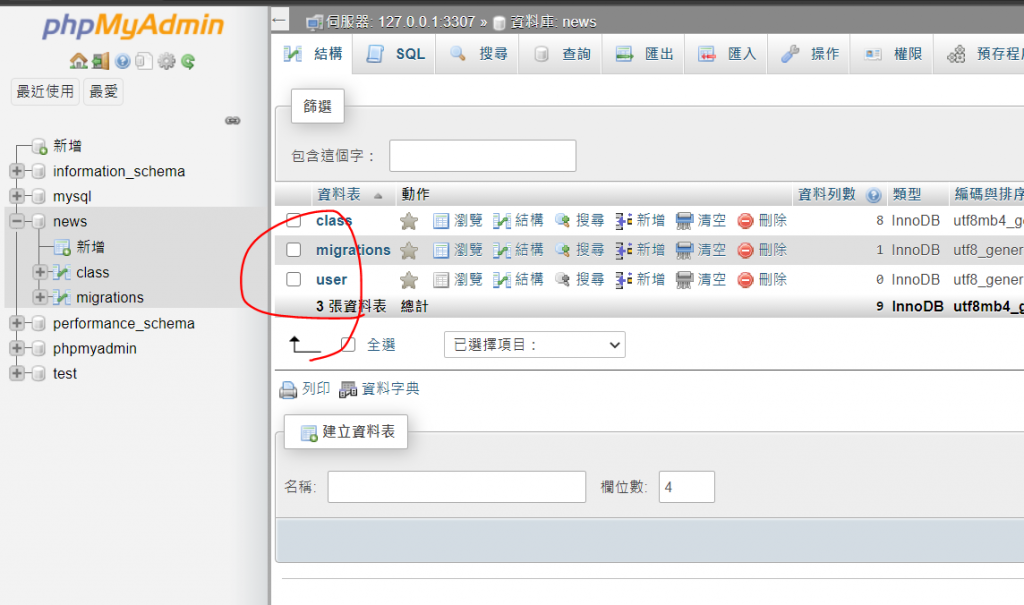
打開 http://localhost/ci/index.php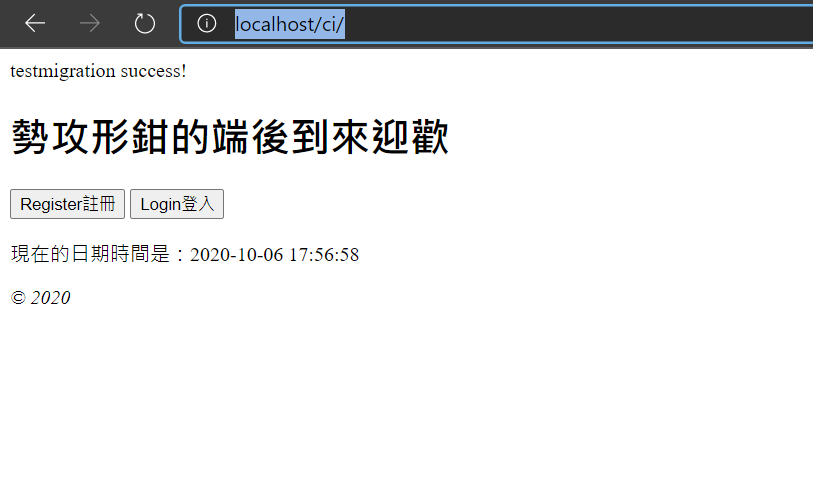
就能看到成功的訊息,
接著打開phpmyAdmin,就會看到我們新建的資料庫囉