iT邦幫忙

第 12 屆 iThome 鐵人賽

DAY 24
0
AI & Data

AWS 數據處理與分析實戰系列 第 24

Day 24 Redshift 教學

  • 分享至 

  • xImage
  •  

在介紹完 Redshift 後,我們直接來創建一個 Redshift

  1. 首先在創建 Redshift 前,需要先創建 cluster subnet group

https://ithelp.ithome.com.tw/upload/images/20201008/201292367xQmOHihvq.png

  1. subnet group 代表等等創建的 Redshift 要開在哪一個 VPC 以及 哪個 Subnet 上,所以需要選擇 VPC 並且把 Redshift 要使用的 Subnet 加入到設定中,這樣可以控制 Redshift 所在的 Subnet,而 Subnet 需要選擇兩個不同AZ的Subnet 這樣如果是啟用 Cluster 時就可以部署 HA 的架構

https://ithelp.ithome.com.tw/upload/images/20201008/20129236QXX94IzMYp.png

  1. 創建完 subnet group 後就可以開始創建今天的主角 Redshift

https://ithelp.ithome.com.tw/upload/images/20201008/20129236RW1bRhIJVb.png

  1. Redshift 規格選擇最小的 dc2.large,Node 的數量設置為 1

https://ithelp.ithome.com.tw/upload/images/20201008/20129236yvq72rQ9H3.png

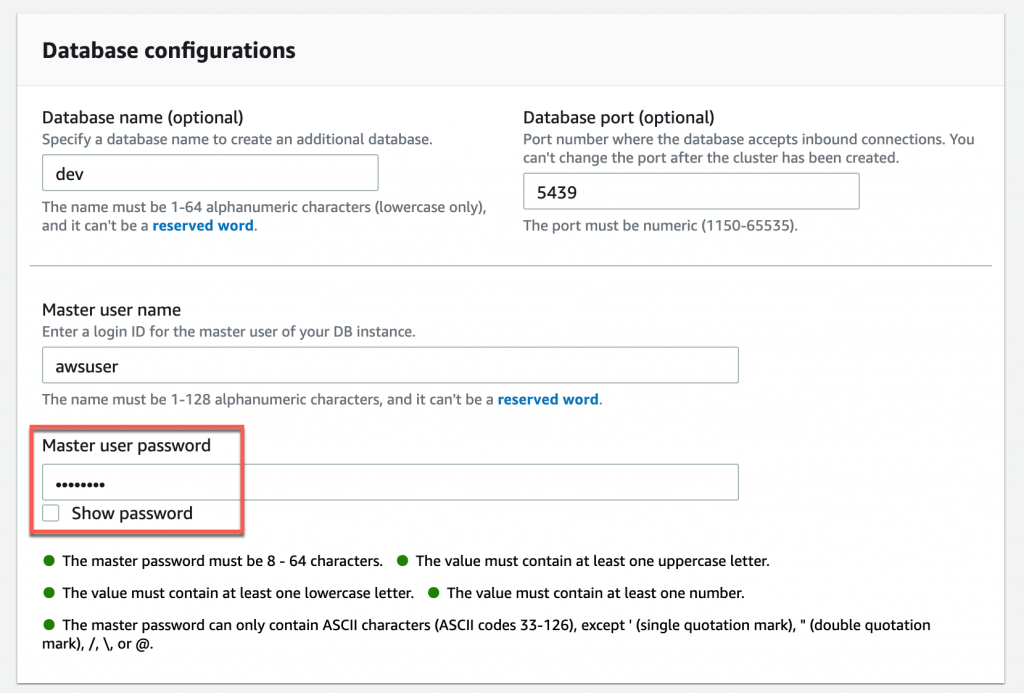
  1. Databace configurations 可以維持預設或更改自己想要的參數,而最重要的是,Databace Name、Master user name、Password 要記得

https://ithelp.ithome.com.tw/upload/images/20201008/20129236CnRiOmh6t5.png

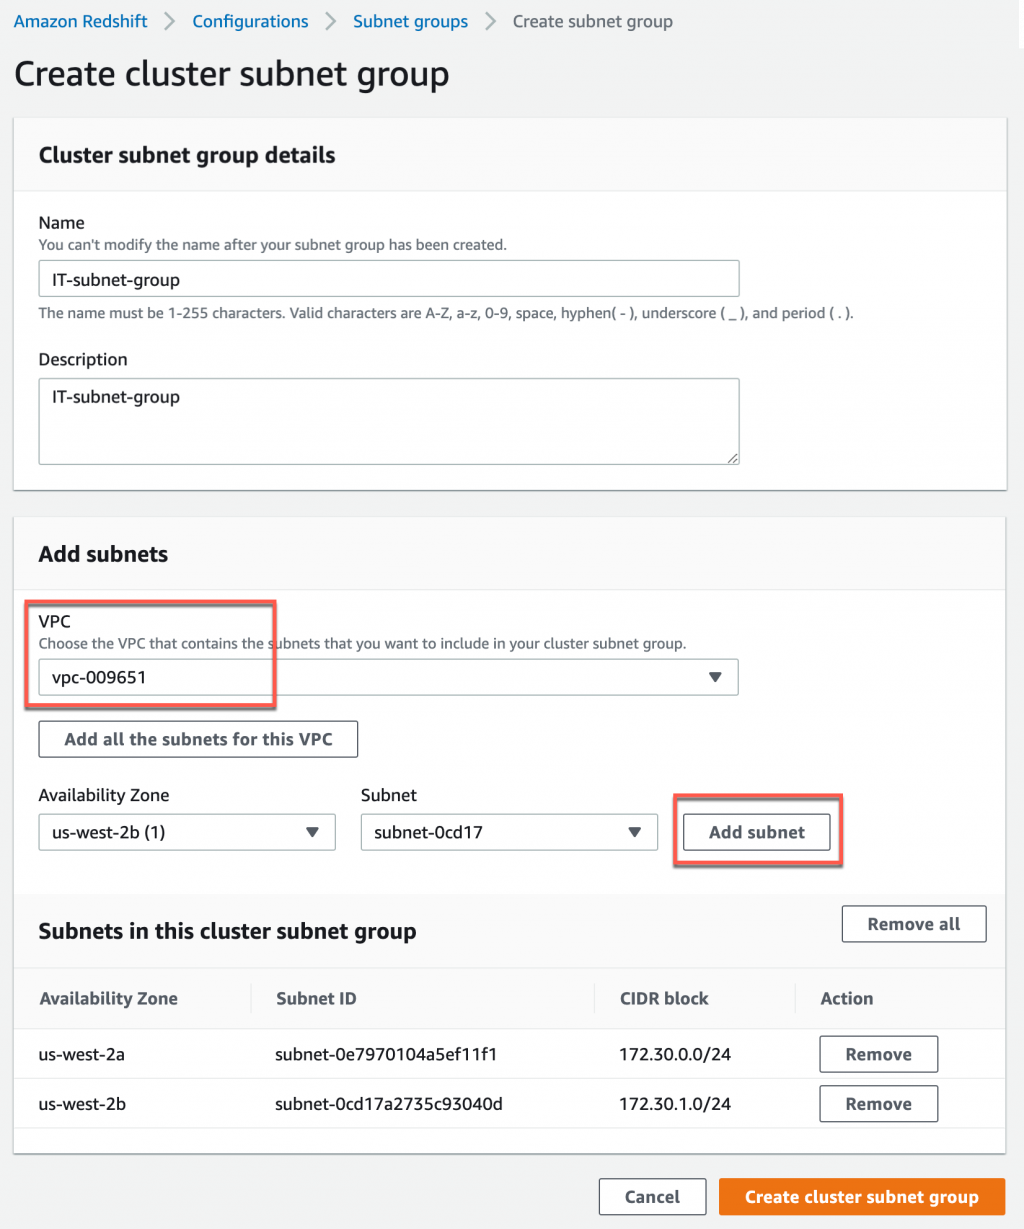
  1. 繼續往下設定 Network and security 的部分,VPC 選擇剛剛設定 subnet group 的 VPC,Security Group 可以選擇預設,如果選擇其他則要記得開 5439 這個 port 這樣才能正常訪問,subnet group 選擇第一步驟所創建的 it-subnet-group,設定完成後就可以點選 Create cluster

https://ithelp.ithome.com.tw/upload/images/20201008/2012923669YYCwif54.png

  1. 創建成功後等待 Status 變成 Available

https://ithelp.ithome.com.tw/upload/images/20201008/20129236FhPS0bZ9xA.png

  1. 看到 Available 後,可以到 Query editor 的頁面登入我們創建出來的 Redshift

https://ithelp.ithome.com.tw/upload/images/20201008/20129236LxJzUHlFcx.png

  1. 登入成功後在這個介面透過 PostgreSQL 的 SQL 語法進行查詢與分析

https://ithelp.ithome.com.tw/upload/images/20201008/20129236SYN7S6R93Y.png


上一篇
Day 23 Redshift 簡介
下一篇
Day 25 透過 Data Catalog 連接 Redshift
系列文
AWS 數據處理與分析實戰30
圖片
  直播研討會
圖片
{{ item.channelVendor }} {{ item.webinarstarted }} |
{{ formatDate(item.duration) }}
直播中

尚未有邦友留言

立即登入留言