本篇介紹如何搭配filebeat和logstash,把apache log送至es
[環境]
OS: Windows 10 (64bit)
上一重已經安裝好Logstash而且建立一個basic pipeline
在這篇章,會試著透過Filebeat取得Apache logs,然後輸出至es
因此後續需要安裝Filebeat及Logstash,如未安裝Filebeat可參閱Elastic Stack第二十七重,如未安裝Logstash可參閱Elastic Stack第二十九重
設定Filebeat,把Apache logs傳送至Logstash
[Note]
因為同樣會存取Apache log,所以如果有照Elastic Stack第二十七重做的話,要先剛把當時enabled的module apache 先disable,
以系統管理員打開 Windows PowerShell,至 Filebeat所在目錄,執行以下指令
.\filebeat modules disable apache

如此一來,這樣後續才不會有錯誤
至 Filebeat 目錄下,打開 filebeat.yml 檔案,修改地方如下
filebeat.inputs:
  enabled: true (1)
  paths:
    - D:\path\to\apache\log (2)
    #- /var/log/*.log (3)
(1): 設置為 true 此處設置的 paths 才會生效
(2): 設置自己local端的apache log location
(3): 原本預設是沒有註解,這邊不需要所以我註解此行
# ------------------------------ Logstash Output -------------------------------
output.logstash: (1)
  # The Logstash hosts
  hosts: ["localhost:5044"] (2)
(1)(2): 取消註解
#cloud.id: your_cloud_id
#cloud.auth: your_auth
註解此兩行,不然稍後執行會有以下錯誤
Exiting: The cloud.id setting enables the Elasticsearch output, but you already have the logstash output enabled in the config
# ---------------------------- Elasticsearch Output ----------------------------
#output.elasticsearch: (1)
  # Array of hosts to connect to.
  #hosts: ["localhost:9200"] (2)
(1)(2): 註解此兩行,不然稍後執行會有以下錯誤
Exiting: error unpacking config data: more than one namespace configured accessing 'output' (source:'filebeat.yml')
到此設定完成,試著開始執行看看 (至 Filebeat 目錄)
.\filebeat -e -c filebeat.yml -d "publish"
會看到如下訊息是正常的,因為 Logstash 還沒執行嘛~
INFO    [publisher_pipeline_output]     pipeline/output.go:143  Connecting to backoff(async(tcp://localhost:5044))
ERROR   [publisher_pipeline_output]     pipeline/output.go:154  Failed to connect to backoff(async(tcp://localhost:5044)): dial tcp [::1]:5044: connectex: No connection could be made because the target machine actively refused it.
設置Logstash的input來源是Filebeat
先展示一下Logstash的pipeline設定的skeleton(骨架)
# The # character at the beginning of a line indicates a comment. Use
# comments to describe your configuration.
input {
}
# The filter part of this file is commented out to indicate that it is
# optional.
# filter {
#
# }
output {
}
首先,把上面這段儲存成檔案 (e.g. first-pipeline.conf),放置在 Logstash目錄 (e.g., D:/logstash-7.9.2/)
設定input來源來自 Filebeat,Logstash安裝時,包含了 Beat input plugin,
此 plugin可以讓 Logstash接收來自Elastic Beats 框架的事件,當然其中包含了 Filebeat
在 input 區塊加入以下幾行
beats {
    port => "5044"
}
因為要先測試看看是否正常,所以在 output 區塊加入以下幾行,把output設為stdout
stdout { codec => rubydebug }
上述添加完後, first-pipeline.conf 檔案應該會長這樣
input {
    beats {
        port => "5044"
    }
}
# The filter part of this file is commented out to indicate that it is
# optional.
# filter {
#
# }
output {
    stdout { codec => rubydebug }
}
用以下指定來驗證設定,可以在開一個cmd,然後至 Logstash 目錄,
bin\logstash -f first-pipeline.conf --config.test_and_exit
其中 --config.test_and_exit 參數是用來parse設定,然後回報錯誤
設定檔無誤的話會有以下訊息
Using config.test_and_exit mode. Config Validation Result: OK. Exiting Logstash
設定正確的話,那就 啟動Logstash吧~
bin\logstash -f first-pipeline.conf --config.reload.automatic
其中 --config.reload.automatic 參數設定可以讓你在更新設定檔後,會自動重新載入設定檔,而不用每次修改後都去停止然後再啟動
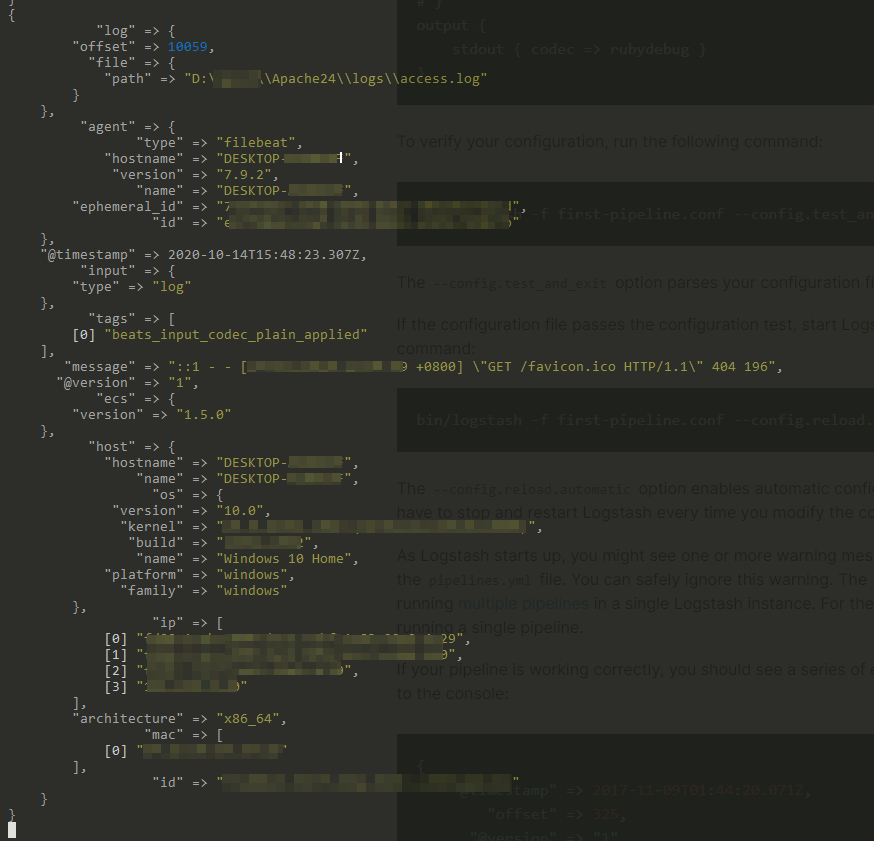
啟動後,如果pipeline正確運行的話,會有類似以下的畫面
設置Logstash的output為Elastic cloud的es
修改 first-pipeline.conf 檔案至如下
input {
    beats {
        port => "5044"
    }
}
# The filter part of this file is commented out to indicate that it is
# optional.
# filter {
#
# }
output {
    elasticsearch {
		hosts => ["https://xxxxxxx.asia-east1.gcp.elastic-cloud.com:9243/"] (1)
		user => "elastic"
		password => "xxxxxxx" (2)
	}
}
(1)(2): 填入自己的elastic cloud
編輯完成儲存後,等 Logstash 重載設定檔完成後,然後到自己apache serve的網頁瀏覽一下,
至Kibana確認是否有成功建立index及輸入資料
GET _cat/indices?v
以我的為例,index name 為 logstash-2020.10.14-000001
查看資料
GET logstash-2020.10.14-000001/_search
成功了!!!
小小新手,如有理解錯誤或寫錯再請不吝提醒或糾正
先說聲抱歉,中間原本是預計會說明filter,而且我在centos8成功過了,
但是Windows parse log一直有問題...
Logstash
Parsing Logs with Logstash
