score = Object

   scoreList2: [
      {value : 100, className: "psaa"} ,
      {value : 95,  className: "psaa"} ,
      {value : 59,  className: "color"} ,
      {value : 85,  className: "psaa"} ,
      {value : 100, className: "psaa"} ,
      ]


    <% for( score of scoreList2 ) { %>
        <li><span class="<%= score.className %>"><%= score.value %></span></li>
    <% } %>
原網站:http://localhost:3000/
以下進入:http://localhost:3000/testPost 取得body.userName值
執行順序
(1)Http Request請求 post 網址:/testPost
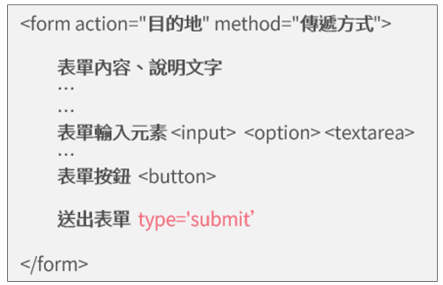
   <form method="post" action="/testPost">
      <!-- method="get"資料會顯示在網址列 -->
      <!-- method="post"資料不會顯示在網址列 -->
      <input type="text" name="userName" />
      <input type="submit" name="YesNO" value="OK" />
    </form>
(2)後端收到請求的 方法post 及 路徑/testPost
    //方法post 及 路徑/testPost
    app.post("/testPost",function(req,res){
    var data = req.body.userName;
    //抓index.html的body 抓不到XD
    //前面要增加urlencoded物件才抓的到

    res.send("我抓到了" + data);
})
2-1如果是get req.query 因為網址列會顯示get內容
   //方法get 及 路徑/test
    app.get('/test', function (req, res) {
        res.send(' query string = ' + req.query.name);
    });
method="get"資料會顯示在網址列
method="post"資料不會顯示在網址列
(3)確認符合,執行方法:在body內抓userName
    app.use(express.urlencoded({extended:true}));
    //搭配body.userName;

    app.post("/testPost",function(req,res){
    var data = req.body.userName;
    //抓index.html的body 抓不到XD
    //前面要增加urlencoded物件才抓的到

    res.send("我抓到了" + data);
    })
<input type="text" name="userName" />
id = 每個東西都可以擁有
name = 送給後端的名字代號(form內的input才有)
同事做好把東西交給你繼續做時,可以拿這個檢查同事有沒有做好
(交貨檢查)
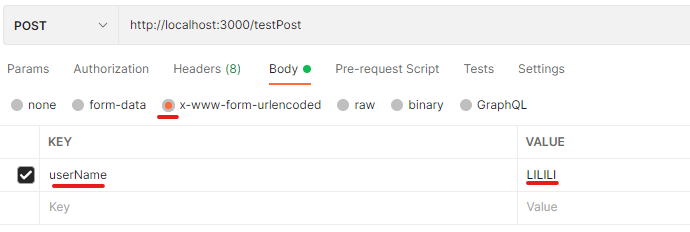
(1)建立新分類 > 建立新請求 > 輸入網址 >存檔
      <input type="text" name="userName" />
      <input type="submit" name="YesNO" value="OK" />

      app.use(express.json()); //json物件
      app.post("/testPost",function(req,res){
          var data = req.body.userName;
          res.send("我抓到了" + data);
      })
(2)使用 raw JSON
app.use(express.urlencoded({extended:true}));
//搭配body.userName;
(3)使用 raw JSON
app.use(express.json()); //json物件
{"userName": "LILILI","YesNo":"OK"}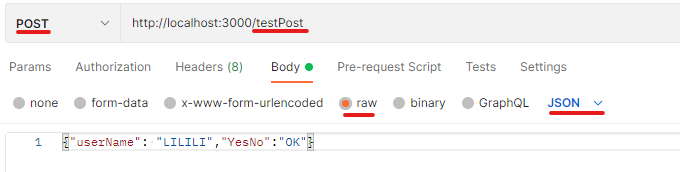

可以檢查是不是從POST就錯誤,如果連不上就跟前端無關
type="file" 格式必要 enctype="multipart/form-data
    <form action="/upload_file"
          method="post"
          enctype="multipart/form-data">
    <input type="file" name="myfile" accept="image/*" />
    <input type="submit" value="上傳檔案" />
sever端
     const express = :require('express');
     const multer = require('multer') //1.引用multer套件
     const app = express();

     varupload = multer(( dest: 'upload/']); //2.呼叫,使用功能(設置檔案存放的路徑)

     //3.upload.single('myfile')解析上傳檔案(解析器),single:只解析一個
     //upload_file這裡處理
     app.post('/upload_file', upload.single('myfile'), function(req, res){
             res.send("上傳成功");
             });

     app.get("/", function(req, res) [
     res,sendfile(_dirname + '/index.html', function(err) {
     if (err) res,send(404);
     ));
     ));

     app.listen(3000);
6-1限制上傳檔案類型
      <input type="file" name="myfile" accept="image/*" />

      var upload = multer({
      storage: myStorage,  // 設置 storage
      fileFilter: function (req, file, cb) {    // 檔案過濾
          if (file.mimetype != 'image/gif') {
             return cb(new Error('Wrong file type'));
           }
         cb(null, true)
         }
      });
<input type="file" name="myfile" accept=".png,.gif,.bmp">
6-2解析多個檔案(可上傳多個檔案)
    app.post('/upload_file', upload.array('myfile', 12), function (req, res, next) {
    // upload.single('myfile') 一個
    // .array('myfile', 12) 同類型 12個
    // .fields(fields) 不同類型 多個
    res.send("上傳成功");
    });
obj.lastname = {"Lin"};   //{}
obj["lastname"] = "Lin";  //[]

alert(obj.lastname);
alert(obj["lastname"]);
手機號碼
/09[0-9]{8}
(1)透過冒號(:)可以將網址的區段文字存成變數
    app.get("/mail/:zip",function(req,res){
        res.send(req.params.zip);
    })
http://localhost:3000/mail/zzz
·使用wildcard配多文字,易學易用,功能簡單
-問號(?)代表「可有可無」
-米字號(*)代表「任何文字」
(2)Regular Expression 有更精細地規則
-[a-z]代表所有的「小寫英文字元」
-[0-9]代表所有的「數字」
-加號(+)代表「一個或以上」
     // 可替換的限制[0-9]{幾碼}
     app.get("/mail/:zip([0-9]{3})",function(req,res){
         res.send(req.params.zip);
     })
     //http://localhost:3000/mail/300
現在:
npm install express-generator -g
==> -g 全域安裝 以後就不用一個一個抓
express --ejs myPrject
==>建立專案資料夾(myPrject) 獲得專案範本
nodemon app.js
==>隨時跑程式
npm install
==>package.json內的套件全安裝
npm start
==> package.json 的 script: 裡的start( > run start)
==> 主頁面
終端機要開在這:
C:\XXX\Node.js\lab0811\myPrject>
www檔案通常不會更動,變動app.js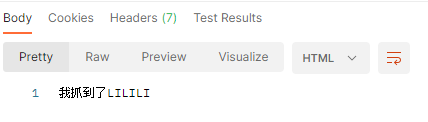
以前(無範本)
npm init -y ==>package.json
npm install express ==>安裝套件
nodemon app.js ==>隨時跑程式
var express = require("express");
var app = express();
app.listen(3000);
routes資料夾下
    var express = require('express');
    var router = express.Router();


    // http://localhost:3000/prod
    router.get('/', function(req, res, next) {
      res.send('prod list');
    });

    //http://localhost:3000/prod/about
    router.get('/about', function(req, res, next) {
        res.send('prod - about page.');
      });


    //   輸入甚麼就是甚麼
    // http://localhost:3000/prod/detail/5
    router.get('/detail/:id', function(req, res, next) {
        res.send('prod #' + req.params.id);
    });

    module.exports = router;  //被app.js抓
app.js下
    var prodRouter = require('./routes/prod'); //路由器匯入prod.js
    app.use('/prod', prodRouter); //掛路由器在主目錄下
(1)安裝
npm install express
npm install express-session
(2)程式碼 secret必要
var session = require("express-session"); //引用express-session

     app.use(
         session({
             secret:"P@$$WORD"
         })
     );
(3)寫入
http://localhost:3000/writeToSession
     app.get("/writeToSession",function(req,res){
         res.send("OK");

         req.session.userName="LILI";
     })
(3)讀取
http://localhost:3000/readFromSession/
     app.get("/readFromSession",function(req,res){
         var data = "GUEST"
         if(req.session.userName){
             data = req.session.userName;
         }
         res.send("HELLO!!!" + data);
     })
express --help
查看如何使用express套件
[]非必要
npm i
裝package.json內的MOD
 rouoxo

 iThome鐵人賽