Hi, 我是魚板伯爵今天要教大家 Text 這個元件,教學內容只會擷取片段程式碼,建議大家搭配完整程式碼來練習。
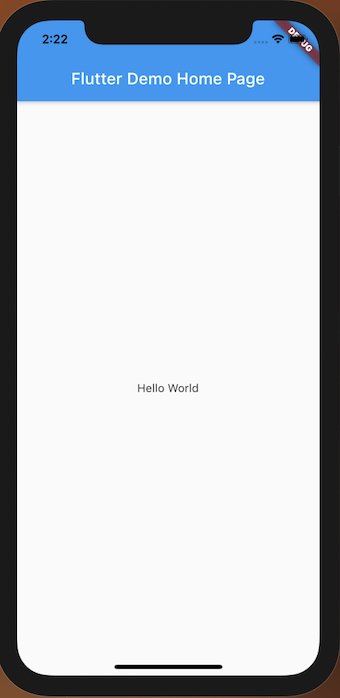
Text文字顯示元件,可以把想要顯示在畫面上的文字打在裡面。
class DemoText extends StatelessWidget {
  const DemoText({Key? key}) : super(key: key);

  @override
  Widget build(BuildContext context) {
    return Container(
      child: Text("Hello World"),
    );
  }
}
如果顯示的字串是一個變數的話,必須要用$加變數才行。
class DemoTextValue extends StatelessWidget {
  const DemoTextValue({Key? key}) : super(key: key);

  @override
  Widget build(BuildContext context) {
    final String str = "World";
    return Column(
      children: [
        Text("Hello $str"),
      ],
    );
  }
}
如果字串是Class包起來之類的話那就要用${}包起來否則無法顯示喔!
class DemoTextClassValue extends StatelessWidget {
  const DemoTextClassValue({Key? key}) : super(key: key);

  @override
  Widget build(BuildContext context) {
    final word = Word();
    return Column(
      mainAxisAlignment: MainAxisAlignment.center,
      children: [
        Text("Hello ${word.str}"),
      ],
    );
  }
}

class Word {
  final String str = "World";
}
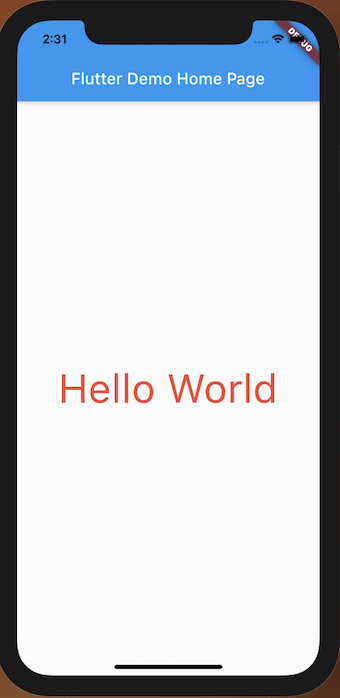
文字的風格、大小和顏色等等都可以在TextStyle中做調整。
class DemoTextStyle extends StatelessWidget {
  const DemoTextStyle({Key? key}) : super(key: key);

  @override
  Widget build(BuildContext context) {
    return Column(
      mainAxisAlignment: MainAxisAlignment.center,
      children: [
        Text(
          "Hello World",
          style: TextStyle(
            color: Colors.red,
            fontSize: 50,
          ),
        ),
      ],
    );
  }
}
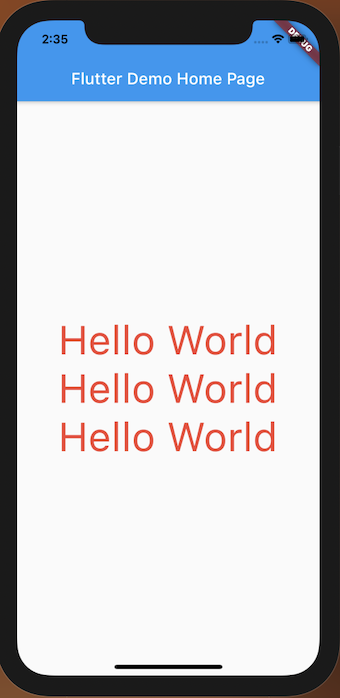
你還可以將你的style打包起來重複使用。
class DemoTextStyle extends StatelessWidget {
  const DemoTextStyle({Key? key}) : super(key: key);

  @override
  Widget build(BuildContext context) {
    return Column(
      mainAxisAlignment: MainAxisAlignment.center,
      children: [
        Text(
          "Hello World",
          style: myStyle(),
        ),
        Text(
          "Hello World",
          style: myStyle(),
        ),
        Text(
          "Hello World",
          style: myStyle(),
        ),
      ],
    );
  }

  TextStyle myStyle() {
    return TextStyle(
      color: Colors.red,
      fontSize: 50,
    );
  }
}
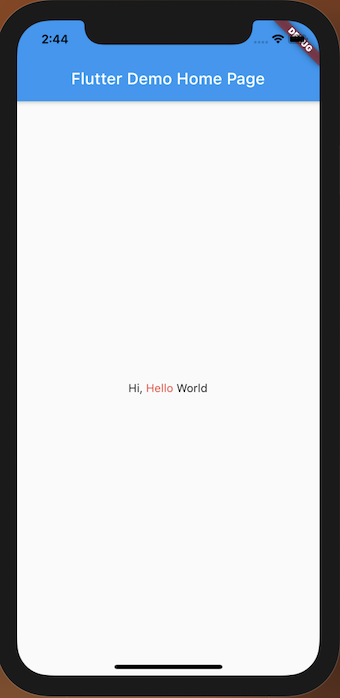
有時候在顯示文檔的時候會想把重點變成不一樣的顏色,你可以考慮使用RichText把多個字串包在一起。
class DemoRichText extends StatelessWidget {
  const DemoRichText({Key? key}) : super(key: key);

  @override
  Widget build(BuildContext context) {
    return Container(
      child: RichText(
        text: TextSpan(
          children: <TextSpan>[
            TextSpan(
              text: 'Hi, ',
              style: TextStyle(
                color: Colors.black,
              ),
            ),
            TextSpan(
              text: 'Hello',
              style: TextStyle(
                color: Colors.red,
              ),
            ),
            TextSpan(
              text: ' World',
              style: TextStyle(
                color: Colors.black,
              ),
            ),
          ],
        ),
      ),
    );
  }
}
如果想要使用外部字體的話,需要先到pubspec.yaml最下面的fonts設定字體包的路徑,然後重新build app就可以使用設定的字體了。
pubspec.yaml
  fonts:
    - family: asd
      fonts:
        - asset: assets/asd/asd-Regular.ttf
        - asset: assets/asd/asd-Italic.ttf
Widget:
class DemoTextFamily extends StatelessWidget {
  const DemoTextFamily({Key? key}) : super(key: key);

  @override
  Widget build(BuildContext context) {
    return Container(
      child: Text(
        "Hello World",
        style: TextStyle(fontFamily: 'asd'),
      ),
    );
  }
}


 iThome鐵人賽