
reference: medium - Filtering Image content with Google’s Cloud Vision API for iOS
還記得昨天提到的Google ML Kit是可以直接在行動裝置上使用嗎?
那如果我是想要透過API方式整合現有的應用程式呢?
我一樣可以使用臉部偵測嗎?
這就是今天這篇文章的主題啦!
註1:以下的環境準備是針對第一次建立專案,之後使用就不會這麼麻煩了
註2:這個工具設定過程會需要綁定信用卡,如果是按照這個系列文操作是不會收費的,
但若對綁信用卡有疑慮或是覺得自己會被Google收取費用 (收費規則是每月用量超過1000單位),
請自行跳過文章。
Google Cloud Vision API是由Google所開發的視覺處理套件,可以輕鬆的與應用程式透過API整合。
當然,前置環境準備還是需要的:
準備一個Google帳號
建立專案,這裡使用的名稱為Face Detection on iThome,你可以:
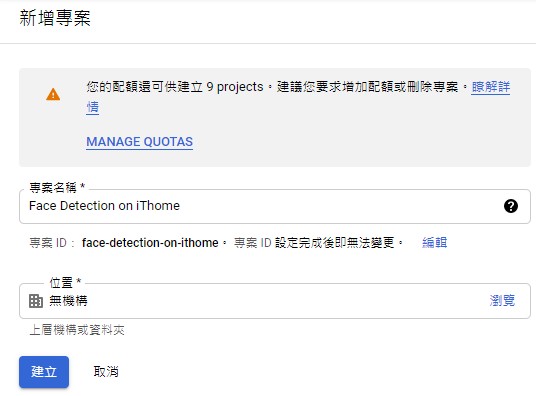
建立完成後,你會看到專案的管理資源頁面
在上方「搜尋產品和資源」的輸入框中填入Cloud Vision API,選擇第一個結果
在Cloud Vision API頁面,點選「啟用」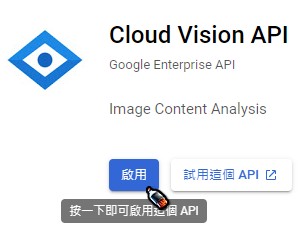
選擇剛剛建立的Face Detection on iThome專案,點選「開啟」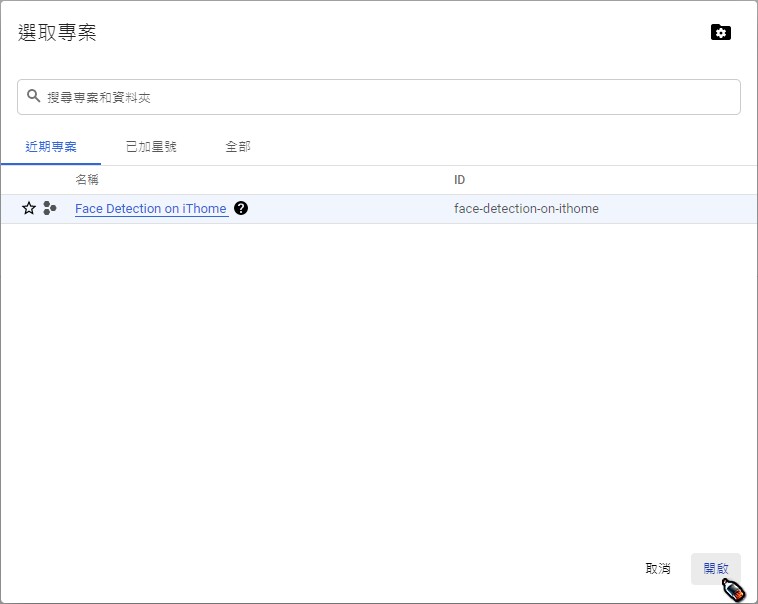
啟用後,會進入API和服務 - Cloud Vision API頁面,我們需要建立憑證才可以給應用程式使用API。這裡使用的是服務帳戶 (Service Account)的驗證方式 (有興趣看其他驗證機制的可以看這篇Google文件,這裡就不詳加闡述)
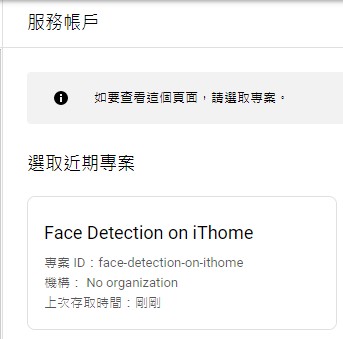

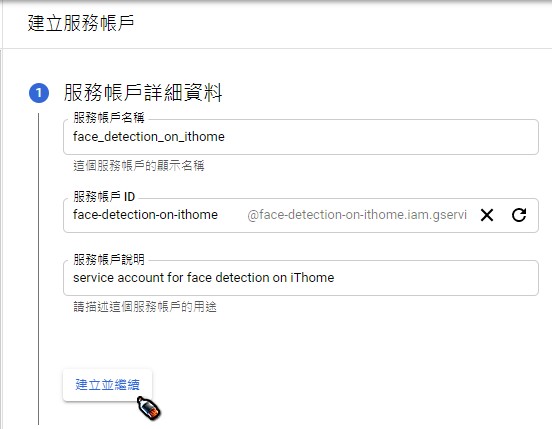
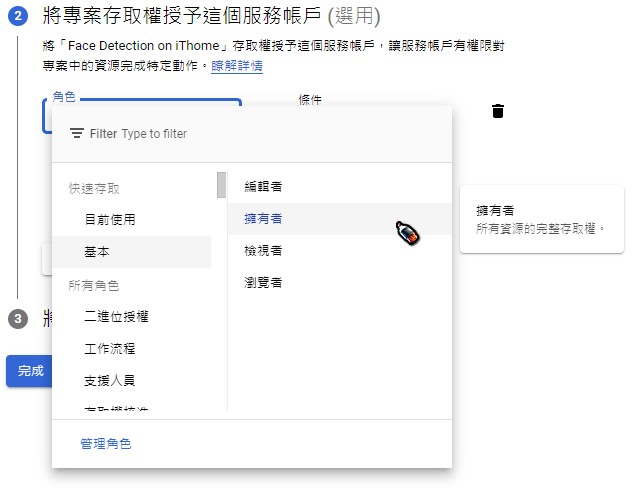
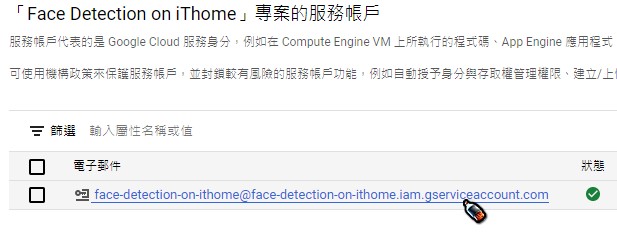
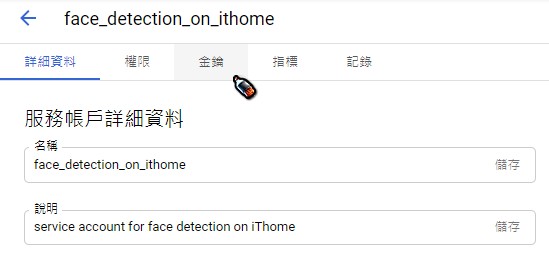
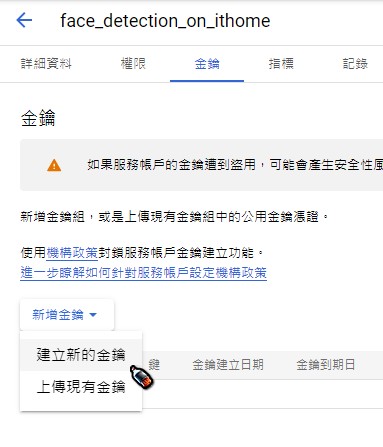
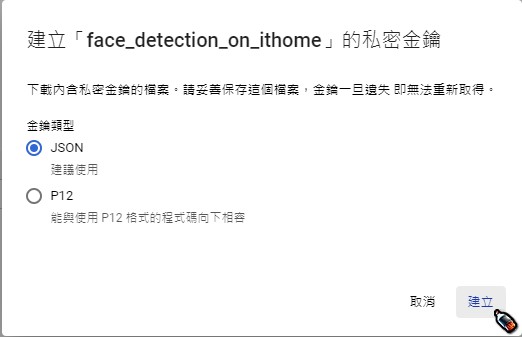
非常重要 非常重要 非常重要 請妥善保存並記得這個金鑰檔案的路徑 (副檔名為.json),後面會需要用到它回到步驟7之前開啟的API和服務 - Cloud Vision API頁面,點選左上角的導覽選單 (就是有三條橫線的icon)-> 「帳單」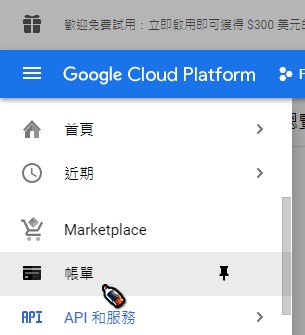
在帳單頁面中,會出現"這項專案沒有帳單帳戶",點選「連結帳單帳戶」-> 「建立帳單帳戶」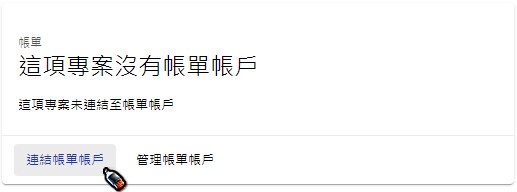
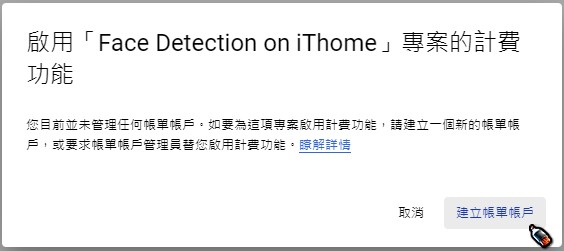
在跳出的帳戶資訊與付款資訊畫面填入相關資訊,設定無誤完成後會回到帳單頁面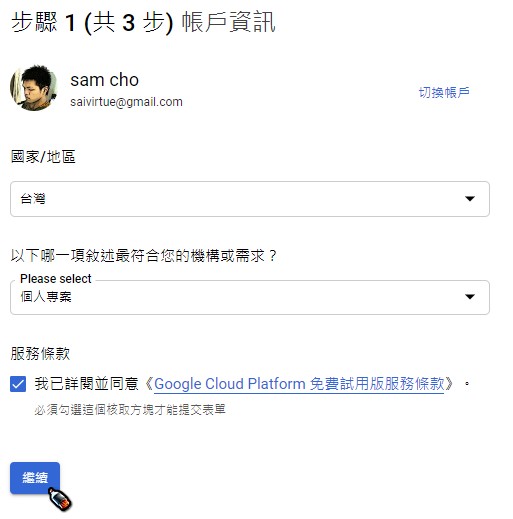
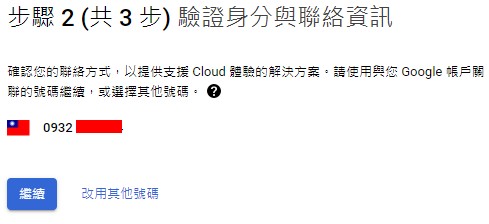
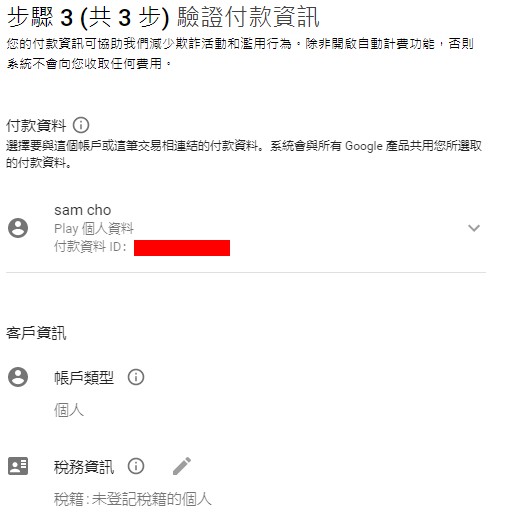
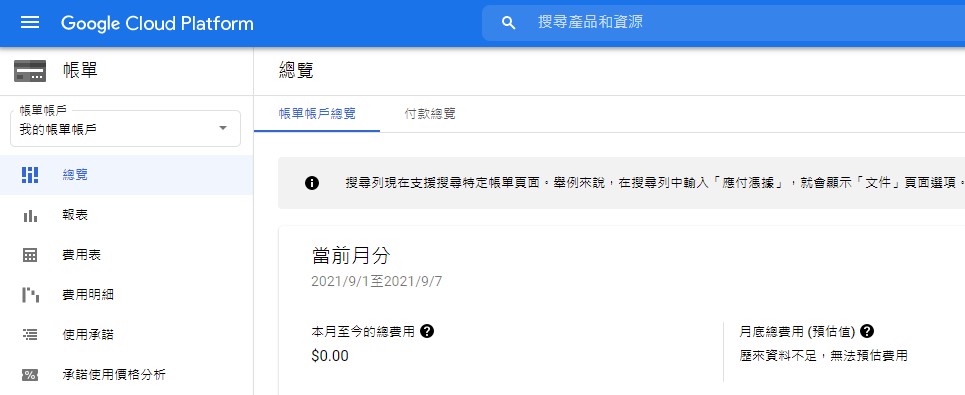
Google Cloud上的環境準備到這邊就完成了,接著讓我們寫Code吧!
既然要用Google ML Kit,當然就要用Google Colab來測試 (完全免費,不用擔心)。
開啟新分頁,連線到Google Colab,點選「新增筆記本」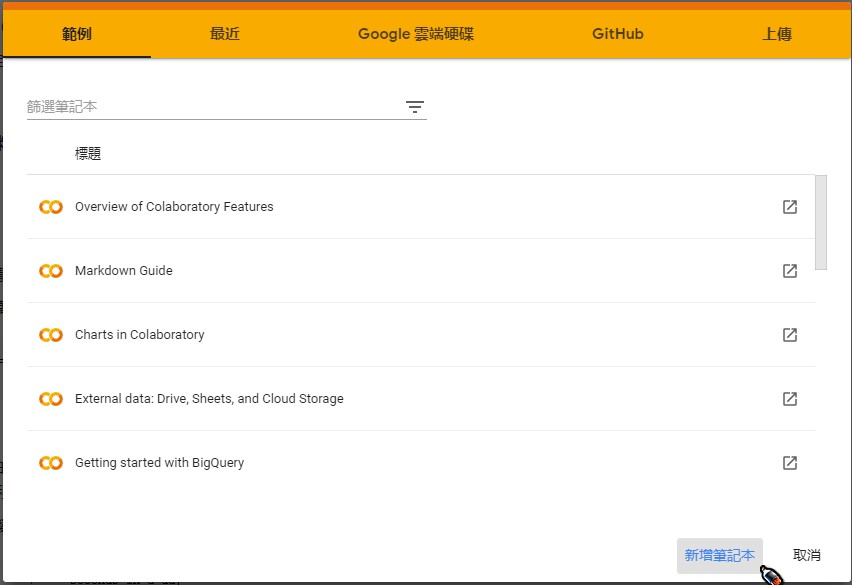
CTRL + Enter: 執行目前的程式碼儲存格 (或按儲存格左方的▶圖示)SHIFT + Enter: 執行目前的程式碼儲存格,並且新增一個程式碼儲存格CTRL + M B: 在目前鼠標停留處下方插入一個程式碼儲存格 (或按上方的+程式碼按鈕)
# 安裝Google Cloud Vision API for python
!pip install google-cloud-vision
from google.colab import files
import json
# 上傳檔案 (請在下方「選擇檔案」點選後,上傳在前面建立的服務帳號金鑰) (JSON檔案)
uploaded = files.upload()

try:
  json.loads(open(next(iter(uploaded.keys()))).read())
except ValueError as e:
  print('invalid json: %s' % e)
  raise Exception('請選擇JSON格式的金鑰檔案!')
import os
# 設定Google API憑證環境變數
os.environ['GOOGLE_APPLICATION_CREDENTIALS'] = next(iter(uploaded.keys()))
# 匯入使用到的libraries
import io
import cv2
from google.cloud import vision
from PIL import Image
# 定義偵測臉部函數 (使用Google Cloud Vision API)
def detect_face_and_draw(face_file):
  with io.open(face_file, 'rb') as image_file:
    client = vision.ImageAnnotatorClient()
    content = image_file.read()
    image = vision.Image(content=content)
    face = client.face_detection(image=image, max_results=1).face_annotations[0]

  box = [(int(vertex.x), int(vertex.y)) for vertex in face.bounding_poly.vertices]
  img = cv2.imread(face_file)
  img = cv2.cvtColor(img, cv2.COLOR_BGR2RGB)
  cv2.rectangle(img, box[0], box[2], (0, 255, 0), 2)
  cv2.putText(img, str(format(face.detection_confidence, '.3f')), (box[0][0], box[0][1] - 10), cv2.FONT_HERSHEY_COMPLEX, 0.6, (255, 0, 0))
  image = Image.fromarray(img)
  display(image)
# 定義擷取當前web camera的影像函數
from IPython.display import display, Javascript
from google.colab.output import eval_js
from base64 import b64decode

def take_photo(filename='photo.jpg', quality=0.8):
  js = Javascript('''
    async function takePhoto(quality) {
      const div = document.createElement('div');
      const capture = document.createElement('button');
      capture.textContent = '擷取圖片';
      div.appendChild(capture);

      const video = document.createElement('video');
      video.style.display = 'block';
      const stream = await navigator.mediaDevices.getUserMedia({video: true});

      document.body.appendChild(div);
      div.appendChild(video);
      video.srcObject = stream;
      await video.play();

      // Resize the output to fit the video element.
      google.colab.output.setIframeHeight(document.documentElement.scrollHeight, true);

      // Wait for Capture to be clicked.
      await new Promise((resolve) => capture.onclick = resolve);

      const canvas = document.createElement('canvas');
      canvas.width = video.videoWidth;
      canvas.height = video.videoHeight;
      canvas.getContext('2d').drawImage(video, 0, 0);
      stream.getVideoTracks()[0].stop();
      div.remove();
      return canvas.toDataURL('image/jpeg', quality);
    }
    ''')
  display(js)
  data = eval_js('takePhoto({})'.format(quality))
  binary = b64decode(data.split(',')[1])
  with open(filename, 'wb') as f:
    f.write(binary)
  return filename
# 偵測圖片中的人臉 (請按下方的"擷取圖片"按鈕擷取影像)
try:
  filename = take_photo()
  detect_face_and_draw(filename)

except Exception as err:
  print(str(err))
最後結果:
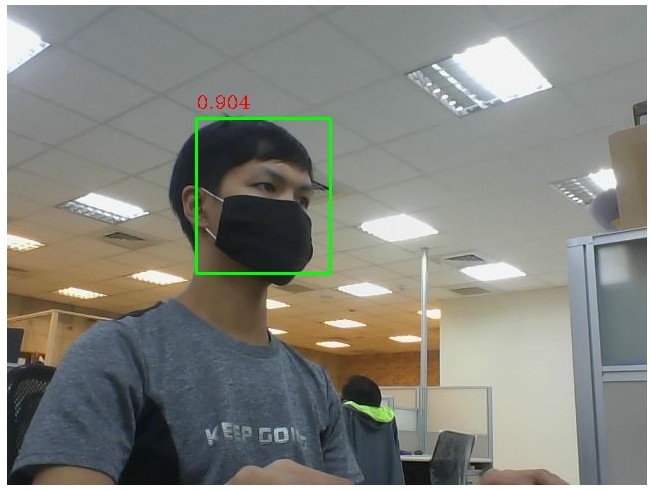
會在圖片中用紅色字體標註此人臉偵測的準確率,以及用綠色框框標註人臉位置
可以看到Google Vision API可以偵測出戴口罩且不是正面的人臉,
這個在後續其他方法實作人臉偵測時可以比較看看結果。
Google Colab參考檔案在這
下一篇我們將回到行動裝置的臉部偵測Google ML Kit!
