上一篇介紹到GET主要用於資料獲取
HttpPost主要用於資料添加
這裡我們沿用之前專案新增一個TeacherController.cs
並增加一個Add的方法用HttpPost屬性修飾
using Microsoft.AspNetCore.Http;
using Microsoft.AspNetCore.Mvc;
using MyApiTest1.Models;
using System;
using System.Collections.Generic;
using System.Linq;
using System.Threading.Tasks;

namespace MyApiTest1.Controllers
{
    [Route("api/[controller]")]
    [ApiController]
    public class TeacherController : ControllerBase
    {
        [HttpPost("Add")]
        public string AddPerson(Person person)
        {
            int id = person.Id;
            string name = person.Name;
            int age = person.Age;
            string sex = person.Sex;
            return "完成添加";
        }

    }
}
這裡沒有涉及DB只是模擬資料傳進來後打印添加完成的顯示文
寫完了之後當然要來嘗試呼叫看看感受POST的功能
POST無法直接用網址訪問方式來測試呼叫
因此這裡我們使用jQuery來簡單測試基本api呼叫
預設專案不支援一些靜態文件資源存取(比方html,js,圖片)。
因此需要至Startup.cs中
在Configure 方法
利用middleware(中介軟體)來啟用靜態資源
app.UseStaticFiles();//啟用靜態資源可存取性使其可以訪問wwwroot目錄下的靜態資源
public void Configure(IApplicationBuilder app, IWebHostEnvironment env)
{
    if (env.IsDevelopment())
    {
        app.UseDeveloperExceptionPage();
    }

    app.UseStaticFiles();//啟用靜態資源可存取性
    app.UseRouting();


    app.UseAuthorization();

    app.UseEndpoints(endpoints =>
    {
        endpoints.MapControllers();
    });
}
在此還要特別注意
中介軟體順序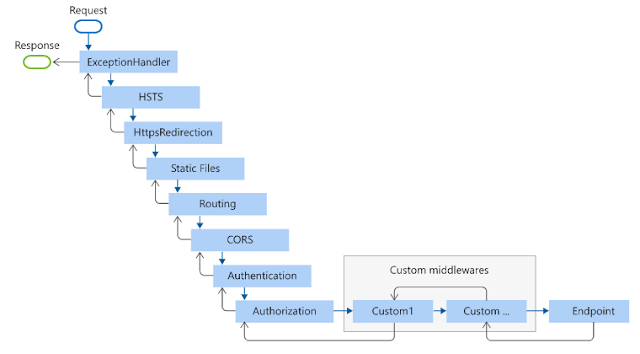
寫成是順序要特別留意
比方Authentication一定要在Authorization之上。
新增完該middleware後
再到專案下新增wwwroot目錄(會自動變地球圖示)
之後再新增AddTeacher.html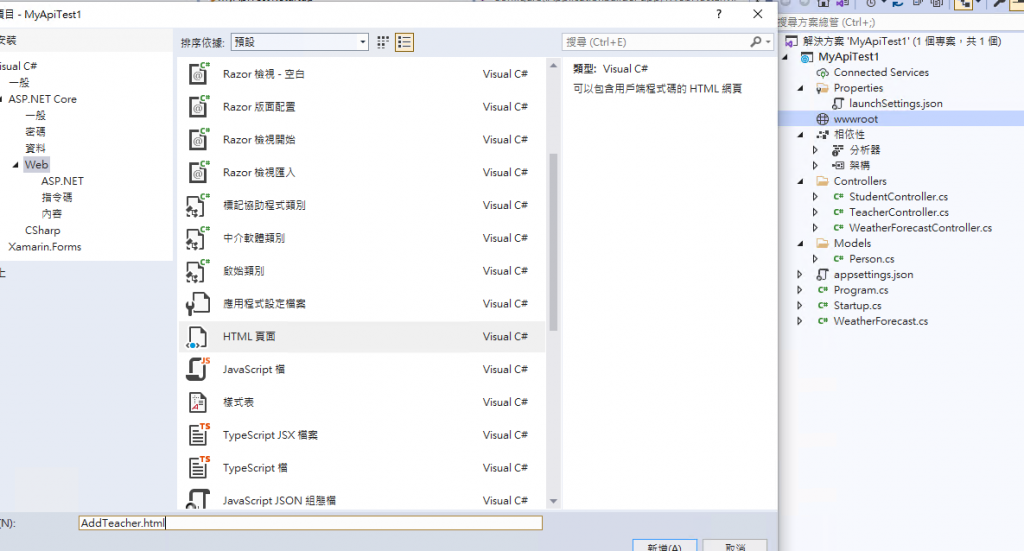
再補加上jQUery
透過新增用戶端程式庫新增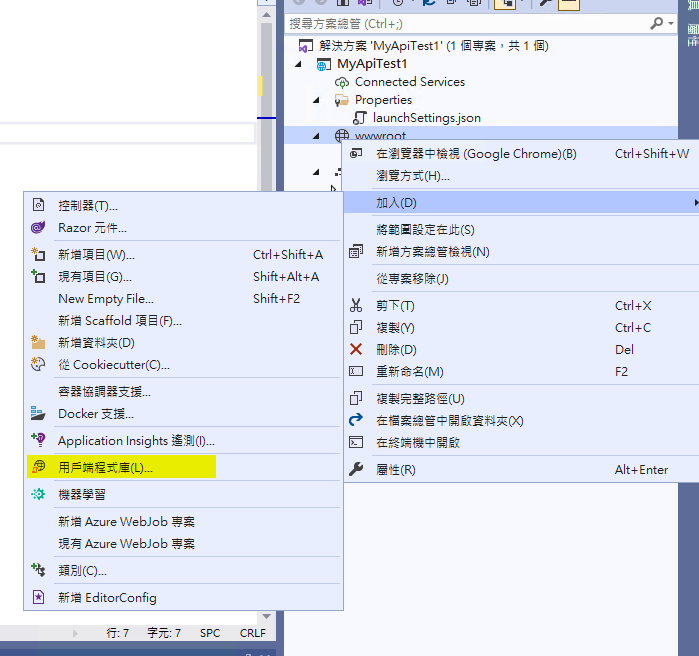
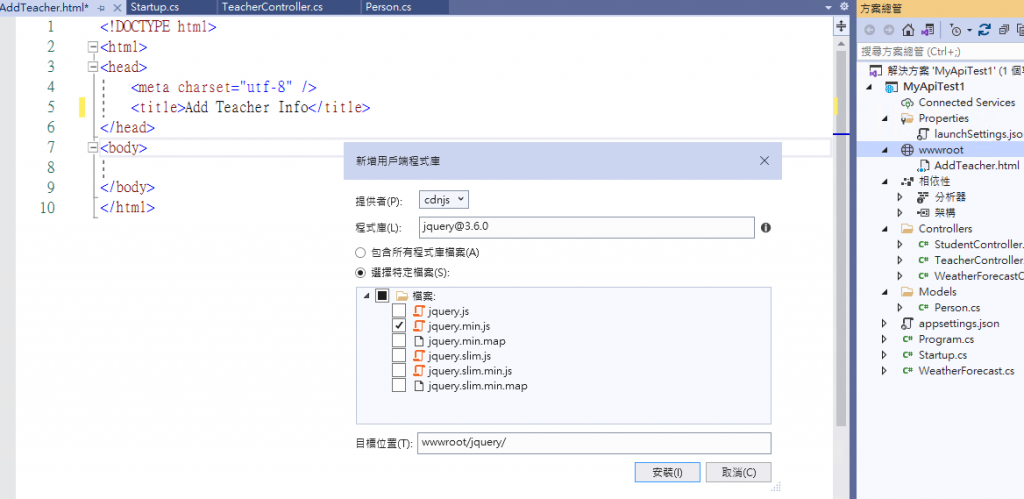
點選安裝後就可以看到透過libman.json安裝好的jQUery套件
我們直接在html中引入然後撰寫提交POST請求的前端表單頁面和相應jQuery處裡邏輯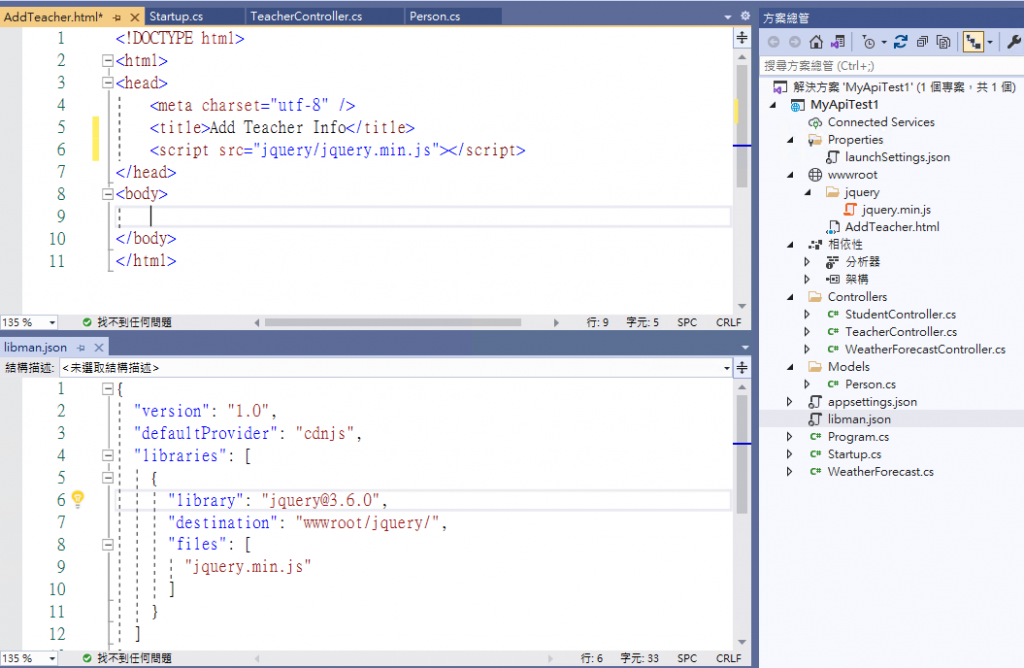
<!DOCTYPE html>
<html>
<head>
    <meta charset="utf-8" />
    <title>Add Teacher Info</title>
    <script src="jquery/jquery.min.js"></script>
</head>
<body>
    <div>
        <input type="button" id="btnAdd" value="添加" />
        <span id="msg"></span>
    </div>

    <script type="text/javascript">
        $("#btnAdd").click(function () {
            $.ajax({
                //請求模式
                type: "post",
                //請求的URL
                url: "api/Teacher/Add",
                //預期server responde的資料型態
                dataType: "text",
                //請求送出發送的資料(body內文json字串)
                data: JSON.stringify({ id: 1, name: 'Andy', age: 22, sex: 'man' }),
                //內文型態
                contentType: "application/json",
                success: function (result) {
                    $("#msg").text(result);
                }
            });
        });
    </script>
</body>
</html>
實際呼叫測試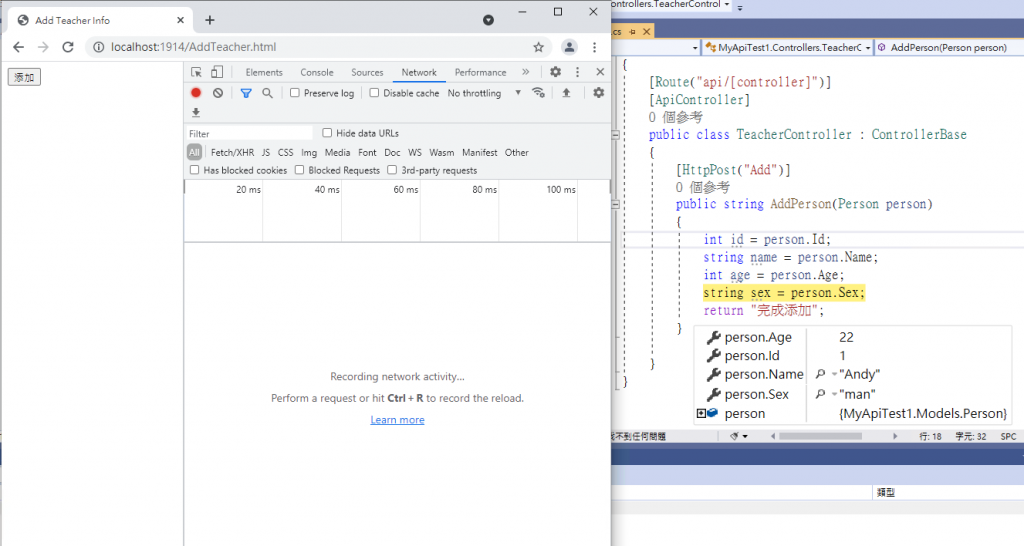

以上就是透過jQuery針對POST請求.net core web api的分享
已同步發表至個人部落格
https://coolmandiary.blogspot.com/2021/09/net-core-web-api03httppost.html