今日的程式碼 => GITHUB
google_sign_in plugin文件
sign_in_with_apple 文件
今天介紹的程式碼是可以運行的,只是在連接 Firebase 的部分,大家要自己連接 Firebase。因此 clone 後,大家還要再進行微調。
這邊我只有實作 Google Sign In 的部分。 FB 和 Apple 我沒有去實作他。Google 的部分大家只要把 googleService 的檔案直接拉到對應的位置就可以了。
這邊會介紹最普遍的 Google Sign In 方式。
Firebase 官方文件
GoogleService-Info.plist 放入 ios/Runner
Info.plist 設定<!-- Put me in the [my_project]/ios/Runner/Info.plist file -->
<!-- Google Sign-in Section -->
<key>CFBundleURLTypes</key>
<array>
<dict>
<key>CFBundleTypeRole</key>
<string>Editor</string>
<key>CFBundleURLSchemes</key>
<array>
<!-- TODO Replace this value: -->
<!-- Copied from GoogleService-Info.plist key REVERSED_CLIENT_ID -->
<string>com.googleusercontent.apps.861823949799-vc35cprkp249096uujjn0vvnmcvjppkn</string>
</array>
</dict>
</array>
<!-- End of the Google Sign-in Section -->
google-services.json
有的時候會是 kotlin 版本衝突等等要看情況,目前我的有版本衝突,我找到這個 ISSUE,所以需要增加這個
implementation 'com.google.guava:listenablefuture:9999.0-empty-to-avoid-conflict-with-guava'
https://pub.dev/packages/sign_in_with_apple
Firebase Sign In With Apple 官方文件
這邊我只有做過 IOS 的部分,沒有做過 android 的部分。但是因為目前手頭上沒有 apple developer account,所以有的是憑印象講的。
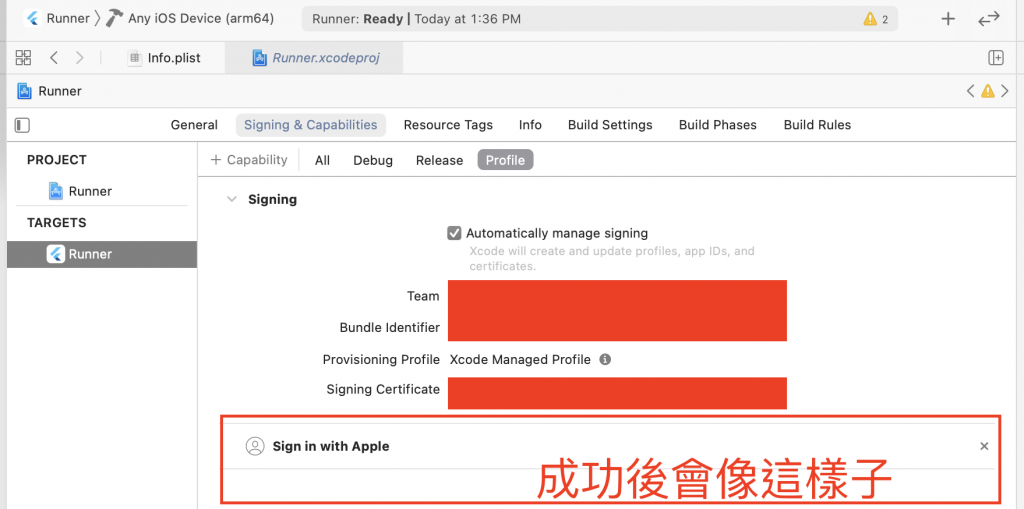
請先付費給 Apple,拿到 apple developer account.
創建服務 ID https://developer.apple.com/account/resources/identifiers/list/serviceId
選擇支援 Sign In With Apple
Server 端要記得到 https://developer.apple.com/account/resources/authkeys/list 建立一組支援 Sign in with Apple 的 Key。
如果手機需要實測的話記得要把 device id 加到 https://developer.apple.com/account/resources/devices/list 。
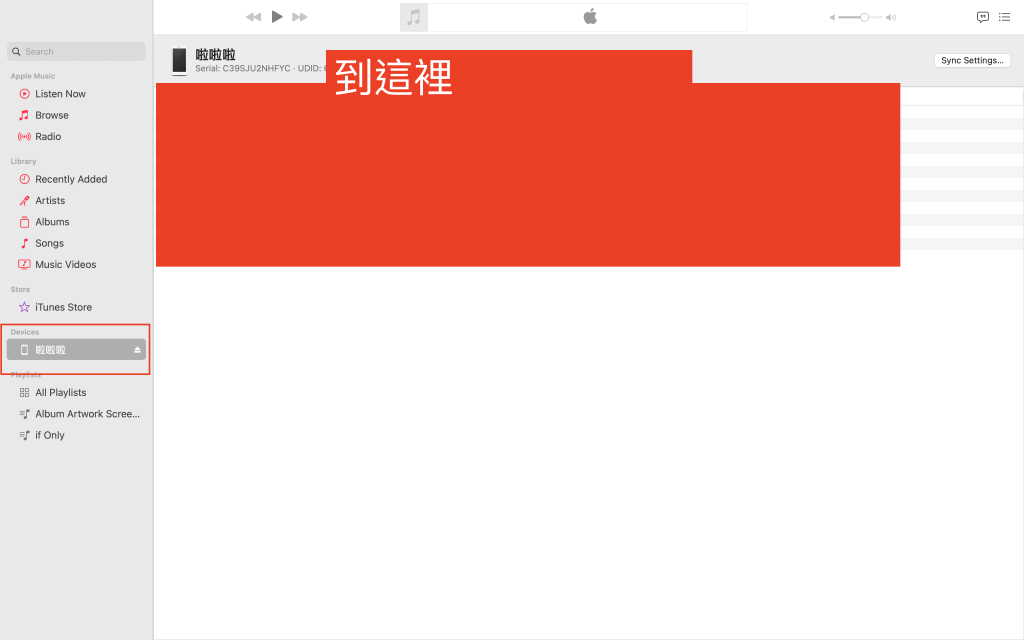
如何查看自己的手機 device id 的話可以去 Music 裡面點擊自己的 device。看到 UUID 的選項,並加進去


flutter_facebook_auth 套件
超級詳細的 Flutter Facebook Auth 官方文件
注意:
請完全設置 FB(未測試)或將其刪除,因為它與 google 插件混淆。會導致 google 登入失敗。
這邊我也是大部分都參考 Firebase 的官網 https://firebase.flutter.dev/docs/auth/social/
,這邊我定義了一個狀態,有登出、登入中、已登入。
初始化 authProvider 的部分,我去監聽 user 的資料,並且取得 firebase 的 token,拿到這個 token 後,就可以做後續和後端的串接。這邊主要是要看你的專案怎麼規劃。
enum ApplicationLoginState { loggedOut, loggedIn, loadding }

class AuthProvider extends ChangeNotifier {
  /// init Firebase
  AuthProvider() {
    init();
  }

  ApplicationLoginState _loginState = ApplicationLoginState.loadding;

  ApplicationLoginState get loginState => _loginState;
  String _token = "";
  String get token => _token;

  User? _user;
  User? get user => _user;
  /// 拿到 TOKEN
  Future<void> init() async {
    await Firebase.initializeApp();

    try {
      FirebaseAuth.instance.authStateChanges().listen((user) async {
        if (user == null) {
          print("NULL USER");
          _loginState = ApplicationLoginState.loggedOut;
          notifyListeners();
        } else {
          _user = user;
           _token = await user.getIdToken(true);
          _loginState = ApplicationLoginState.loggedIn;
          debugPrint("Firebase Token:" + _token.toString(), wrapWidth: 4096);
          notifyListeners();
        }
      });
    } catch (e) {
      print("error from Auth_Provider get User id :$e");
    }
  }

  /// 登出
  void signOut() {
    FirebaseAuth.instance.signOut();
  }

  /// Google
  Future<void> signInWithGoogle() async {
    try {
      print("signInWithGoogle is onPressed");
      // // Trigger the authentication flow
      final googleInUser = await GoogleSignIn(
        scopes: [
          'email',
          'https://www.googleapis.com/auth/contacts.readonly',
        ],
      ).signIn();
      // Obtain the auth details from the request
      final googleAuth = await googleInUser?.authentication;
      // / Create a new credential
      final OAuthCredential credential = GoogleAuthProvider.credential(
          accessToken: googleAuth?.accessToken, idToken: googleAuth?.idToken);
      //use google login with firebase
      await FirebaseAuth.instance.signInWithCredential(credential);
    } on FirebaseAuthException catch (e) {
      // errorCallback(e);
    }
  }

  /// Apple
  Future<void> signInWithApple() async {
    // To prevent replay attacks with the credential returned from Apple, we
    // include a nonce in the credential request. When signing in with
    // Firebase, the nonce in the id token returned by Apple, is expected to
    // match the sha256 hash of `rawNonce`.
    final rawNonce = generateNonce();
    final nonce = sha256ofString(rawNonce);

    // Request credential for the currently signed in Apple account.
    final appleCredential = await SignInWithApple.getAppleIDCredential(
      scopes: [
        AppleIDAuthorizationScopes.email,
        AppleIDAuthorizationScopes.fullName,
      ],
      nonce: nonce,
    );

    // Create an `OAuthCredential` from the credential returned by Apple.
    final oauthCredential = OAuthProvider("apple.com").credential(
      idToken: appleCredential.identityToken,
      rawNonce: rawNonce,
    );
    print(appleCredential);
    print("SIGN IN WITH APPLE");
    // Sign in the user with Firebase. If the nonce we generated earlier does
    // not match the nonce in `appleCredential.identityToken`, sign in will fail.
    await FirebaseAuth.instance.signInWithCredential(oauthCredential);
  }

  /// Generates a cryptographically secure random nonce, to be included in a
  /// credential request.
  String generateNonce([int length = 32]) {
    final charset =
        '0123456789ABCDEFGHIJKLMNOPQRSTUVXYZabcdefghijklmnopqrstuvwxyz-._';
    final random = Random.secure();
    return List.generate(length, (_) => charset[random.nextInt(charset.length)])
        .join();
  }

  /// Returns the sha256 hash of [input] in hex notation.
  String sha256ofString(String input) {
    final bytes = utf8.encode(input);
    final digest = sha256.convert(bytes);
    return digest.toString();
  }

  /// FB
  Future<void> signInWithFacebook() async {
    // Trigger the sign-in flow
    final LoginResult loginResult = await FacebookAuth.instance.login();

    // Create a credential from the access token
    final OAuthCredential facebookAuthCredential =
        FacebookAuthProvider.credential(loginResult.accessToken!.token);

    // Once signed in, return the UserCredential
    await FirebaseAuth.instance.signInWithCredential(facebookAuthCredential);
  }
}
