Recyclerview
Recyclerview在App開發中十分常見,接下來就用kotlin來呈現recyclerview
一開始要先加入dependency
implementation "androidx.recyclerview:recyclerview:1.1.0"
    // For control over item selection of both touch and mouse driven selection
implementation "androidx.recyclerview:recyclerview-selection:1.1.0-rc01"
xml(主畫面)
<androidx.recyclerview.widget.RecyclerView
    android:layout_width="match_parent"
    android:layout_height="wrap_content"
    android:id="@+id/recyclerview"
    app:layoutManager="androidx.recyclerview.widget.LinearLayoutManager"/>
這邊在建立一個item_view的xml
<?xml version="1.0" encoding="utf-8"?>
<LinearLayout
    xmlns:android="http://schemas.android.com/apk/res/android"
    android:id="@+id/item_view"
    android:layout_width="match_parent"
    android:layout_height="wrap_content">

     <TextView
         android:layout_width="0dp"
         android:layout_height="wrap_content"
         android:layout_weight="0.92"
         android:textSize="25dp"
         android:id="@+id/textview" />

</LinearLayout>
再來是activity
val user :MutableList<Fruit> = mutableListOf()
user.add(Fruit("apple"))
user.add(Fruit("banana"))
user.add(Fruit("lemon"))
val recyclerView:RecyclerView = findViewById(R.id.recyclerview)
val recyclerAdapter = RecyclerAdapter(this,user)
recyclerView.adapter = recyclerAdapter
最後是adapter
class RecyclerAdapter(private val content:Context, private val mData:List<Fruit>):
    RecyclerView.Adapter<RecyclerAdapter.ViewHolder>() {
    val inflater:LayoutInflater = LayoutInflater.from(content)

    inner class ViewHolder(itemView:View):RecyclerView.ViewHolder(itemView){
        val fruitname = itemView.findViewById<TextView>(R.id.textview)
    }

    override fun onCreateViewHolder(parent: ViewGroup, viewType: Int): RecyclerAdapter.ViewHolder {
        val view= LayoutInflater.from(content).inflate(R.layout.item_view,parent,false)
        return ViewHolder(view)
    }

    override fun getItemCount(): Int {
        return mData.size
    }

    override fun onBindViewHolder(holder: ViewHolder, position: Int) {
        var currentData:Fruit = mData[position]
        holder.fruitname.text = currentData.fruit
    }

}
其實在不用databinding的情況下,kotlin的寫法跟java其實是差不多的
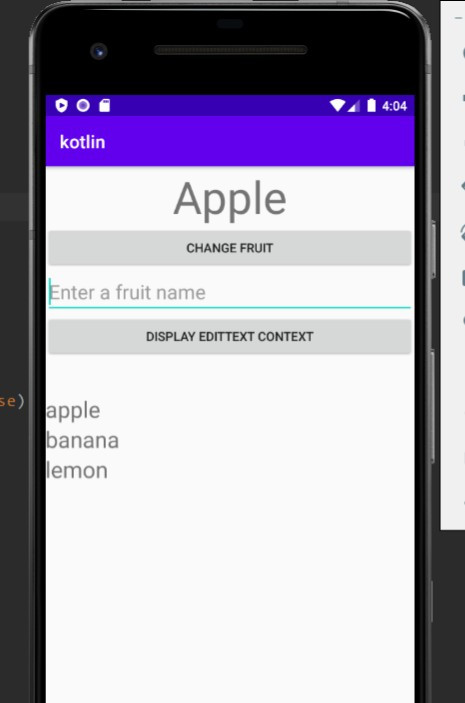
成果如下
