iT邦幫忙

2021 iThome 鐵人賽

DAY 15
0
DevOps

不僅是程式碼代管平台 - Github 能做些什麼?系列 第 15

GitHub Action 實作持續整合 - 以 ASP.NET Core 專案為例

  • 分享至 

  • xImage
  •  

接下來的兩篇文章,會結合前面 GitHub Action 所學,實作持續整合持續佈署兩個部分。因為個人最近寫比較多一點 ASP.NET Core 專案,所以會以此作為範例,給有興趣的讀者參考。

.NET Core 持續整合流程

在開始動手之前,先簡單說明 .NET Core 專案如何編譯到佈署。如下圖所示,每次在佈署網站之前,都必須經過:

  1. Restore: 將參考的套件下載下來
  2. Build: 建置專案
  3. Test: 執行測試
  4. Publish: 發布可執行檔案/網站
  5. Deploy: 佈署至站台

https://ithelp.ithome.com.tw/upload/images/20210918/200914944b1v7qCPHe.png

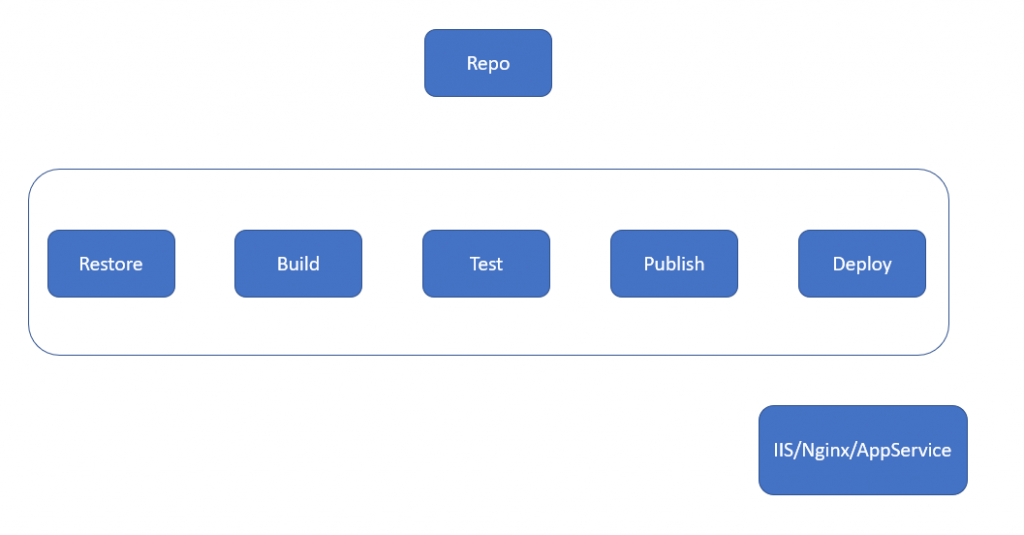
在小型/不常變動專案的專案,開發人員會透過 Visual Studio 完成上列工作,但如果需要頻繁更新,則需要透過自動化工具進行上列程序,而這次,我們想透過 GitHub Action 幫我們完成這些事項。使用 .NET Core 進行上述工作時有一個好處,即是透過 .NET Core CLI 方式執行,除了簡化流程、可讀性高,也容易維護。下表為簡單的指令說明:

指令 說明
dotnet restore 恢復(下載與整合)所需要的 Nuget 套件
dotnet build 建置專案
dotnet test 執行測試專案
dotnet publish 產生可發行的專案

前置作業 - 透過 Visual Studio 2019 建立 ASP.NET Core MVC/MS Test 專案

你可以直接使用我 GitHub Repo 進行練習,或者你已經很熟這一個部分,可以直接略過這一章節

GitHub 與 Visual Studio 2019 已經有相當好的整合,所以你可以直接把專案放上 GitHub Repo

步驟 1. 開啟 Visual Studio 2019,點選建立新專案
https://ithelp.ithome.com.tw/upload/images/20210915/20091494EVj4okd76c.png

步驟 2. 找到 ASP.NET Core Web 應用程式 (MVC)
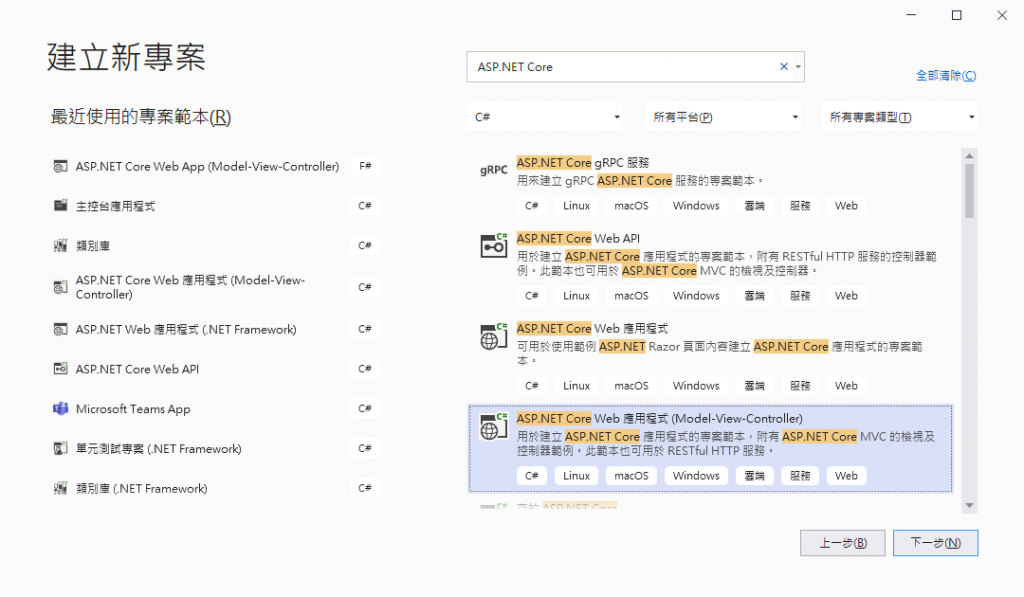
https://ithelp.ithome.com.tw/upload/images/20210915/200914940etSxjimWq.png

步驟 3. 輸入專案名稱,點選下一步
https://ithelp.ithome.com.tw/upload/images/20210915/20091494ae9zpdrv9Y.png

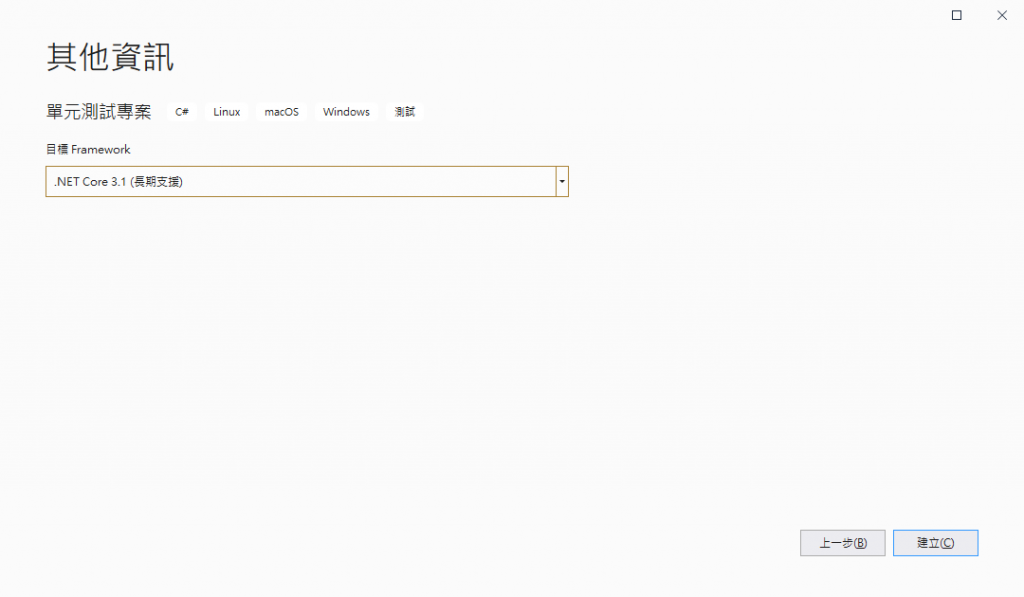
步驟 4. 選擇 .NET Core 版本,並且點選建立
https://ithelp.ithome.com.tw/upload/images/20210915/20091494XRwPH5kjcJ.png

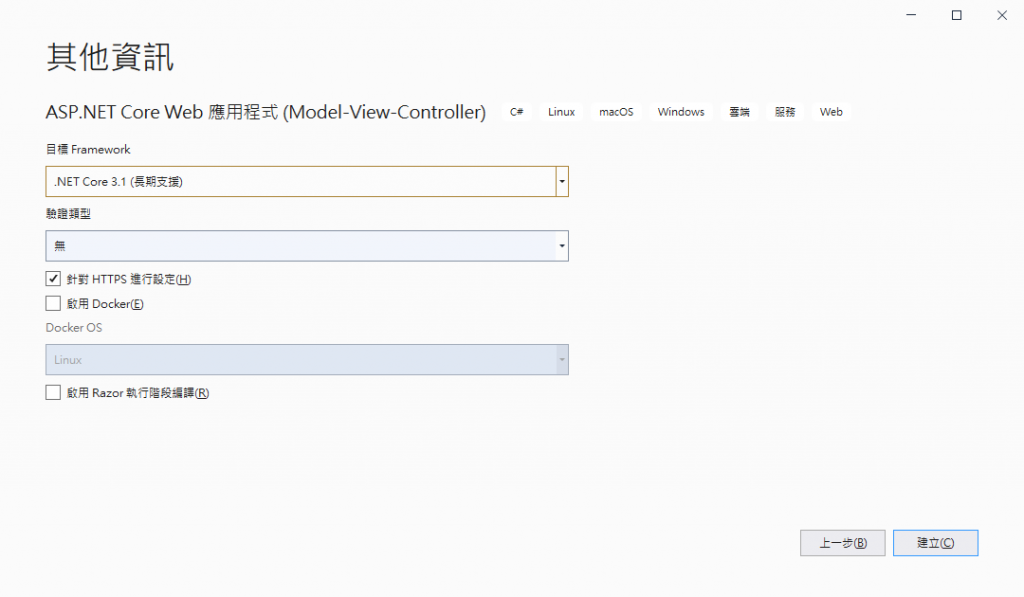
步驟 5. 右鍵點選方案,加入 > 新增專案
https://ithelp.ithome.com.tw/upload/images/20210915/20091494vIMfeU6V99.png

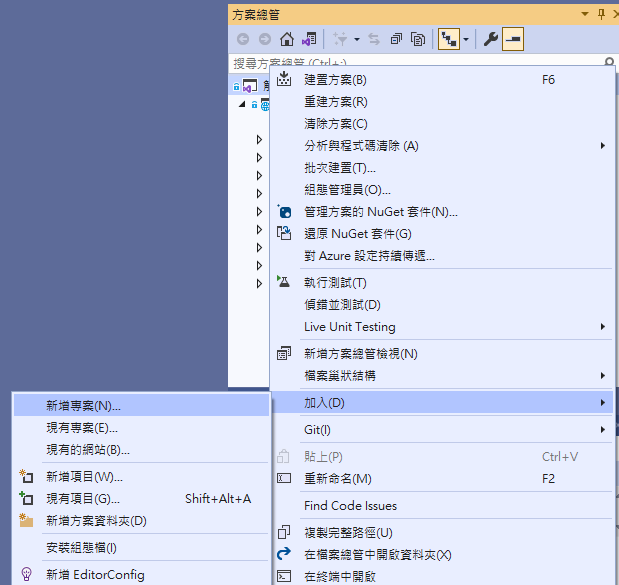
步驟 6. 輸入測試進行搜尋,加入單元測試專案
https://ithelp.ithome.com.tw/upload/images/20210915/200914947s0GhQzDJW.png

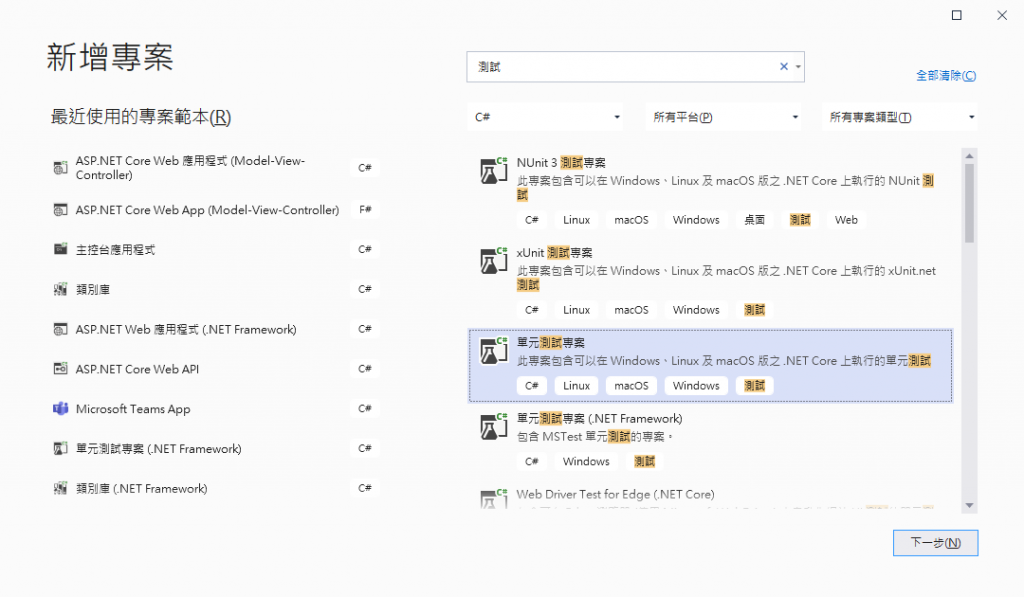
步驟 7. 輸入名稱與支援版本,點選建立
https://ithelp.ithome.com.tw/upload/images/20210915/20091494ewPiZOPGOv.png

https://ithelp.ithome.com.tw/upload/images/20210915/20091494T2AEnGhslp.png

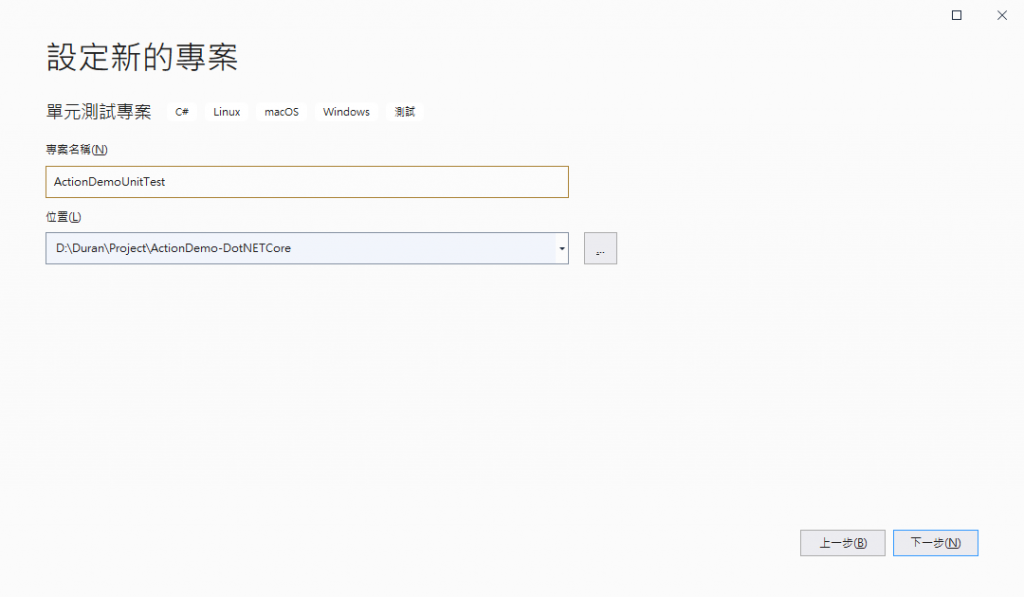
步驟 8. 完成建立測試專案,開啟 UnitTest1.cs,加入下列方法並存檔

[DataTestMethod]
[DataRow(1, 1, 2)]
[DataRow(12, 30, 42)]
[DataRow(14, 1, 15)]
public void Test_Add(int a, int b, int expected)
{
    var actual = a + b;
    Assert.AreEqual(expected, actual);
}

完成後你的程式碼應該如下:
https://ithelp.ithome.com.tw/upload/images/20210915/20091494gX3SezEn7J.png

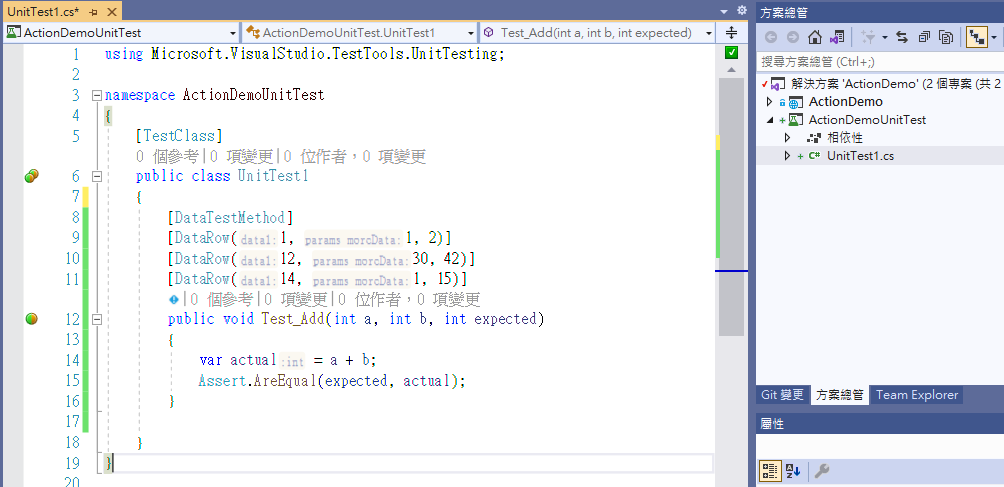
步驟 9. 建立專案完成後,點選上方功能列中的 檢視 > Team Explorer
https://ithelp.ithome.com.tw/upload/images/20210915/20091494D4G0nDHdKg.png

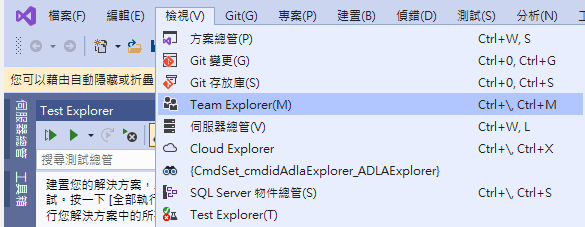
步驟 10. 點選上方像 "插頭" 的按鈕,找到 GitHub > 建立 (需要登入)
https://ithelp.ithome.com.tw/upload/images/20210915/20091494qT9dvCO4s4.png

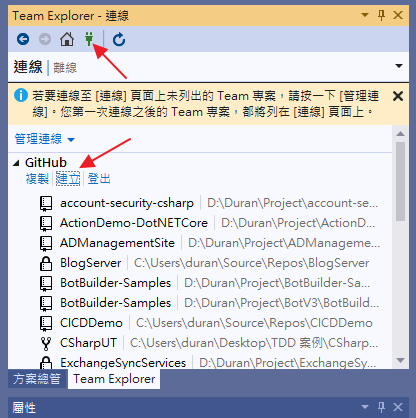
步驟 11. 輸入專案相關資訊,點選建立
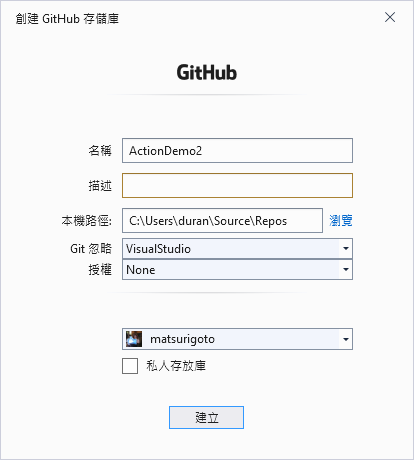
https://ithelp.ithome.com.tw/upload/images/20210915/20091494m5YSfQSRQx.png

步驟 12. 完成上傳
https://ithelp.ithome.com.tw/upload/images/20210915/20091494J8z3lGbsca.png

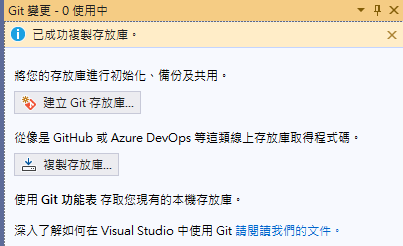
步驟 13. 開啟你的 GitHub Repo,可以發現專案已經上傳
https://ithelp.ithome.com.tw/upload/images/20210915/200914946TKQ9tYr01.png


建立 GitHub Action workflow for .NET Core

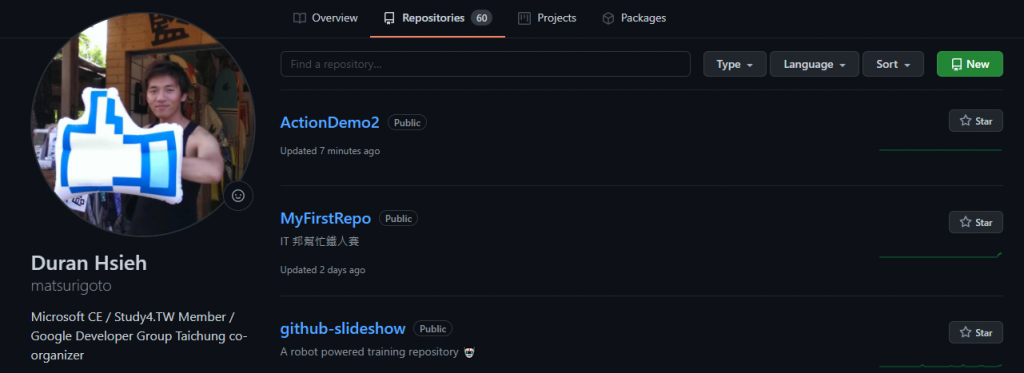
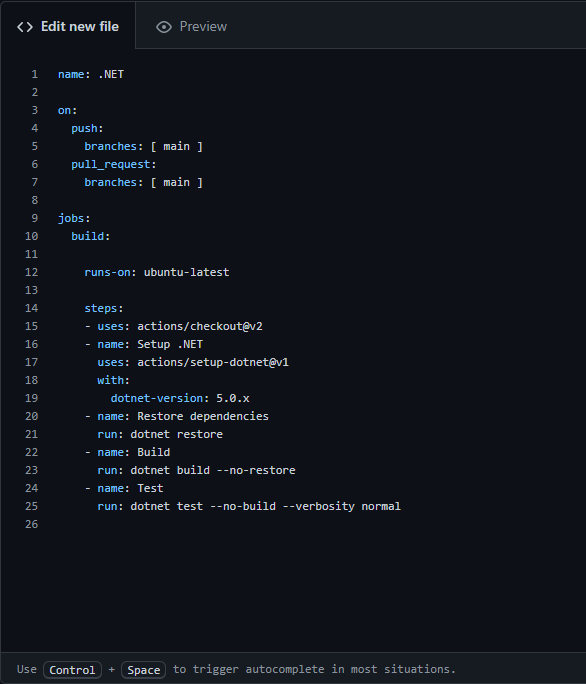
步驟 1. 點選剛剛建立好的 Repo > Action,選擇 .NET
https://ithelp.ithome.com.tw/upload/images/20210915/200914941gk0jhDNSe.png

步驟 2. 專案已經幫我們建立好 YAML 檔案,內容也相當容易閱讀 (若你已經閱讀完 GitHub Action YAML - 語意解析與指令說明)。仔細查看,你會發現只做了 checkout, dotnet restore, dotnet build, 與 dotnet test 這幾個步驟。

注意:在前面專案我們使用的版本為 ASP.NET Core 3.1,若你仔細看 YAML 檔案,我們使用是 5.0.X,建議修改一致

https://ithelp.ithome.com.tw/upload/images/20210915/20091494saeZmAWaSC.png

步驟 3. 點選右上角 Start Commit,儲存 YAML 檔案
https://ithelp.ithome.com.tw/upload/images/20210915/20091494OEU4uNTz1i.png

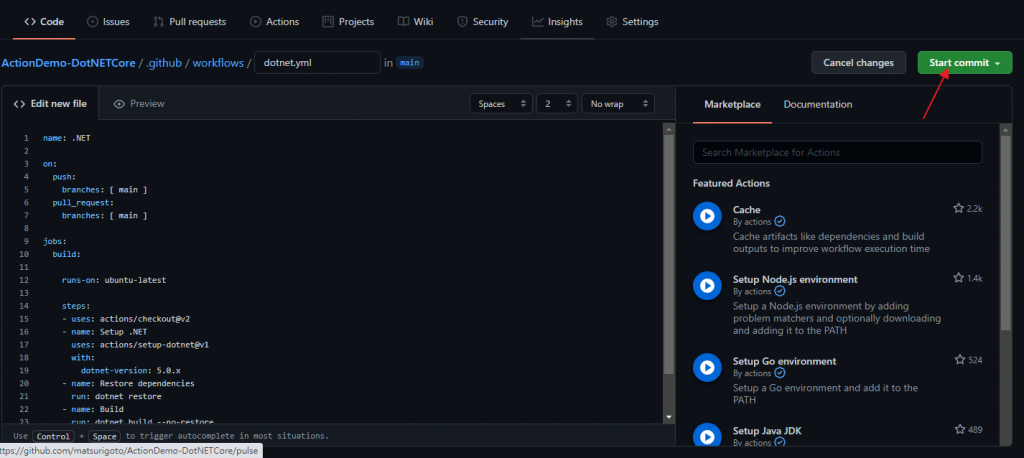
步驟 4. 重新點選 Action 功能,即可以看見 GitHub Action 已經在執行 (因為你的預設 workflow 是有更新就執行)
https://ithelp.ithome.com.tw/upload/images/20210915/2009149454Ho1Jd8NN.png

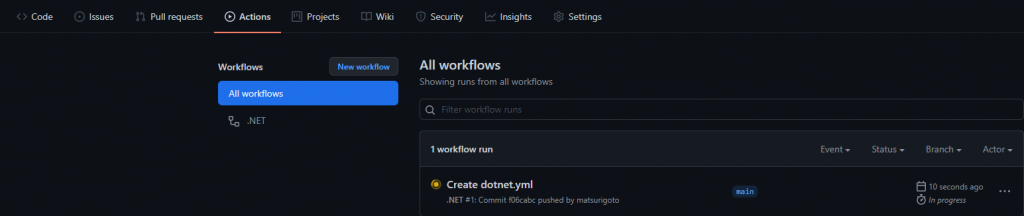
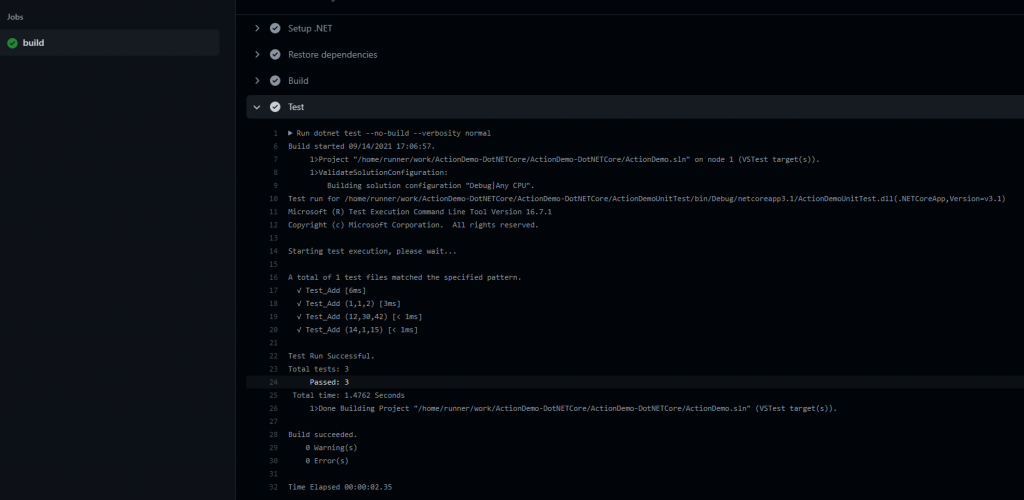
步驟 5. 可以點進去看一下執行結果 (執行時間18秒,成功)
https://ithelp.ithome.com.tw/upload/images/20210915/20091494nZNsKcgB7q.png

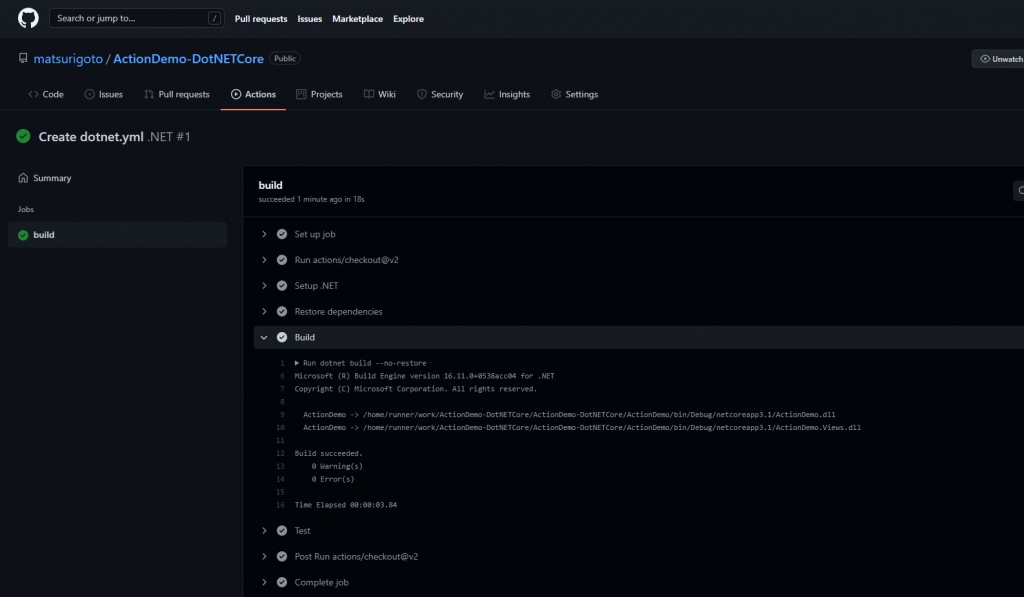
你可以點開 Test 部分,確認你的單元測試有執行成功
https://ithelp.ithome.com.tw/upload/images/20210915/20091494t0QAGUycQu.png


經過這篇文章,你大概知道如何規劃 workflow 進行持續整合工作,配合前幾個章節工具使用與語法學習,你應該有能力開始為自己的專案建立簡單的持續整合流程。在後續的文章,我們將實作持續佈署:將應用程式上傳至 Azure App Service 與 IIS。

若喜歡我的文章,歡迎點 like, 分享與訂閱。


上一篇
GitHub Action YAML 撰寫技巧 - 環境變數(Environment Variables) 與 秘密 (Secrets)
下一篇
GitHub Action 實作持續交付 - 部署至 Azure App Service
系列文
不僅是程式碼代管平台 - Github 能做些什麼?30
圖片
  直播研討會
圖片
{{ item.channelVendor }} {{ item.webinarstarted }} |
{{ formatDate(item.duration) }}
直播中

尚未有邦友留言

立即登入留言