在前一篇文裡提到,VoK希望開發者專注於 Kotlin code 的開發,所以Karibu-DSL 封裝了 Vaadin 渲染 View 的部份,以下將介紹如何顯示及輸入資料。
開新檔,名為 MainView.kt
package com.example.vok

import com.github.mvysny.karibudsl.v10.*
import com.vaadin.flow.router.Route

@Route("")
class MainView: KComposite() {
    private val root = ui{
        verticalLayout {
            content { align(center, top) }
            h1("2021 iThome鐵人賽")
            h2("使用 Kotlin 快速開發 Web 程式 -- Vaadin系列")
        }
    }
}
MainView.kt 繼承 KComposite,實作 ui() 方法並取名為 root 是官方推薦的方式,整個畫面由 ui{} 區段包起來,verticalLayout 為垂直排列。content、h1、h2...都是 Karibu-DSL 一員。
相信寫過 TornadoFX、Ktor HTML DSL、Flutter、Android Jetpack Compose 等框架的開發者對這樣的頁面編寫模式或許不陌生,僅管背後運作機制不盡相同。
同樣的程式,若使用 Vaadin 寫起來會像這樣:
package com.example.vok

import com.vaadin.flow.component.dependency.CssImport
import com.vaadin.flow.component.html.H1
import com.vaadin.flow.component.html.H2
import com.vaadin.flow.component.orderedlayout.VerticalLayout
import com.vaadin.flow.router.Route

@Route("")
@CssImport ( "./styles/shared-styles.css" )
class MainView : VerticalLayout() {
    init {
        add(H1("2021 iThome鐵人賽"))
        add(H2("使用 Kotlin 快速開發 Web 程式 -- Vaadin系列"))
    }
}
看似差不多,但畫面一旦更複雜些,可想而知會更繁雜,且不若DSL階層式容易除錯,更不用說還要自訂css了。
第6行中定義 @Route("") ,別忘了原來的首頁,請記得修改 WelcomView.kt
@Route("old")
class WelcomeView: KComposite() {
   :
   :
}
在Terminal視窗執行 ./gradlew clean web:appRun,打開 http://localhost:8080 出現下列畫面
目前畫面看起來還很陽春,接下來將會一步步逐漸改善,首先建立 MainLayout.kt
package com.example.vok

import com.github.mvysny.karibudsl.v10.KComposite
import com.github.mvysny.karibudsl.v10.div
import com.vaadin.flow.component.page.Viewport
import com.vaadin.flow.router.RouterLayout

@Viewport(Viewport.DEVICE_DIMENSIONS)
class MainLayout: KComposite(), RouterLayout {
    private val root = ui {
        div {
            setSizeFull()
        }
    }
}
此為整個畫面的佈局,日後要加入選單或修改畫面樣式,皆可在此調整。
新增學生資料 data class Student.kt
package com.example.vok

import com.github.vokorm.KEntity
import com.gitlab.mvysny.jdbiorm.Dao
import java.util.*

data class Student(
    override var id: Long? = null,
    var name: String? = null,
    var birthday: LocalDate? = null,
    var created: Date? = null,
    var gender : Gender? = null,
    var height: Double? = null,
    var weight: Double? = null,
    var student_id : String? = null
): KEntity<Long>{
    companion object :Dao<Student, Long>(Student::class.java)
}
KEntity 是 vok-orm 套件裡關於資料表的 interface,上述定義了學生資料表的實體類(entity class) Student。
開新檔 CreateStudentView.kt
package com.example.vok

import com.github.mvysny.karibudsl.v10.*
import com.vaadin.flow.router.Route

@Route("create-student", layout = MainLayout::class)
class CreateStudentView: KComposite() {
    private val binder = beanValidationBinder<Student>()
    private val root = ui {
        verticalLayout {
            h1("新增學生資料")
            textField("姓名"){
                focus()
                bind(binder).bind(Student::name)
            }
            datePicker("生日"){
                bind(binder).bind(Student::birthday)
            }
            comboBox<Gender>("性別"){
                setItems(*Gender.values())
                bind(binder).bind(Student::gender)
            }
            numberField("身高"){
                bind(binder).bind(Student::height)
            }
            numberField("體重"){
                bind(binder).bind(Student::weight)
            }

            button("Save")
        }
    }
}
第6行,Route除了指定此畫面路徑外,後面多了個參數,即是先前建立的主要佈局
第8行,使用 beanValidationBinder 方法,將實體類 Student bind 進來
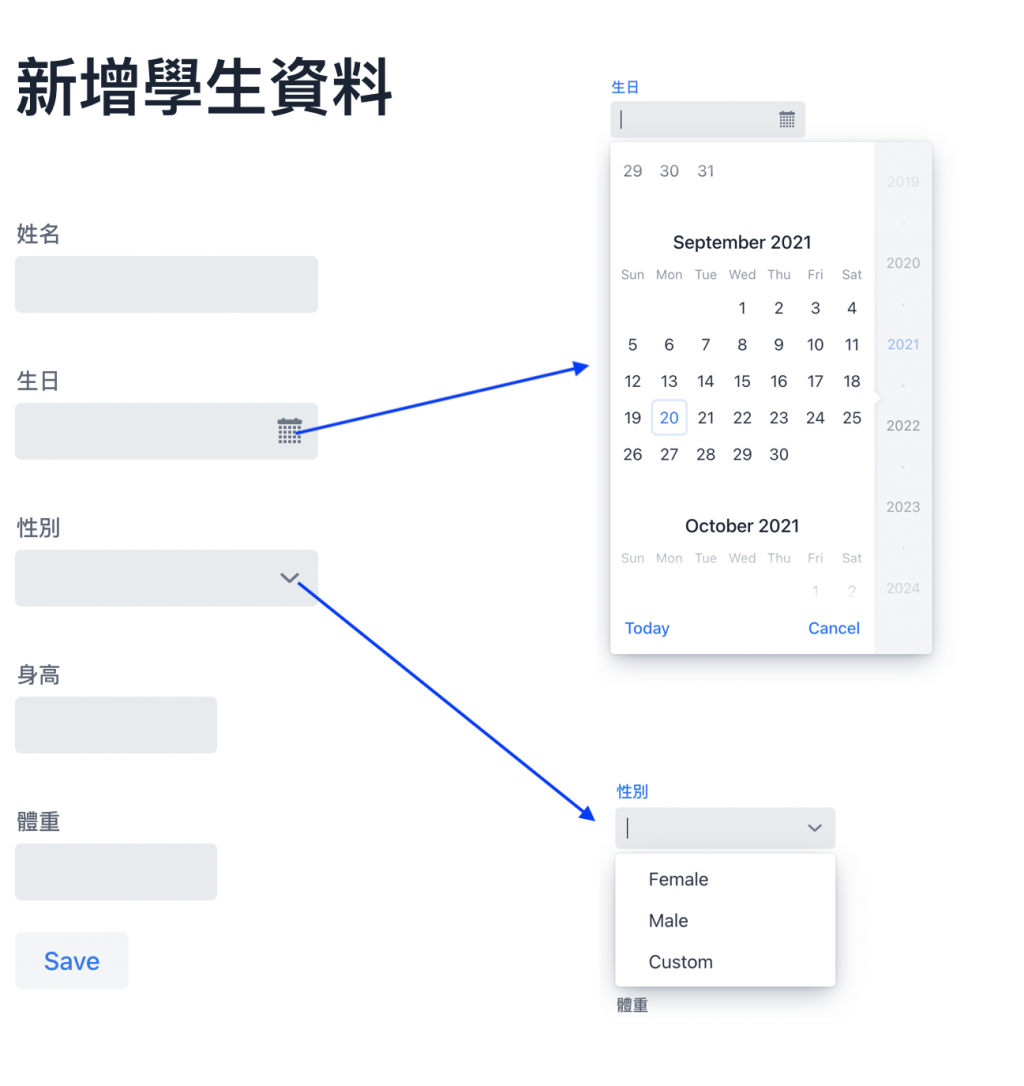
第12行開始,因應需求使用不同 UI Component 供使用者輸入
第20行 性別欄為combobox,在這裡使用 enum 填充選項,請在Student.kt最後加上
    enum class Gender {
        Female,
        Male,
        Custom
    }
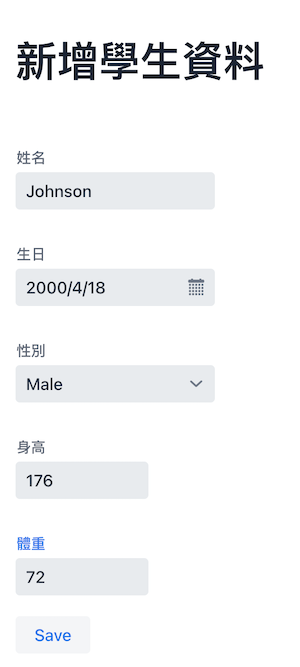
到目前為止,執行畫面如下
但按下Save鍵尚無反應
build.gradle.kts 關於 DB 的依賴設定,在此使用H2 database、flyway migration
    implementation("org.flywaydb:flyway-core:7.1.1")
    implementation("com.h2database:h2:1.4.200")
請在 /web/src/main/resources/db/migration/ 路徑下建立一個 create table 的 SQL DDL script,命名為 V01__CreateStudent.sql,檔名格式為 V[編號]__[檔名].sql,若有多個migration檔,將按照版本(編號)依序執行,且只執行一次。
但目前使用的是H2 database,Server一旦停止資料庫就消失了,此範例每次重新執行,所有migrations 都會被依序執行
    create TABLE Student(
      id bigint auto_increment PRIMARY KEY,
      name VARCHAR(200) NOT NULL,
      birthday DATE,
      created TIMESTAMP,
      gender VARCHAR(20) NOT NULL,
      height DOUBLE NOT NULL,
      weight DOUBLE NOT NULL,
      student_id VARCHAR(20)
    );
定義好資料表後,資料即可實際被儲存,請修改 CreateStudentView.kt
                button("Save"){
                    onLeftClick {
                        val student = Student()
                        if (binder.writeBeanIfValid(student)){
                            student.save()
                        }
                    }
                }
增加 onLeftClick listener,writeBeanIfValid() 方法會檢查 student 是否可儲存再回傳boolean 值
透過顯示單筆資料頁顯示已儲存資料,
package com.example.vok

import com.github.mvysny.karibudsl.v10.*
import com.vaadin.flow.component.Text
import com.vaadin.flow.router.BeforeEvent
import com.vaadin.flow.router.HasUrlParameter
import com.vaadin.flow.router.Route

@Route("student", layout = MainLayout::class)
class StudentView: KComposite(), HasUrlParameter<Long> {
    private lateinit var name: Text
    private lateinit var gender: Text
    private lateinit var birthday: Text
    private val root = ui {
        verticalLayout {
            div {
                strong("姓名 : "); this@StudentView.name = text("")
            }
            div {
                strong("性別 : "); this@StudentView.gender = text("")
            }
            div {
                strong("生日 : "); this@StudentView.birthday = text("")
            }
        }
    }

    override fun setParameter(event: BeforeEvent?, studentId: Long?) {
        val student = Student.getById(studentId!!)
        name.text = student.name
        gender.text = student.gender.toString()
        birthday.text = student.birthday.toString()
    }

    companion object {
        fun navigateTo(studentId: Long) = navigateToView(StudentView::class, studentId)
    }
}
在 ui{ } 內畫出欲顯示欄位,給定預設值空字串
再實作 interface HasUrlParameter setParameter() 方法,用來解析url 帶的參數。此例中,url http://localhost:8080/student/1 studentID 即為 1
        override fun setParameter(event: BeforeEvent?, studentId: Long?) {
            val student = Student.getById(studentId!!)
            name.text = student.name
            gender.text = student.gender.toString()
            birthday.text = student.birthday.toString()
        }
第1行 接收參數 student id
第2行 使用getById()方法查詢id=1的學生資料
第3-5行 分別將取得資料回寫到 ui{} 區塊內的 text()欄位顯示
最後,在CreateStudentView.kt save()方法最後加上一行,傳遞參數 student.id 並跳轉到 StudentView 頁
            button("Save"){
                onLeftClick {
                    val student = Student()
                    if (binder.writeBeanIfValid(student)){
                        student.save()
                        StudentView.navigateTo(student.id!!)
                    }
                }
            }
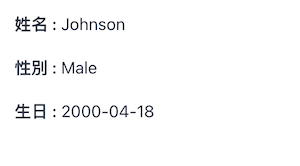
最後執行結果如下


本日程式已上傳Github
