iT邦幫忙

2021 iThome 鐵人賽

DAY 27
0
自我挑戰組

Be friend with JavaScript系列 第 27

Day 27 - axios

  • 分享至 

  • xImage
  •  
  • 利用 XMLHttpRequest 原理
  • 可用 Node.js 後端進行請求
  • 語法簡短
  • 直覺化
  • return 的是 Promise,所以可以使用 then(),catch()等,也可以用 async function。

使用前要先載入Axios 套件,下面兩個 CDN 擇一使用,切記要先載入套件,再載入 JavaScript,因為程式碼由上往下執行,若先載入 JavaScript 再載入 axios 套件會出錯。

  • Using jsDelivr CDN:
    <script src="https://cdn.jsdelivr.net/npm/axios/dist/axios.min.js"></script>
  • Using unpkg CDN:
    <script src="https://unpkg.com/axios/dist/axios.min.js"></script>
  • 若是在 Node.js 安裝則要 npm install axios

當發送請求成功時,會得到一個 response object,而這個 response object 裡面包含了許多內容,包含:

  • data - 從 server 取得的資料
  • status - server 回傳的 HTTP 狀態碼
  • statusText - server 回傳的 HTTP 狀態訊息
  • headers - server 傳送的 headers
  • config - request 提供的配置訊息

axios 可以使用許多請求方式(get, post, put, delete, patch, options, head...等),這邊只介紹取得資料的方式:
axios.get(url, config)
例如:

axios.get("https://randomuser.me/api/?results=1").then(res => {
    console.log(res.data);
    console.log(res.status);
    console.log(res.headers);
    console.log(res.config);
});

來看看成功取得資料後得到的這個 response object 裡的內容
res.data:
https://ithelp.ithome.com.tw/upload/images/20210929/20140282mY81OoOE4p.jpg
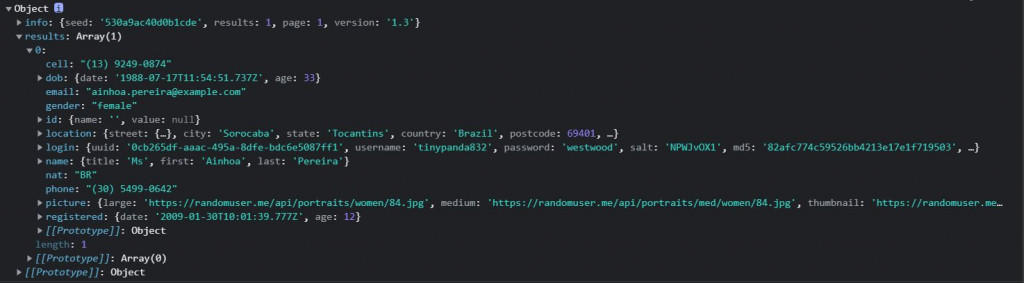
res.status: 因為成功取得資料所以會顯示 200
res.headers:
https://ithelp.ithome.com.tw/upload/images/20210929/201402820CORuLjFse.jpg
res.config:
https://ithelp.ithome.com.tw/upload/images/20210929/20140282GRrtwc3fwP.jpg

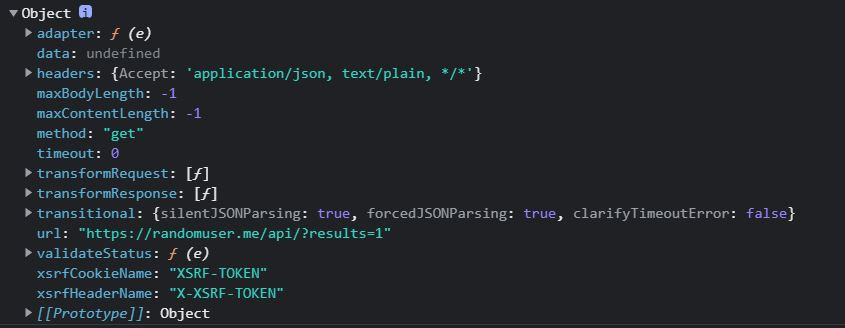
參考資料:https://zetcode.com/javascript/axios/


上一篇
Day 26 - async / await
下一篇
Day 28 - 使用各種方式取得資料
系列文
Be friend with JavaScript39
圖片
  直播研討會
圖片
{{ item.channelVendor }} {{ item.webinarstarted }} |
{{ formatDate(item.duration) }}
直播中

尚未有邦友留言

立即登入留言