承上篇
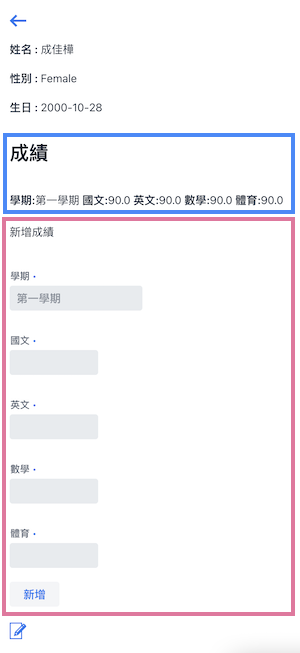
上篇實作完成執行結果如上圖所示,藍色區塊為該學生成績,紅色區塊為新增成績編輯畫面,全部程式皆在StudentView.kt裡,接下來我們要將藍色及紅色部份分離出來。
GradeViewComponent.kt,將藍色區塊程式碼剪下,完成程式如下 :package com.example.vok
import com.github.mvysny.karibudsl.v10.*
import com.vaadin.flow.component.HasComponents
import com.vaadin.flow.component.dependency.CssImport
import com.vaadin.flow.component.dependency.StyleSheet
import com.vaadin.flow.component.orderedlayout.VerticalLayout
class GradeViewComponent: KComposite() {
var studentId: Long = 0
set(value) {
field = value
refresh()
}
private lateinit var grades: VerticalLayout
private val root = ui{
verticalLayout {
isMargin = false
h2("成績")
grades = verticalLayout()
}
}
fun refresh() {
grades.removeAll()
Student.getById(studentId).grades.fetch().forEach {
grades.html("<p>" +
"<strong>學期:</strong>${it.description} " +
"<strong>國文:</strong>${it.mandarin} " +
"<strong>英文:</strong>${it.english} " +
"<strong>數學:</strong>${it.math} " +
"<strong>體育:</strong>${it.pe}" +
"</p>")
}
}
}
fun HasComponents.grandsViewComponent(block: GradeViewComponent.()->Unit = {}) = init(GradeViewComponent(), block)
這裡多了studentId屬性值供外部設定,設定studentId屬性後呼叫refresh()方法,清除成績div區塊後,再讀取成績資料以html語法直接替換顯示。
GradeEditorComponent.kt
package com.example.vok

import com.github.mvysny.karibudsl.v10.*
import com.vaadin.flow.component.HasComponents
import com.vaadin.flow.component.button.Button

class GradeEditorComponent : KComposite() {
    var gradeCreatedListener: () -> Unit = {}
    lateinit var student: Student
    private val gradeBinder = beanValidationBinder<Grade>()
    private lateinit var addGradeButton: Button
    private val root = ui {
        verticalLayout {
            text("新增成績")

            textField("學期") {
                bind(gradeBinder).bind(Grade::description)
                placeholder = "第一學期"
            }
            numberField("國文") {
                bind(gradeBinder).bind(Grade::mandarin)
            }
            numberField("英文") {
                bind(gradeBinder).bind(Grade::english)
            }
            numberField("數學") {
                bind(gradeBinder).bind(Grade::math)
            }
            numberField("體育") {
                bind(gradeBinder).bind(Grade::pe)
            }
            addGradeButton = button("新增") {
                onLeftClick { addGrade() }
            }
        }
    }

    private fun addGrade() {
        val grade = Grade()
        if (gradeBinder.validate().isOk && gradeBinder.writeBeanIfValid(grade)) {
            grade.student_id = student.id
            grade.save()
            gradeBinder.readBean(Grade())
            gradeCreatedListener()
        }
    }
}

fun HasComponents.gradeEditorComponent(block: GradeEditorComponent.() -> Unit = {}) =
    init(GradeEditorComponent(), block)
StudentView.kt
package com.example.vok

import com.github.mvysny.karibudsl.v10.*
import com.vaadin.flow.component.Text
import com.vaadin.flow.component.icon.VaadinIcon
import com.vaadin.flow.router.BeforeEvent
import com.vaadin.flow.router.HasUrlParameter
import com.vaadin.flow.router.Route
import com.vaadin.flow.router.RouterLink

@Route("student", layout = MainLayout::class)
class StudentView: KComposite(), HasUrlParameter<Long> {
    private lateinit var editLink: RouterLink
    private lateinit var name: Text
    private lateinit var gender: Text
    private lateinit var birthday: Text
    private lateinit var gradeView: GradeViewComponent
    private lateinit var gradeEditor: GradeEditorComponent
    private val root = ui {
        verticalLayout {
            routerLink(VaadinIcon.ARROW_LEFT, null, viewType = AllStudentsView::class)
            div {
                strong("姓名 : "); this@StudentView.name = text("")
            }
            div {
                strong("性別 : "); this@StudentView.gender = text("")
            }
            div {
                strong("生日 : "); this@StudentView.birthday = text("")
            }
            gradeView = grandsViewComponent()
            gradeEditor = gradeEditorComponent {
                gradeCreatedListener = { gradeView.refresh() }
            }
            editLink = routerLink(VaadinIcon.EDIT,null)
        }
    }

    override fun setParameter(event: BeforeEvent?, studentId: Long) {

        val student = Student.getById(studentId)
        gradeView.studentId = studentId
        gradeEditor.student = student
        name.text = student.name
        gender.text = student.gender.toString()
        birthday.text = student.birthday.toString()
        editLink.setRoute(EditStudent::class, student.id!!)
    }

    companion object {
        fun navigateTo(studentId: Long) = navigateToView(StudentView::class, studentId)
    }
}
gradeView、gradeEditor分別為藍色、紅色區塊
以下程式會使用到簡單 html、css 概念
除了可使用html()方法輸出 HTML 外,亦可使用 Karibu-DSL提供的其他方法。紅色區塊要將它改為div table 顯示
    fun refresh() {
        grades.removeAll()
        grades.apply {
            div("table") {
                div("tr") {
                    div("td") { strong("學期") }
                    div("td") { strong("國文") }
                    div("td") { strong("英文") }
                    div("td") { strong("數學") }
                    div("td") { strong("體育") }
                }
            }
        }
        Student.getById(studentId).grades.fetch().forEach {
            grades.apply {
                div("table") {
                    div("tr") {
                        div("td") { label("${it.description}") }
                        div("td") { label("${it.mandarin}") }
                        div("td") { label("${it.english}") }
                        div("td") { label("${it.math}") }
                        div("td") { label("${it.pe}") }
                }
            }
        }
    }
div後面括號內為css class name ,表示我們需要一個 css檔。在Vaadin flow framework 專案結構,css檔放置在 web/frontend/,新增 table.css
.table {
  display: table;
  border-collapse: collapse;
  width: 500px;
  margin:0px;
}

/* tr */
.tr{
    display: table-row; border:0px; margin:0px;
}

/* td , th */
.td {
  display: table-cell;
  width: 180px;
}
css 已經準備好了,該如何引入呢?請開啟 GradeViewComponent.kt,在最前面加上標示
@CssImport("frontend://table.css")
class GradeViewComponent : KComposite() {

(略)
}
這樣就完成自訂樣式(style)的畫面了。雖然看起來似乎複雜了一點,但需要自訂Style時非常的好用,執行結如果下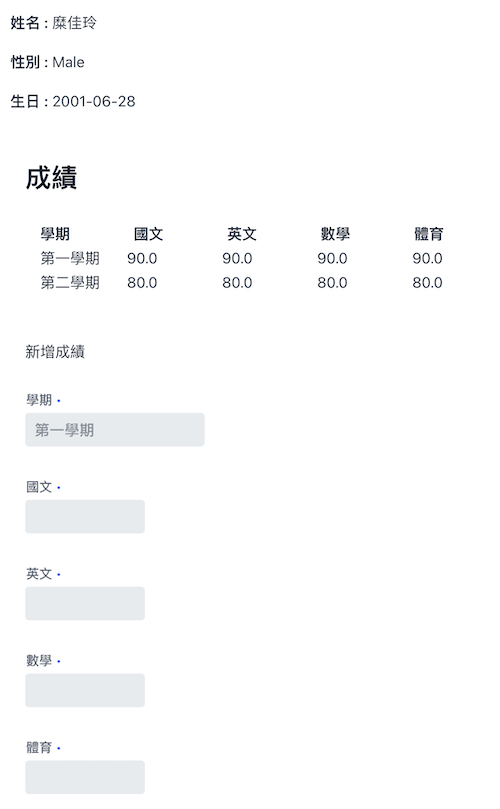
參考資料 : css產生器
本日程式已上傳GitHub


 iThome鐵人賽