今天我們會利用上一篇的 分頁組件 範例來做更改,不過差別在於,這次我們父子組件的溝通不是透過 props & $emit 而是透過另一個方式來達成相同的功能
接著我們今天就會透過 ref 的方式來改寫上一次的分頁組件範例,達到相同的功能
使用方式 : 在組件上透過給定 ref 這個 attribute ,為子組件賦予一個 ID 引用
<component ref="自定義ID"></component>
this.$refs.自定義ID.要取得的子元素內容或是方法
記得,父層訪問是透過 this.$refs
看到這裡是不是感覺畫面好像更簡潔? 我們不再需要定義一堆東西在子組件上面了~
HTML 部份
<div id="app">
  <ul>
      <li v-for="item in renderData">{{ item.text }}</li>
  </ul>
  <page-component ref="pages"></page-component>
</div>
這邊父組件只定義 ref,用來當做與子組件溝通的橋樑
父組件部份
var app = new Vue({
  el: '#app',
  data:{
    pageIndex: 1,
    pageCount: 3,
    itemCount: 6,
    pageSize: 2,
    datas: [
        { id: 1, text: "1111" },
        { id: 2, text: "2222" },
        { id: 3, text: "3333" },
        { id: 4, text: "4444" },
        { id: 5, text: "5555" },
        { id: 6, text: "6666" },
    ],
  },
  mounted() {
      // 透過 this.$refs 去調用子組件的 init function,並傳入參數 this (Vue 實例)
      this.$refs.pages.init(this);
  },
  computed:{
    renderData(){
      if (this.pageIndex === 1) {
          return this.datas.filter(ele => ele.id <= 2);
      }
      if (this.pageIndex === 2) {
          return this.datas.filter(ele => ele.id > 2 && ele.id <= 4);
      }
      if (this.pageIndex === 3) {
          return this.datas.filter(ele => ele.id > 4 && ele.id <= 6);
      }
    }
  },
  methods:{
      updatePage(idx) {
          this.pageIndex = idx;

          // 透過 this.$refs 去調用子組件的 init function,確保資料有同步
          this.$refs.pages.init(this);
      }
  }
})
透過 this.$refs 去調用子組件的方法,並將 Vue 實例 當作參數傳給 子組件
子組件部份 ( component )
Vue.component('page-component', {
    template: `
        <div>
            <button type="button" @click="prev">上一頁</button>
            <button type="button" :class="{pagenow: pageNow === item}" v-for="item in totalPage" @click="pageTo(item)">{{ item }}</button>
            <button type="button" @click="next">下一頁</button>
        </div>
    `,
    data: function () {
        return {
            pageNow: 1,
            totalPage: 1,
            fatherVue: null,
        }
    },
    methods: {
        init(parentVue) {
            this.fatherVue = parentVue;
            this.totalPage = parentVue.pageCount;
            this.pageNow = parentVue.pageIndex;
        },
        prev() {
            if (this.fatherVue.pageIndex <= 1) return;
            this.pageNow--;
            this.fatherVue.updatePage(this.pageNow);
        },
        next() {
            if (this.fatherVue.pageIndex === this.fatherVue.pageCount) return;
            this.pageNow++;
            this.fatherVue.updatePage(this.pageNow);
        },
        pageTo(idx) {
            this.fatherVue.updatePage(idx);
        }
    },
});
子組件在父組件呼叫 init function 時,初始化並同步數據
並將父組件傳過來的參數 this >> init(parentVue) 儲存為 fatherVue,用來與父組件溝通
所以用 this.fatherVue.updatePage(參數); ,請父組件更新訊息
就完成了跟上一次一樣的功能了~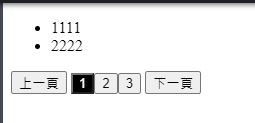
其實父子組件的溝通,還有其他的方式,不過這邊就只稍微介紹兩種我自己運用的方式
props & $emit
ref
還有 Vuex ... 等,但就有興趣再去找找文章啦~
itread01.com , Vue元件間通訊6種方式
Vue 官方文件 - 访问子组件实例或子元素
碼上快樂 , Vue.js中ref ($refs)用法舉例總結