話說~ 從疫情到現在,已經不知道多久沒出去玩了~
好想出去玩玩喔~
從開賽到現在已經默默地來到第二十天了~
以目前所學習的內容,已經可以開發一個小小 Vue 的專題了,所以現在跟著一起做吧
在之前的開發,我們通常是使用 ajax 來取得資料,不過在 Vue 中,比較常使用的方式為 axios
一樣的我們先將 axios 套件 CDN 引入到檔案內
<script src="https://unpkg.com/axios/dist/axios.min.js"></script>
接著就與 ajax 的使用方式差不多囉~ 以 GET 為範例
new Vue({
  el: '#app',
  data () {
    return {
    }
  },
  mounted () {
    axios
      .get('https://www.runoob.com/try/ajax/json_demo.json')
      .then(response => {
          // 請求成功處理
      })
      .catch(function (error) {
          // 请求失败处理
      });
  }
})
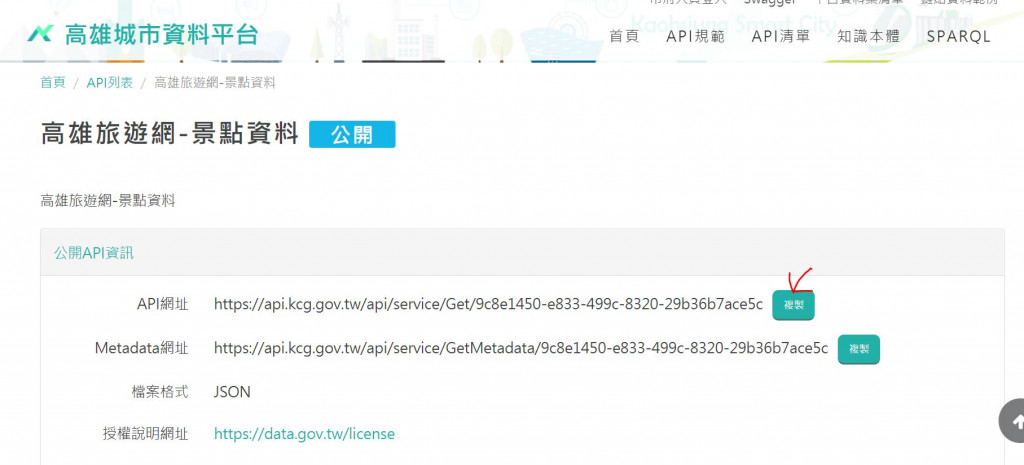
這次的小專題,會使用到 高雄市政府的 API資料開放平台,先取得景點資料
高雄市政府的 API資料開放平台
高雄旅遊網-景點資料
<div id="app">
<ul>
  <li v-for="item in attractions" :key="item.Id">{{ item.Name }}</li>
</ul>
</div>

<script>
var app = new Vue({
  el: '#app',
  data:{
    attractions: []
  },
  mounted() {
    this.getDatas();
  },
  methods:{
    getDatas(){
      axios.get("https://api.kcg.gov.tw/api/service/Get/9c8e1450-e833-499c-8320-29b36b7ace5c").then( res => {
        this.attractions = res.data.data.XML_Head.Infos.Info;
      }).catch( error => { })
    }
  }
})
</script>
目前就可以印出所有的旅遊景點了
這邊使用到切割字串( substring )、判斷是否在陣列內( includes )的手法來製作
var app = new Vue({
  el: '#app',
  data:{
    attractions: [], // 原始資料
    areaList: [], // 地區列表
  },
  mounted() {
    this.getDatas();
  },
  methods:{
    getDatas(){
      axios.get("https://api.kcg.gov.tw/api/service/Get/9c8e1450-e833-499c-8320-29b36b7ace5c").then( res => {
        this.attractions = res.data.data.XML_Head.Infos.Info;
        this.getAreaList();
      }).catch( error => { })
    },
    getAreaList(){
      this.attractions.forEach(ele => {

        // 因為沒有地區欄位,所以自己切割出來
        let areaName = ele.Add.substring(6,9);

        // 如果地區列表內不存在當前地區,就 push 進去 ( 過濾重複 )
        if(!this.areaList.includes(areaName)) this.areaList.push(areaName);
      })
    }
  }
})
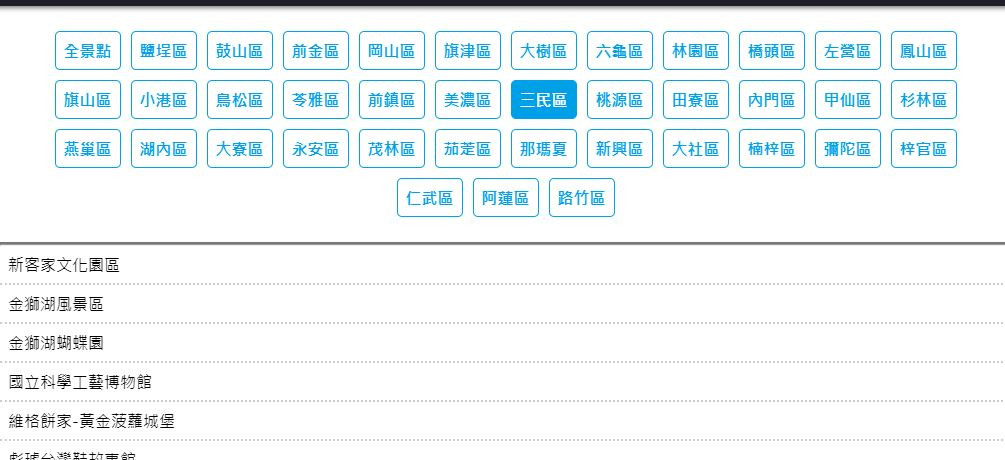
這邊使用到 match 做判斷,記錄當前選中地區並套用選中樣式
HTML 部份
<div id="app">
  <div class="flexbox areaList">
    <div class="areaBtn" :class="{activeArea: selectArea === '全景點'}" @click="setArea('全景點')">全景點</div>
    <div class="areaBtn" :class="{activeArea: selectArea === item }" v-for="item in areaList" :key="item" @click="setArea(item)"> {{ item }} </div>
  </div>
  <hr>

  <ul>
    <li v-for="item in renderAttractions" :key="item.Id">{{ item.Name }}</li>
  </ul>
</div>
套用 css 來凸顯目前選擇的地區或狀態,並改成根據選擇條件做列表渲染
JS 部份
var app = new Vue({
  el: '#app',
  data:{
    attractions: [],
    areaList: [],
    selectArea: '全景點', // 預設選中全景點
  },
  mounted() {
    this.getDatas();
  },
  computed:{
    // 根據選擇條件做即時列表渲染
    renderAttractions(){
      if(this.selectArea === '全景點'){
        return this.attractions;
      }else{
        return this.attractions.filter(ele => ele.Add.match(this.selectArea))
      }
    }
  },
  methods:{
    getDatas(){
      axios.get("https://api.kcg.gov.tw/api/service/Get/9c8e1450-e833-499c-8320-29b36b7ace5c").then( res => {
        this.attractions = res.data.data.XML_Head.Infos.Info;
        this.getAreaList();
      }).catch( error => { })
    },
    getAreaList(){
      this.attractions.forEach(ele => {
        let areaName = ele.Add.substring(6,9);
        if(!this.areaList.includes(areaName)) this.areaList.push(areaName);
      })
    },
    setArea(item){
      // 儲存選中選項
      this.selectArea = item;
    }
  }
})
目前就先完成到可依照選擇條件查看該地區的景點了~
v-bind:class
v-for 列表渲染computed 做動態列表渲染@click 事件處理