昨天成功將Django網站佈署到Heroku上,當然我們會需要撰寫BackendURL頁面來讓API可以被呼叫,但在此之前,有一項技能必須要先點亮才行,就是如何使用Heroku的資料庫!不然我們被API呼叫丟進來的PayToken,沒辦法儲存下來。
Heroku不支援原本Django預設的SQLite,因此我們要使用Heroku自帶的主流資料庫-- Heroku Postgres。
我們繼續使用Heroku CLI,輸入以下指令可以先確認一下,會看到是否有資料庫的add-on。
> heroku addons

這邊會看到預設已建立好一個Heroku Postgres資料庫,但有了這個後要怎麼使用呢?
我們會用兩種方式進行資料庫的使用:
pgAdmin,較直覺也省時間。psycopg2
關於Postgres的pgAdmin圖形化資料庫管理工具下載與安裝步驟,我就不細說明。這個到官網去,聰明的你一定可以一路next到底就解決的了。
安裝好pgAdmin後,我們需要作資料庫連接的初始設定,因為Heroku幫我們建好了資料庫,我們也有UI管理工具,接下來就是要取得連接的資訊。
有兩種方式可以取得:
我們使用以下指令,可以查詢Database連線資訊
> heroku config

其中config的字串以下列方式進行解析:
postgres://{user}:{password}@{hostname}:{port}/{database-name}
所以可以找出user、password、hostname、port、database-name這五個資訊備用。
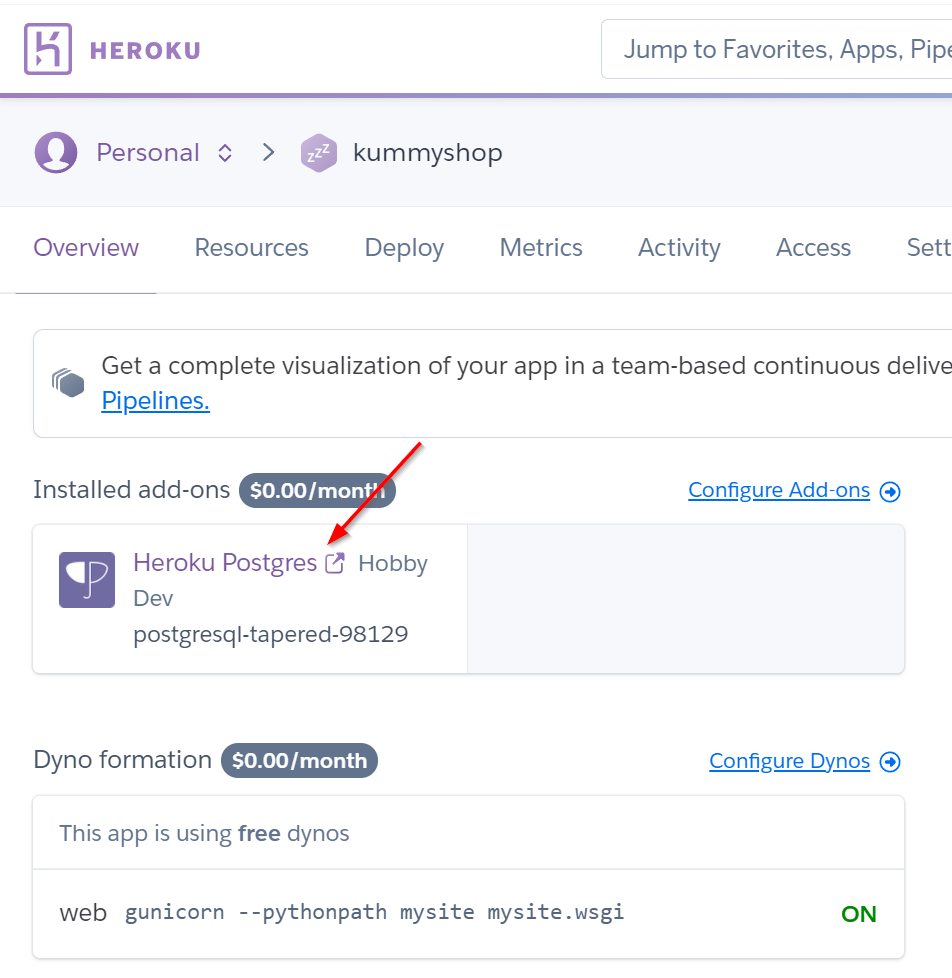
在登入後,首頁可看到Heroku Postgres的連接,點進去後可看到Datastore相關的資訊。
接著,再點入Settings後,查看View Credentials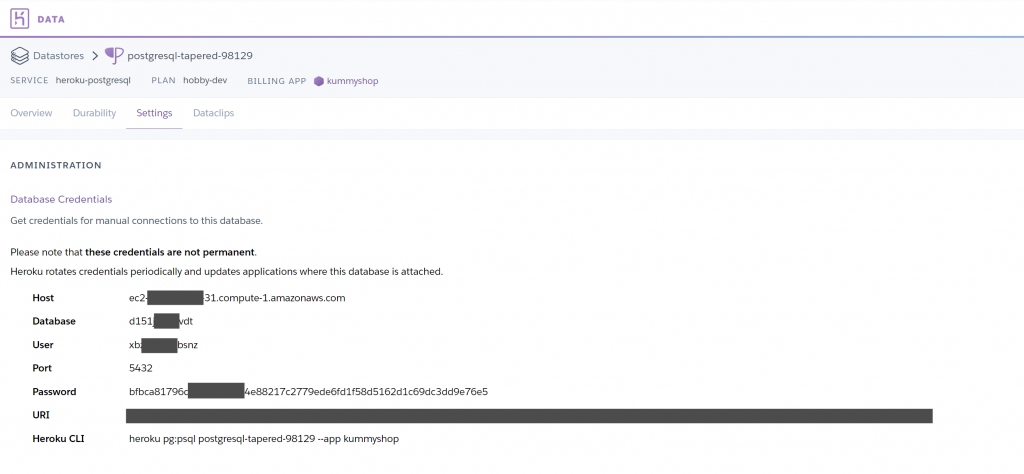
也可以找到對應的User、Password、Host、Port、Database值。
我們在Servers底下執行Create Server,在對應的欄位輸入上面取得的資訊。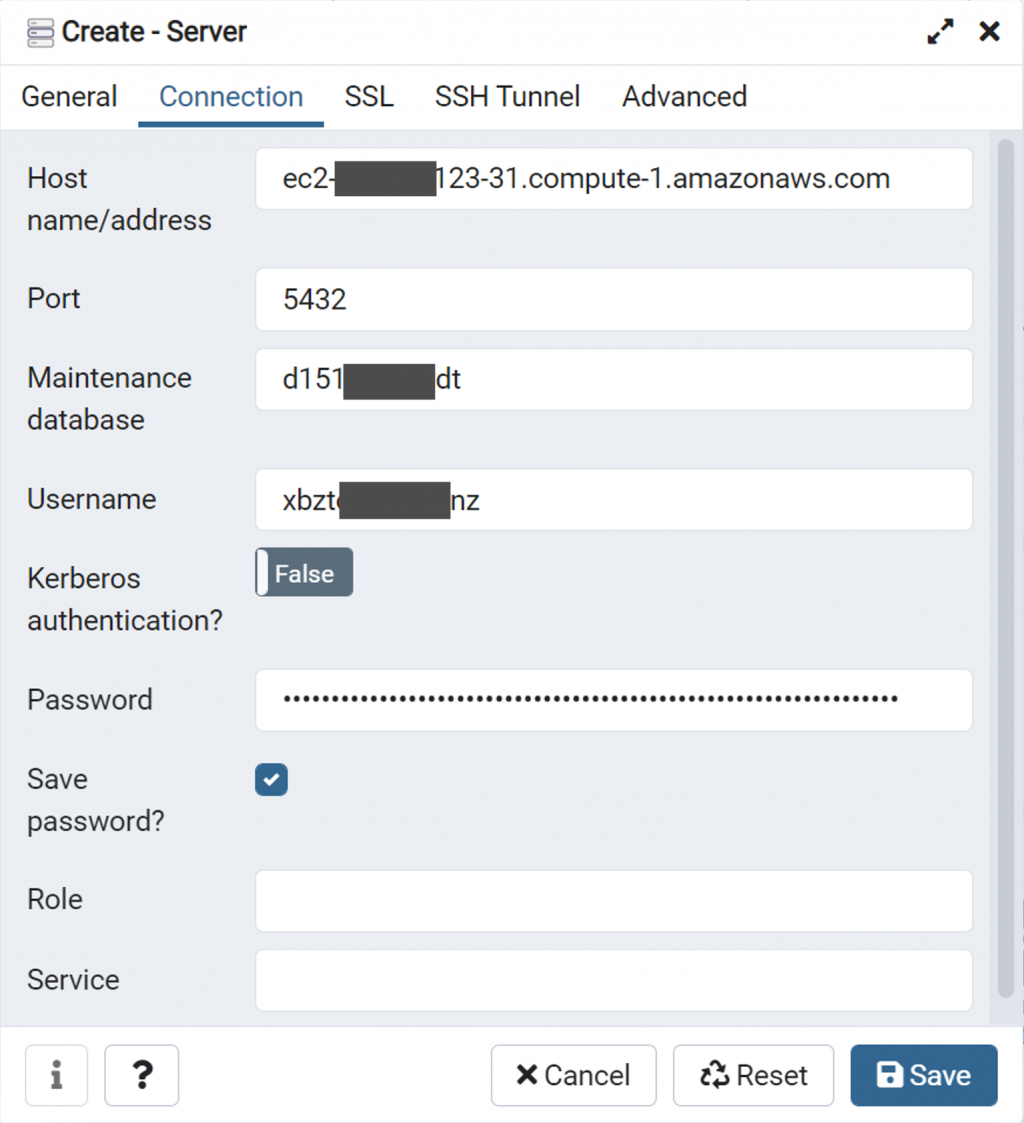
另外在SSL Tab中,將SSL mode從Prefer改為你所需要的,例如Require或Allow。依個人所需,其差異如下:
| sslmode | Eavesdropping protection | MITM protection | Statement |
|---|---|---|---|
| disable | No | No | I don't care about security, and I don't want to pay the overhead of encryption. |
| allow | Maybe | No | I don't care about security, but I will pay the overhead of encryption if the server insists on it. |
| prefer | Maybe | No | I don't care about encryption, but I wish to pay the overhead of encryption if the server supports it. |
| require | Yes | No | I want my data to be encrypted, and I accept the overhead. I trust that the network will make sure I always connect to the server I want. |
| verify-ca | Yes | Depends on CA-policy | I want my data encrypted, and I accept the overhead. I want to be sure that I connect to a server that I trust. |
| verify-full | Yes | Yes | I want my data encrypted, and I accept the overhead. I want to be sure that I connect to a server I trust, and that it's the one I specify. |
表面資料來源:Table 31-1. SSL Mode Descriptions
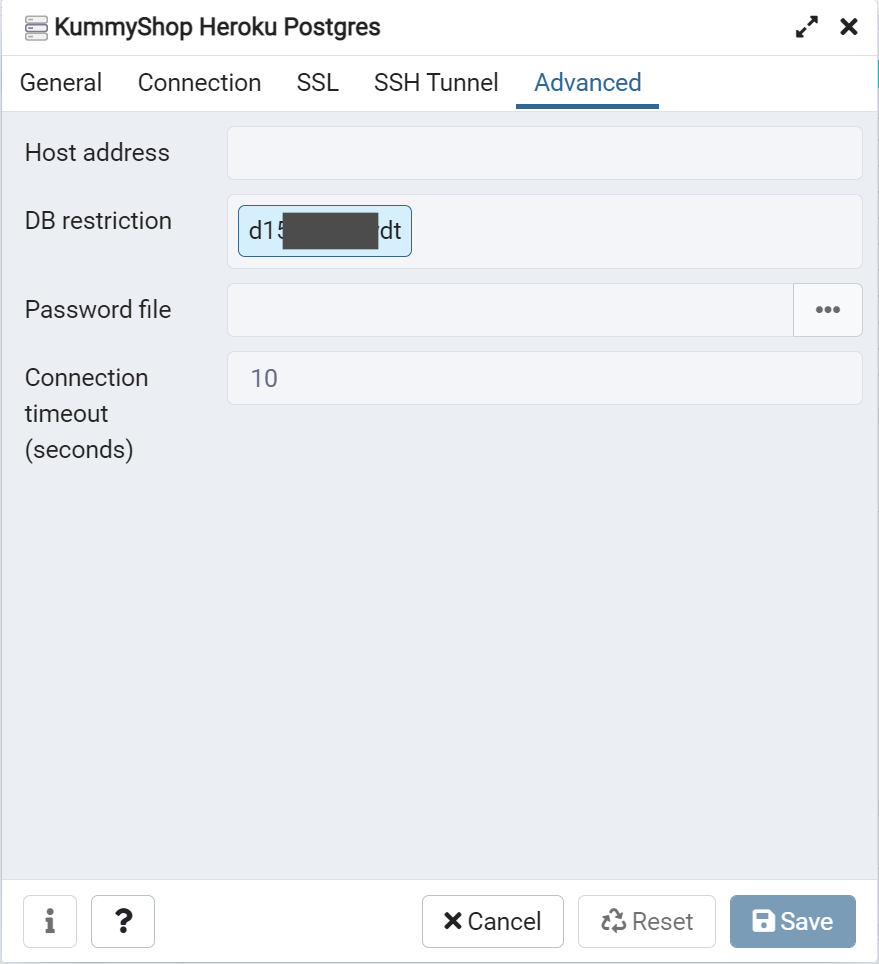
而在Advanced Tab中,在DB restriction將剛剛的Database值輸入,這樣可以讓這個共用Server連上後,只顯示我們的這個資料庫,不然到時候會有好幾千個同樣也掛在這個DB Server上面的Database (雖然都無權限存取)。
成功連上後,我們可以看到左側樹狀結構以及進行簡單查詢也可看到Table資料。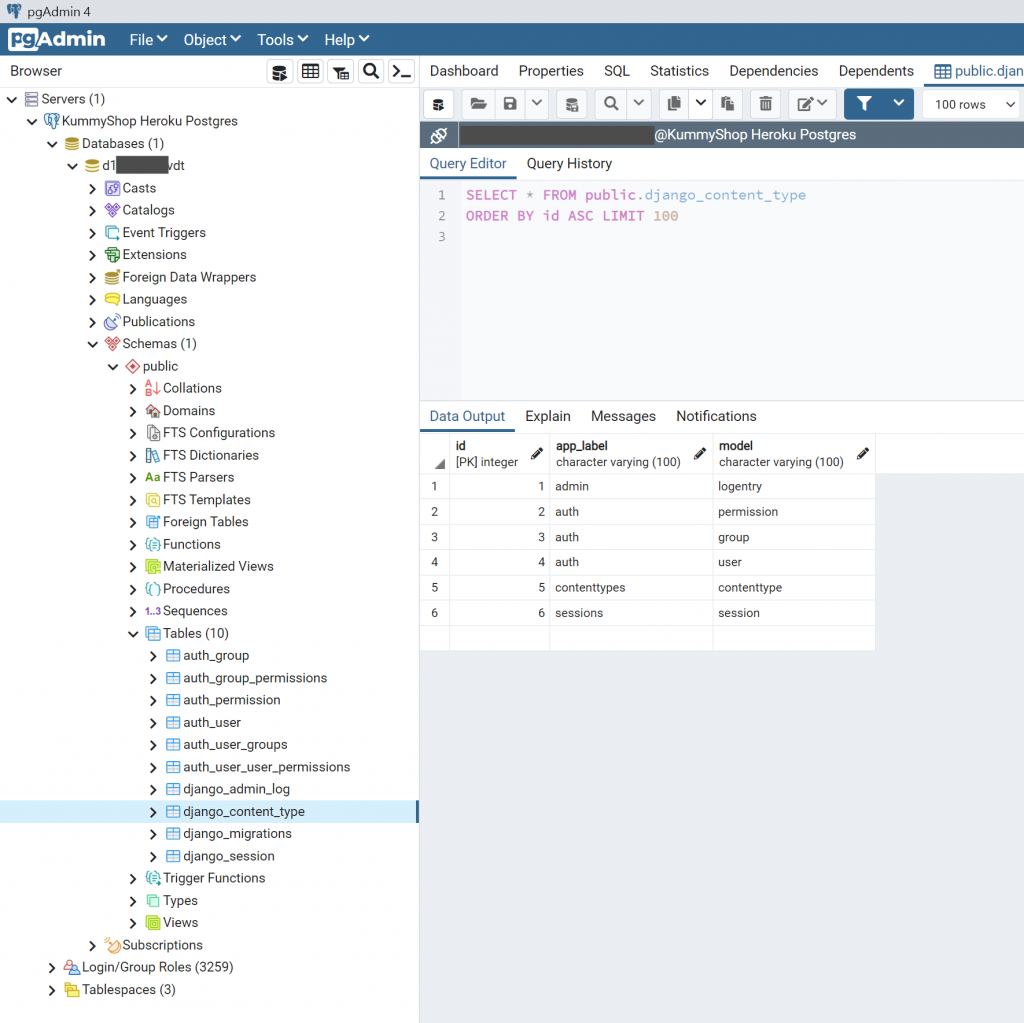
我們需要資料庫來記錄Order在建立時的初始資料,以及等待API呼叫BackendURL時,可將PayOrder更新到已建立的訂單中。我們先建立一個Table叫ks_order_payment專門來處理訂單的延伸付款資料,由於目前並不打算建立整電商系統,因此就只模擬情境建立我們所需要的資料即可,想像中會有一個完整的ks_order與ks_order_detail資料表,然後才有這個payment的延伸資料,但我們先不進行實作。
透過UI建立新的Table以及Columns,如下: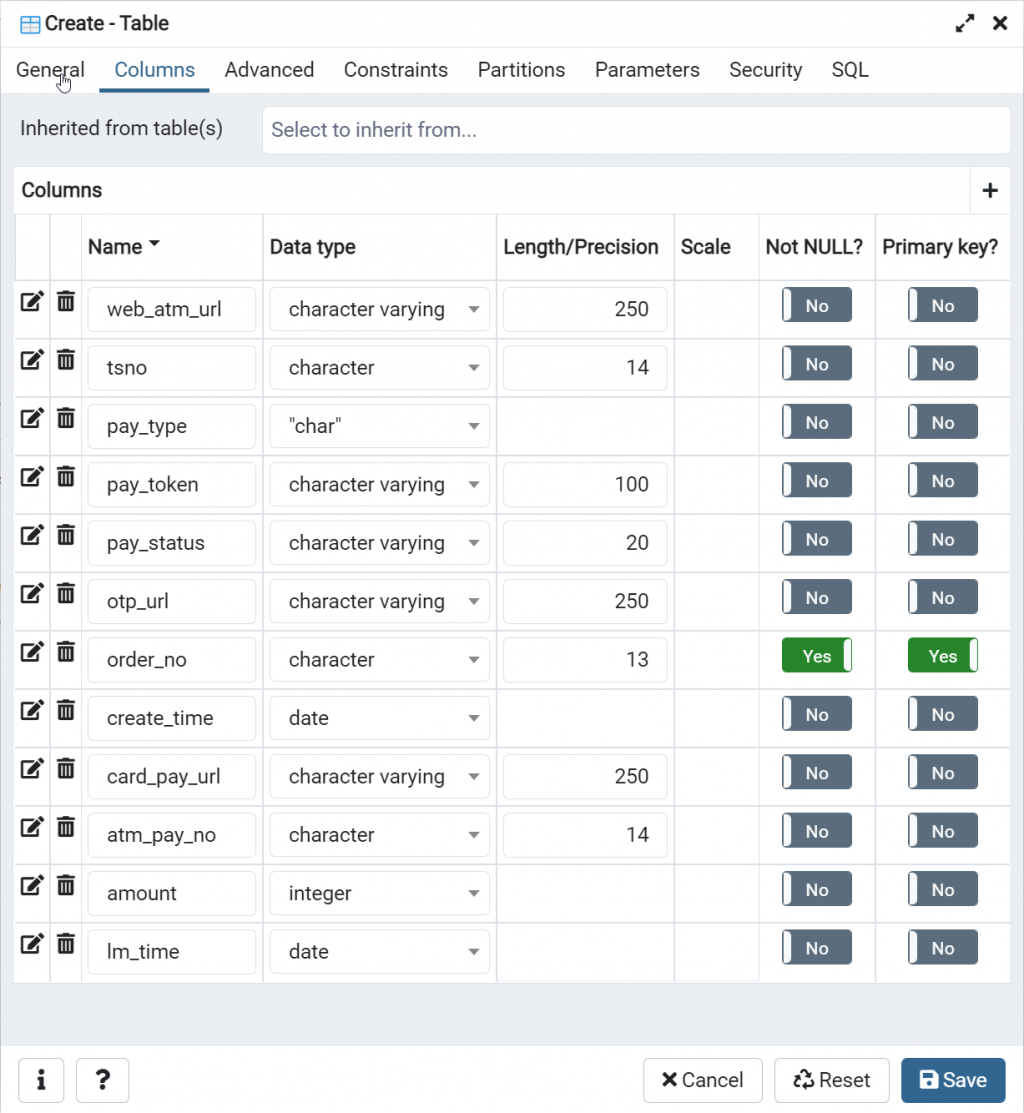
欄位我就不一一說明,這邊會以order_no作為Primary Key,然後訂單建立順序的排序會以ks_order_payment來排序,剩下的就是其他我們想記錄的各種屬性欄位。
UI有SQL功能幫我們產生好語法:
CREATE TABLE IF NOT EXISTS public.ks_order_payment
(
    web_atm_url character varying(250),
    tsno character(14),
    pay_type "char",
    pay_token character varying(100),
    pay_status character varying(20),
    otp_url character varying(250),
    order_no character(13) NOT NULL,
    create_time date,
    card_pay_url character varying(250),
    atm_pay_no character(14),
    amount integer,
    lm_time date,
    PRIMARY KEY (order_no)
)

TABLESPACE pg_default;

ALTER TABLE public.ks_order_payment
    OWNER to xbz_____zbsnz;
另一個使用Django的物件關聯對映(ORM, Object Relational Mapping)技術,就是以Model類別方式宣告,自動與連線好的資料庫進行對應,包含建立所需要的關聯式資料庫Table,之後針對物件作新增、修改、刪除等操作,也會直接反映到資料庫中。
這部份,就等明天再來寫了!
