在上一章我們使用的倉庫內的chart,這章後面會介紹怎麼建立自己的chart,不過在建立自己的的chart前,可以看看是否已經有線上寫好的版本,這時你就需要透過指令尋找chart。
當你想要尋找特定chart時,可以透過search指令來尋找chart,
helm search hub
或者
helm search repo
這兩者的差別在於 search hub 是去Artifact hub 找尋chart。
如下圖: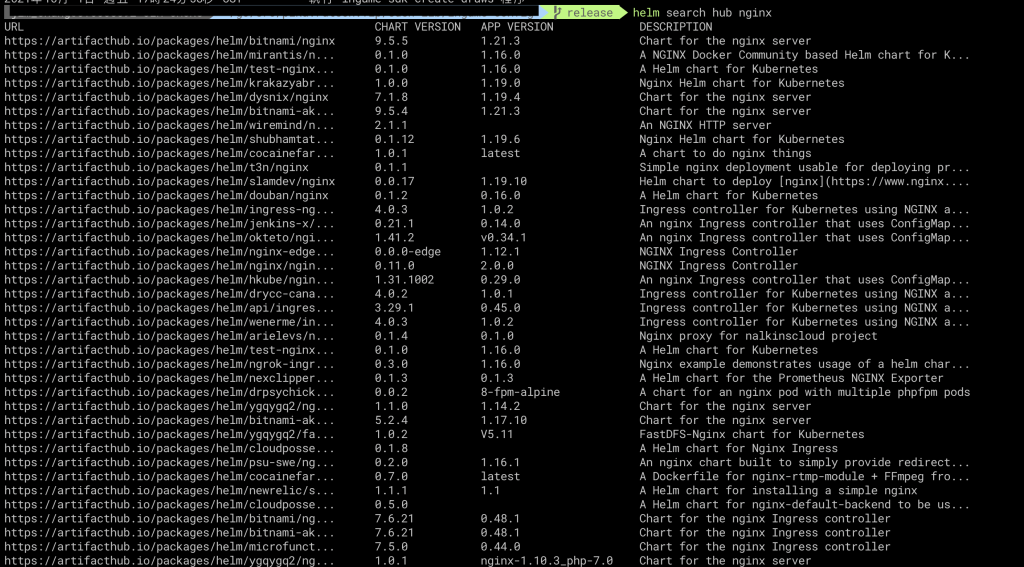
而helm search repo則是搜尋你加到本機repo的chart(用helm repo add)加到本機的。
如下圖:
可以看到從線上的Artifact hub找到的chart比我們當初加入到本地repo的chart多上很多,如果只是單純要找chart的話,可以用search hub去尋找即可。
如果你看了線上的chart都沒有你要的,就可以建立一個自己的chart。
要建立自己的chart,可以透過helm create指令:
helm create nginx-demo
他會建出像下圖的目錄: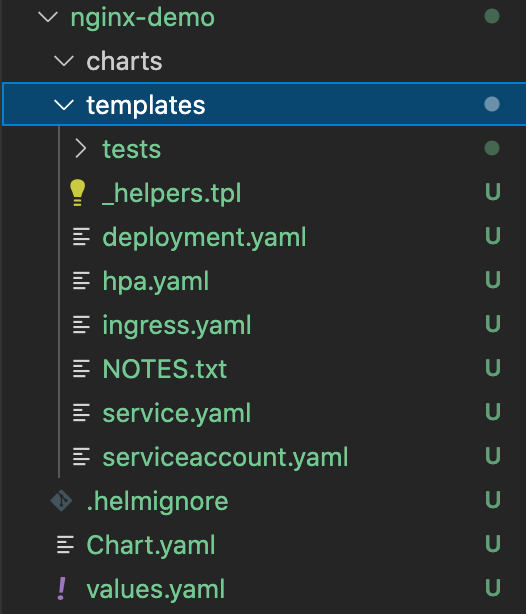
打開deployment.yaml,可以看到他出現下面這種格式:
apiVersion: apps/v1
kind: Deployment
metadata:
  name: {{ include "nginx-demo.fullname" . }}
  labels:
    {{- include "nginx-demo.labels" . | nindent 4 }}
spec:
  {{- if not .Values.autoscaling.enabled }}
  replicas: {{ .Values.replicaCount }}
  {{- end }}
  selector:
    matchLabels:
      {{- include "nginx-demo.selectorLabels" . | nindent 6 }}
  template:
    metadata:
      {{- with .Values.podAnnotations }}
      annotations:
        {{- toYaml . | nindent 8 }}
      {{- end }}
      labels:
        {{- include "nginx-demo.selectorLabels" . | nindent 8 }}
    spec:
      {{- with .Values.imagePullSecrets }}
      imagePullSecrets:
        {{- toYaml . | nindent 8 }}
      {{- end }}
      serviceAccountName: {{ include "nginx-demo.serviceAccountName" . }}
      securityContext:
        {{- toYaml .Values.podSecurityContext | nindent 8 }}
      containers:
        - name: {{ .Chart.Name }}
          securityContext:
            {{- toYaml .Values.securityContext | nindent 12 }}
          image: "{{ .Values.image.repository }}:{{ .Values.image.tag | default .Chart.AppVersion }}"
          imagePullPolicy: {{ .Values.image.pullPolicy }}
          ports:
            - name: http
              containerPort: 80
              protocol: TCP
          livenessProbe:
            httpGet:
              path: /
              port: http
          readinessProbe:
            httpGet:
              path: /
              port: http
          resources:
            {{- toYaml .Values.resources | nindent 12 }}
      {{- with .Values.nodeSelector }}
      nodeSelector:
        {{- toYaml . | nindent 8 }}
      {{- end }}
      {{- with .Values.affinity }}
      affinity:
        {{- toYaml . | nindent 8 }}
      {{- end }}
      {{- with .Values.tolerations }}
      tolerations:
        {{- toYaml . | nindent 8 }}
      {{- end }}
上圖當中可看到不少.Values.replicaCount這種格式的設定,這時打開values.yaml
直接搜尋replicaCount,可以找到這個
replicaCount: 1
這邊代表當你使用helm install或helm update時,就會使用values.yaml內設定的數值。不過,如果要讓不同站別使用不同設定,還需要別的處理方式,這部分會留到下一章講解。


 iThome鐵人賽