上一篇我們介紹了 interfaces/operations.ts 裡定義的 Operation types ,還沒看過的讀者們 傳送門 在此~
接著從這一篇開始我們會從執行 Operation 的入口點,也就是位於 slate editor 的 core action : apply() 開始介紹,並深入進裡頭完成整個 Operations 流程的各種實作細節。
先來看一下 interfaces/editor.ts 裡的 BaseEditor interface 是如何定義 apply method 的:
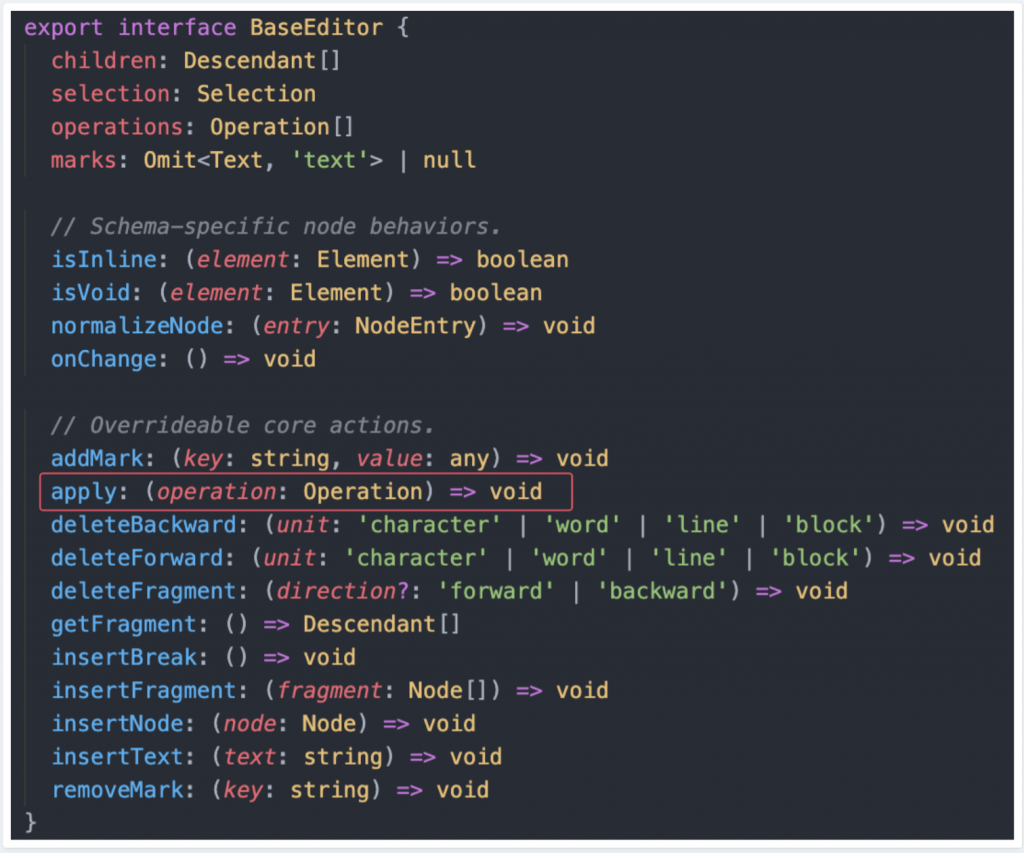
它的使用方式很基本,就是傳入我們在前一篇文章介紹過的,符合 Operation type 規範的參數來執行指定的 Operation ,來看一下官方文件上提供的它的使用範例
editor.apply({
  type: 'insert_text',
  path: [0, 0],
  offset: 15,
  text: 'A new string of text to be inserted.',
})

editor.apply({
  type: 'remove_node',
  path: [0, 0],
  node: {
    text: 'A line of text!',
  },
})

editor.apply({
  type: 'set_selection',
  properties: {
    anchor: { path: [0, 0], offset: 0 },
  },
  newProperties: {
    anchor: { path: [0, 0], offset: 15 },
  },
})
作為所有 Operations 的入口點,我們在後續 Transforms 的章節也能時常看見它的身影,基本上我們可以說 Transforms 就是由各種 Operations 與條件判斷所組成的 methods 。
接著我們就要來深入解析 Operation 的運作流程了!
就如同先前所介紹過的, slate editor 的實作由 create-editor.ts 裡的 createEditor() 來完成,apply() method 也同樣被實作在裡頭。
apply() 的流程主要分為以下幾個部分:
transform ref-type
將目前 editor 中透過 WeakMap 標記的 Ref types 進行對應 Operation 的 Transform 轉換,詳細內容可以參考 Day 14 ,我們就不在這篇文章重複贅述了。
set dirty-paths
將每次執行 operation 『更動到的 path 』或『會受到影響的 path 』做骯髒標記,搭配後續第 4. 的 normalization 做 document model 正規化。
transform editor
實際搭配 Immer.js 執行 document model 資料更新的地方,也是整個 Operation 的主體。這邊可能會有點誤導讀者,它與時常提及的 Transform method 指的不是同一件事,Transform method 是提供給開發者使用的 api ,一個 Transform method 裡面通常含有複數個 Operations ,而這邊的 transform 指的則是每次執行 Operation 時,更新 document model 所會呼叫的 function 。
它被實作於 transforms/general.ts 裡的 GeneralTransforms 裡頭,為了方便讀者辨識,接下來筆者會以 Transform method 與 transform function 做區分。
normalize editor
與 dirty-path 搭配,負責 document model 資料正規化的地方。
set FLUSHING
我們有在 Day 10 時提到過這個流程,因為 slate 視 Operation 操作為原子操作 ,為了避免執行 Transform 時,複數個 Operations 導致 View-Layer 多餘的畫面渲染,也因此 slate 使用 Micro-task 搭配 FLUSHING WeakMap 解決這件事並在最後觸發 onChange() 。
首先來上個 code 瞄個一眼, /** ... */ 的註釋是筆者標上區分流程段落用的
apply: (op: Operation) => {
  /** Transform ref-type section */
  for (const ref of Editor.pathRefs(editor)) {
    PathRef.transform(ref, op)
  }

  for (const ref of Editor.pointRefs(editor)) {
    PointRef.transform(ref, op)
  }

  for (const ref of Editor.rangeRefs(editor)) {
    RangeRef.transform(ref, op)
  }

  /** Set dirty-paths section */
  const set = new Set()
  const dirtyPaths: Path[] = []

  const add = (path: Path | null) => {
    if (path) {
      const key = path.join(',')

      if (!set.has(key)) {
        set.add(key)
        dirtyPaths.push(path)
      }
    }
  }

  const oldDirtyPaths = DIRTY_PATHS.get(editor) || []
  const newDirtyPaths = getDirtyPaths(op)

  for (const path of oldDirtyPaths) {
    const newPath = Path.transform(path, op)
    add(newPath)
  }

  for (const path of newDirtyPaths) {
    add(path)
  }

  DIRTY_PATHS.set(editor, dirtyPaths)

  /** Transform editor section */
  Transforms.transform(editor, op)
  editor.operations.push(op)

  /** Normalize editor section */
  Editor.normalize(editor)

  // Clear any formats applied to the cursor if the selection changes.
  if (op.type === 'set_selection') {
    editor.marks = null
  }

  /** FLUSHING section */
  if (!FLUSHING.get(editor)) {
    FLUSHING.set(editor, true)

    Promise.resolve().then(() => {
      FLUSHING.set(editor, false)
      editor.onChange()
      editor.operations = []
    })
  }
},
我們先來看看第 5. 的 FLUSHING section 。
// weak-maps.ts
export const FLUSHING: WeakMap<Editor, boolean> = new WeakMap()

//create-editor.ts
if (!FLUSHING.get(editor)) {
  FLUSHING.set(editor, true)

  Promise.resolve().then(() => {
    FLUSHING.set(editor, false)
    editor.onChange()
    editor.operations = []
  })
}
slate 首先製作了一個 FLUSHING 的 WeakMap variable ,作為 Editor node 的擴充標記,記錄每個當下的 Editor node 是否正在執行一連串的 Operation 更新
每次的 Operation 都會先判斷 Editor 的 FLUSHING value 是否為 falsy ,若為 falsy 則代表這是整串 Operation queue 中的第一個 Operation 。
將 FLUSHING value 設為 true 後接著將整串 Operations 最後要執行的行為封裝進 Promise .then() 的 callback 中,成為 Micro-task 推送到 Job Queue 。
因為整個 Operation 裡執行的內容皆為 Synchronous 的,因此能確定這組 Micro-task 會在正確的時間點被執行,最後再將 FLUSHING value 設為 false → 執行 onChange() → 清空 operation list 。
這裡的 code 行數短短不到 10 行,卻完美地控制了編輯器渲染層的 re-render 時機點,因為是單純透過一組 WeakMap 來處理整個判斷的,所以我們也能透過操作它來得到更多的彈性(只不過 Slate 目前沒有把 WeakMap export 出來讓開發者使用,只能等作者把相關的 PR merge 起來或是先自己改囉XD)
有關於 Promise 的 Micro-task 相關的內容,筆者這邊提供給不清楚的讀者們一篇文章上前查閱
JS 原力覺醒- Macrotask 與 MicroTask
緊接著下一篇我們要長驅直入第 3. ,一口氣了解 Operation 的本體 transform function 裡頭是如何運作的。
一樣下篇文章見囉!請拭目以待~