前置作業,因為我們是在local進行開發,但由於drone的設定上需要一個對外的https接口,
因此我們透過Ngrox將我們的https:localhost:8081向外暴露,指令如下
$ ngrok http 8081
ngrok by @inconshreveable                                                                                                                                                                       (Ctrl+C to quit)

Session Status                online
Session Expires               1 hour, 55 minutes
Version                       2.3.40
Region                        United States (us)
Web Interface                 http://127.0.0.1:4040
Forwarding                    http://6eb3-115-165-224-61.ngrok.io -> http://localhost:8081
Forwarding                    https://6eb3-115-165-224-61.ngrok.io -> http://localhost:8081

Connections                   ttl     opn     rt1     rt5     p50     p90
                              0       0       0.00    0.00    0.00    0.00
另外,ngrox的操作與申請步驟可以參考下方連結
https://medium.com/life-after-hello-world/5分鐘完成-ngrok-設定-mac-6cedab20bc21
請至Github頁面然後選擇右上方Settings → Developer settings → OAuth Apps
之後New OAuth App,註冊一個新的OAuth application
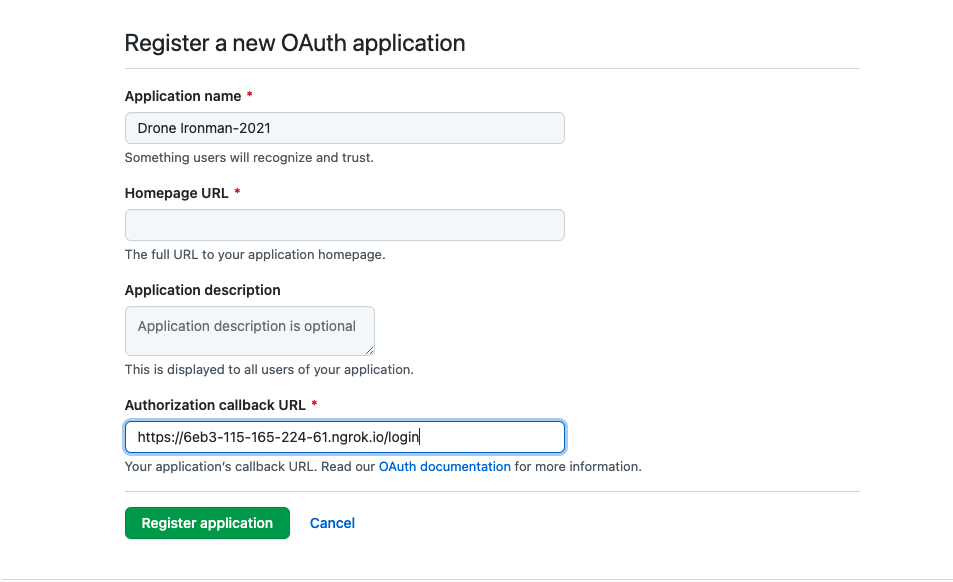
/login
docker-compose.yaml
version: '2'

services:
  drone-server:
    image: drone/drone:1
    ports:
      - 8081:80
    volumes:
      - ./:/data
    restart: always
    environment:
      - DRONE_SERVER_HOST=${DRONE_SERVER_HOST}
      - DRONE_SERVER_PROTO=${DRONE_SERVER_PROTO}
      - DRONE_RPC_SECRET=${DRONE_RPC_SECRET}

      # GitHub Config
      - DRONE_GITHUB_SERVER=https://github.com
      - DRONE_GITHUB_CLIENT_ID=${DRONE_GITHUB_CLIENT_ID}
      - DRONE_GITHUB_CLIENT_SECRET=${DRONE_GITHUB_CLIENT_SECRET}

      - DRONE_LOGS_PRETTY=true
      - DRONE_LOGS_COLOR=true

  # runner for docker version
  drone-runner:
    image: drone/drone-runner-docker:1
    restart: always
    depends_on:
      - drone-server
    volumes:
      - /var/run/docker.sock:/var/run/docker.sock
    environment:
      - DRONE_RPC_HOST=${DRONE_RPC_HOST}
      - DRONE_RPC_PROTO=${DRONE_RPC_PROTO}
      - DRONE_RPC_SECRET=${DRONE_RPC_SECRET}
      - DRONE_RUNNER_CAPACITY=3
這邊要注意一下,在根目錄的位置記得要創建一個.env的檔案並將上頭的environment變數寫入其中!
.env
DRONE_SERVER_HOST=6eb3-115-165-224-61.ngrok.io
DRONE_SERVER_PROTO=https
DRONE_RPC_HOST=drone-server
DRONE_RPC_PROTO=http
DRONE_RPC_SECRET=da39a3ee5e6b4b0d3255bfef95601890afd80709
DRONE_GITHUB_CLIENT_ID=fe42a44452ec710267b6
DRONE_GITHUB_CLIENT_SECRET=eb585deb6dbe76b4a2fc98427a6a205fb2240204
docker-compose up
drone-runner_1  | time="2021-10-15T00:51:46Z" level=info msg="starting the server" addr=":3000"
drone-runner_1  | time="2021-10-15T00:51:46Z" level=error msg="cannot ping the remote server" error="Post http://drone-server/rpc/v2/ping: dial tcp 172.18.0.2:80: connect: connection refused"
drone-server_1  | {
drone-server_1  |   "level": "info",
drone-server_1  |   "msg": "main: internal scheduler enabled",
drone-server_1  |   "time": "2021-10-15T00:51:47Z"
drone-server_1  | }
drone-server_1  | {
drone-server_1  |   "acme": false,
drone-server_1  |   "host": "6eb3-115-165-224-61.ngrok.io",
drone-server_1  |   "level": "info",
drone-server_1  |   "msg": "starting the http server",
drone-server_1  |   "port": ":80",
drone-server_1  |   "proto": "https",
drone-server_1  |   "time": "2021-10-15T00:51:47Z",
drone-server_1  |   "url": "https://6eb3-115-165-224-61.ngrok.io"
drone-server_1  | }
drone-server_1  | {
drone-server_1  |   "interval": "30m0s",
drone-server_1  |   "level": "info",
drone-server_1  |   "msg": "starting the cron scheduler",
drone-server_1  |   "time": "2021-10-15T00:51:47Z"
drone-server_1  | }
drone-server_1  | {
drone-server_1  |   "interval": "24h0m0s",
drone-server_1  |   "level": "info",
drone-server_1  |   "msg": "starting the zombie build reaper",
drone-server_1  |   "time": "2021-10-15T00:51:47Z"
drone-server_1  | }
drone-runner_1  | time="2021-10-15T00:51:47Z" level=info msg="successfully pinged the remote server"
drone-runner_1  | time="2021-10-15T00:51:47Z" level=info msg="polling the remote server" arch=amd64 capacity=3 endpoint="http://drone-server" kind=pipeline os=linux type=docker
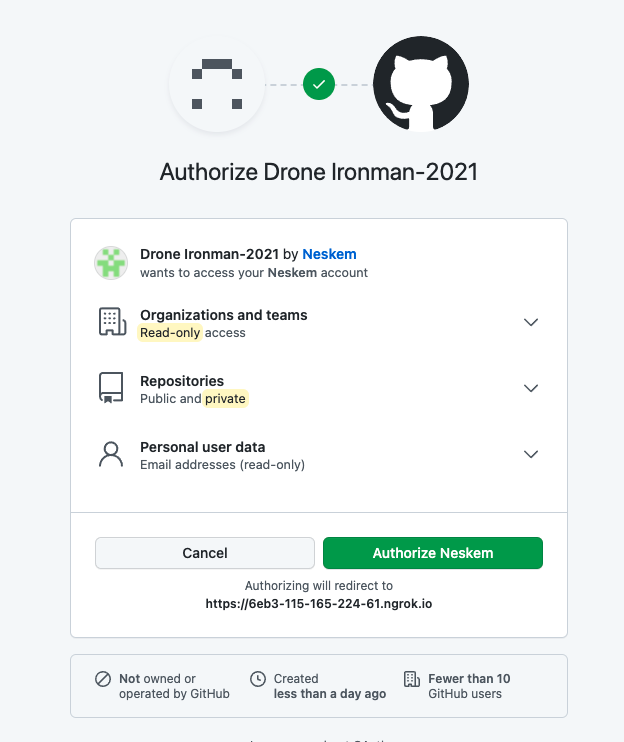
第一次進到Drone Server URL時,會需要進行一個與Github的認證
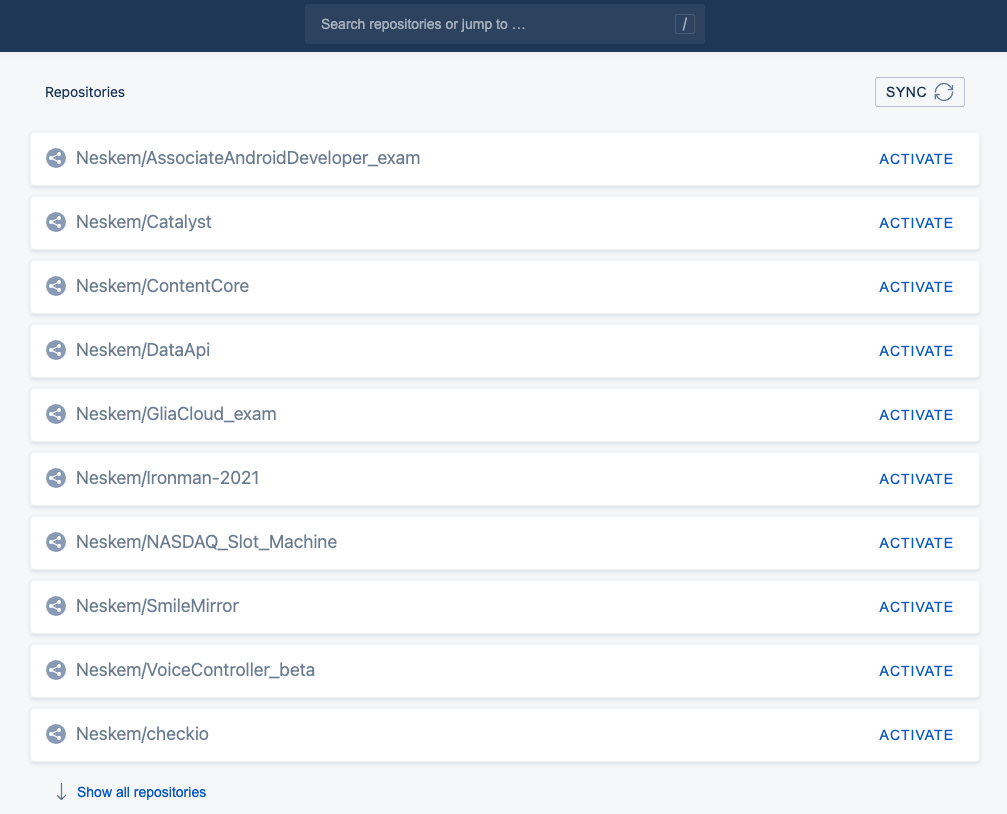
認證後就能看到你在Github所有的Repositories
到這邊我們drone server的設定就已經完成,接下來則要回到Gin Project來新增.drone.yml來撰寫CD啟動時的pipeline
這邊我是選用dockerhub的免費registry
docker-compose.yaml
ironman-2021:
    container_name: ironman-2021
    image: ghjjhg567/ironman2021
這邊記得要補上對應到的docker image repository
.drone.yaml
kind: pipeline
type: docker
name: clone

steps:
  - name: docker
    image: plugins/docker
    settings:
      registry: ghjjhg567/ironman2021:latest
      repo: hub.docker.com/repository/docker/ghjjhg567/ironman2021
      auto_tag: true
      auto_tag_suffix: linux-amd64
      username: ghjjhg567
      password:
        from_secret: docker_password
這邊就參照官方的寫法,每當drone CI被trigger時會去參照跟目錄的Dockerfile並將其build起來push到指定repo。
之後請到drone server URL,並設定Repository的SETTINGS
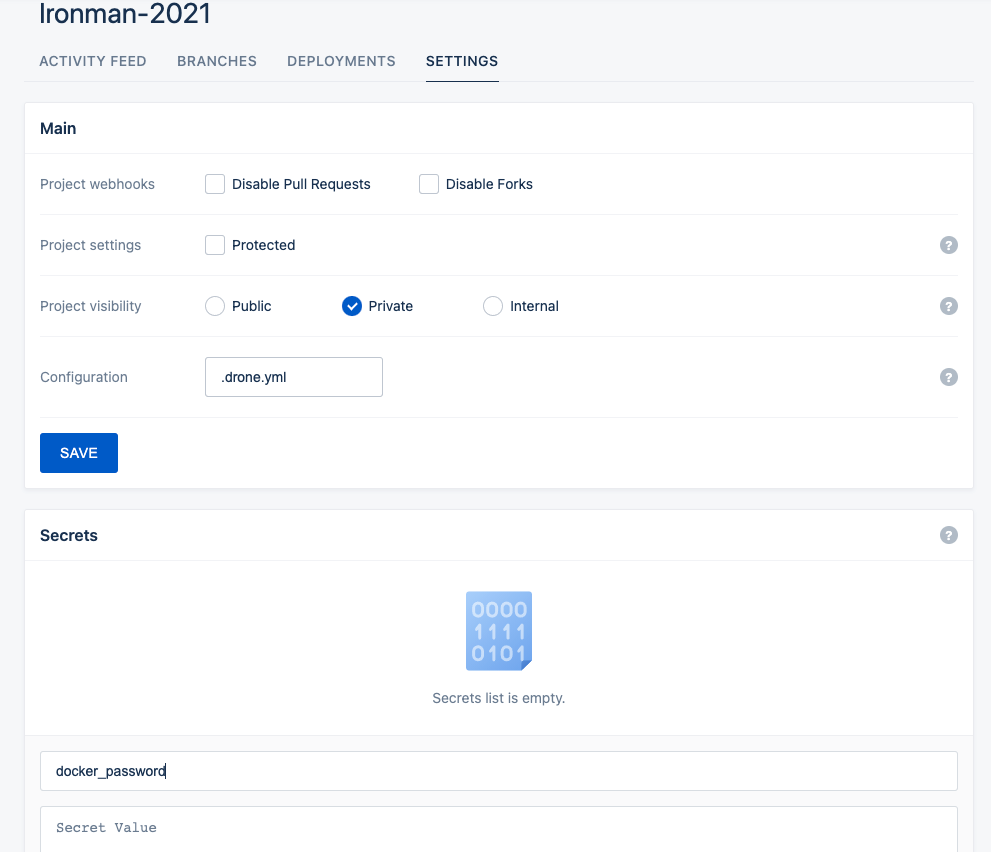
請記得在Secrets加上變數docker_password,並在value填上自己的dockerhub密碼
Push Code to Github
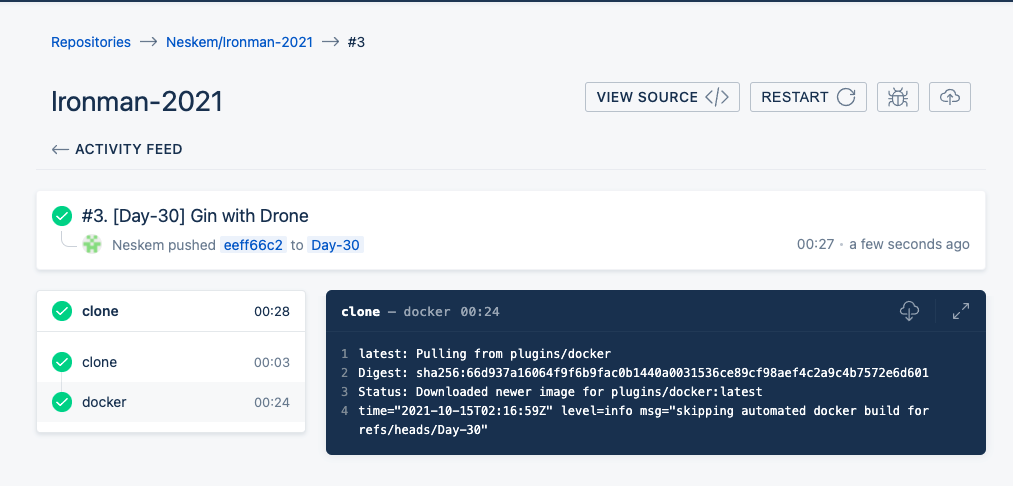
此時就會自動Trigger Drone CI,並執行Drone Pipeline的動作。
https://github.com/Neskem/Ironman-2021/tree/Day-30
這趟旅程說長不長說短不短,我們從一開始的介紹golang語法,到Gin的介紹,再到Gin的常見第三方套件使用與實作,最後再到利用Drone來進行CI,這也算走完了一整個開發週期!
那最後也感謝同事們的邀約與參賽,讓我能夠重拾當初寫Code的熱情來學習新技術,咱們就明年再見吧(應該吧)
https://medium.com/life-after-hello-world/5分鐘完成-ngrok-設定-mac-6cedab20bc21


 狂賀完賽!!
 iThome鐵人賽