Yolo 是深度學習物件偵測中,最喜歡的其中一之,目前是 v7 ,可能 v8 也快要出現。
其中姿勢特徵點偵測是非常酷的一種偵測,可以讓機器透過這些特徵辨識,與人互動。
於GIT上提供的開源碼,直接下載於python開發環境中執行是可以直接使用的。
如果要達成即時偵測需要改寫幾行程式,搭配GPU會更加速效能。
另外特徵點位於哪個部位也要了解才能利於機器運算辨識。
即時實例:
由webcam即時偵測實例(搭配臉部偵測也不致大量停頓):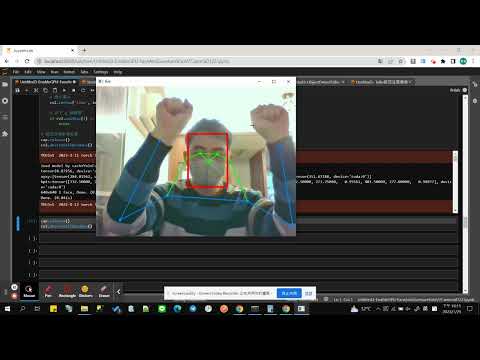
由video偵測標註實例: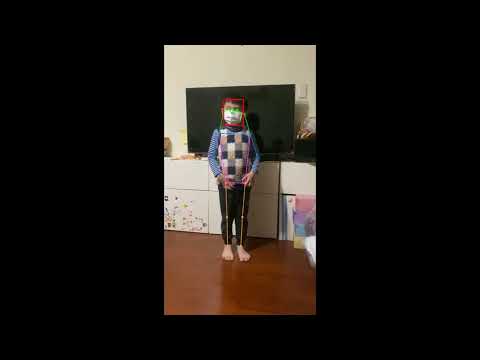
達成的幾個方向要點註明:
原本只讀檔案,改寫成可由 openCV 讀取每個frame
步驟:
(1) https://github.com/WongKinYiu/yolov7/blob/pose/detect.py : line 23 ~ 24
原本:
webcam = source.isnumeric() or source.endswith('.txt') or source.lower().startswith(
('rtsp://', 'rtmp://', 'http://', 'https://'))
改成:
import numpy as np
arr1 = np.array(
[
 [254, 254, 254],
 [255, 255, 255],
 [255, 255, 255]]
)

IsLoadfromCV2 = (type(source) == type(arr1));
if IsLoadfromCV2:
    save_img = not opt.nosave   # save inference images
    webcam = False
else:
    save_img = not opt.nosave and not source.endswith('.txt')  # save inference images
    webcam = source.isnumeric() or source.endswith('.txt') or source.lower().startswith(
        ('rtsp://', 'rtmp://', 'http://', 'https://'))

RtnListKpt = [] # return list
(2) https://github.com/WongKinYiu/yolov7/blob/pose/detect.py : line 54 ~ 61
原本:
# Set Dataloader
vid_path, vid_writer = None, None
if webcam:
    view_img = check_imshow()
    cudnn.benchmark = True  # set True to speed up constant image size inference
    dataset = LoadStreams(source, img_size=imgsz, stride=stride)
else:
    dataset = LoadImages(source, img_size=imgsz, stride=stride)
改成:
# Set Dataloader
vid_path, vid_writer = None, None
if webcam:
    view_img = check_imshow()
    cudnn.benchmark = True  # set True to speed up constant image size inference
    dataset = LoadStreams(source, img_size=imgsz, stride=stride)
elif IsLoadfromCV2:
    dataset = LodImageFromCV2(imgcv2=source)
else:
    dataset = LoadImages(source, img_size=imgsz, stride=stride)
(3) https://github.com/WongKinYiu/yolov7/blob/pose/detect.py : line 116 ~ 119
原本:
if save_img or opt.save_crop or view_img:  # Add bbox to image
  c = int(cls)  # integer class
  label = None if opt.hide_labels else (names[c] if opt.hide_conf else f'{names[c]} {conf:.2f}')
  kpts = det[det_index, 6:]
改成:
if save_img or opt.save_crop or view_img or IsLoadfromCV2:  # Add bbox to image
  c = int(cls)  # integer class
  label = None if opt.hide_labels else (names[c] if opt.hide_conf else f'{names[c]} {conf:.2f}')
  kpts = det[det_index, 6:]
  RtnListKpt.append(kpts) #return list
(4) detect 函式結尾 補上回傳list :
return RtnListKpt
(5) https://github.com/WongKinYiu/yolov7/blob/pose/utils/datasets.py :
補以下類別:
  class LodImageFromCV2: #load image generate from cv2
		def __init__(self, imgcv2, img_size=640, stride=32):
			self.imgcv2 = imgcv2
			self.count = 0
			self.mode = 'image'
		def __iter__(self):
			self.count = 0
			return self
		def __next__(self):
			if self.count >= 1:
				raise StopIteration

			# Padded resize
			img = letterbox(self.imgcv2, auto=False)[0]

			# Convert
			img = img[:, :, ::-1].transpose(2, 0, 1)  # BGR to RGB, to 3x416x416
			img = np.ascontiguousarray(img)
			self.count = 1

			return '', img, self.imgcv2, None
記得回頭 detect.py上方 補 import 此類別!
不重複讀取 model
步驟:
(1) https://github.com/WongKinYiu/yolov7/blob/pose/detect.py 中 加入全域變數:
cacheModelGuesture = None
(2) https://github.com/WongKinYiu/yolov7/blob/pose/detect.py: line 35 ~ 36
原本:
    # Load model
    model = attempt_load(weights, map_location=device)  # load FP32 model
改成:
    # Load model
    if(cacheModelGuesture==None):
        model = attempt_load(weights, map_location=device)  # load FP32 model
        cacheModelGuesture = model
        print('load pose model by weights!')
    else:
        model = cacheModelGuesture
        print('load pose model by cacheModelGuesture!')
CPU運算改成GPU運算
使用CPU會頓很多,要改成GPU才能提升效能:
(1) 下載 Cuda Toolkit 符合環境的版本並安裝 (https://developer.nvidia.com/cuda-toolkit)
(2) 下載 NVIDIA cuDNN (https://developer.nvidia.com/rdp/cudnn-archive),設定資料夾內的目錄到環境變數上
(3) 安裝 pytorch : https://pytorch.org/get-started/previous-versions/ 找符合自己 cuda 版本的指令
特徵點部位
由程式產生的特徵點LIST內容LOG如下(共17個點):
# 特徵點資訊
#                         迴圈本來應使用index      實際傳入函式之index
# 518.39532, 110.67636, 0.99790, #0 nose            #1
# 535.50354, 94.94235, 0.99479,  #1 right eye       #2
# 499.32040, 95.17325, 0.99558,  #2 left eye        #3
# 556.71338, 95.34943, 0.74167,  #3 right ear       #4
# 467.37888, 94.00665, 0.74561,  #4 left ear        #5
# 571.26056, 173.48863, 0.97937, #5 right shoulder  #6
# 441.52887, 179.07047, 0.97978, #6 left shoulder   #7
# 603.04456, 250.00029, 0.95289, #7 right elbow     #8
# 422.85757, 259.88879, 0.95556, #8 left elbow      #9
# 652.29517, 296.06424, 0.94478, #9 right hand      #10
# 390.21753, 327.82108, 0.94747, #10 left hand      #11
# 554.63660, 351.11969, 0.98562, #11 right waist    #12
# 473.02588, 357.50790, 0.98591, #12 left waist     #13
# 556.95941, 472.08643, 0.96462, #13 right knee     #14
# 479.55829, 479.68033, 0.96557, #14 left knee      #15
# 584.53955, 560.24908, 0.87556, #15 right foot     #16
# 493.19171, 564.42810, 0.87791  #16 left foot      #17
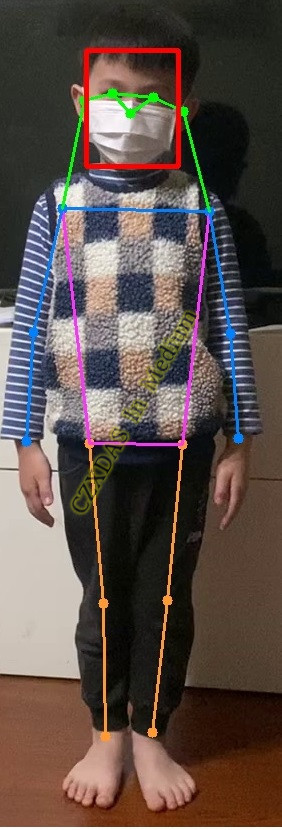
臉部偵測也使用相同的方式來回傳特徵點,達成即時的應用!
 czxdas

 iThome鐵人賽