
2022鐵人賽第一天文章,讀者朋友們好
來稍微探究一下於asp.net core中搭配React前端框架的開發
在這30天成蝶的過程
我想React本身很重ES6和Javascript一些基本語法
算還滿適合拿來當三框架中先拿來進行掌握的一門
(但也是最難掌握也很多人不太推先學的XD)
勉勵自己也將知識專業進行傳播
如文章對於你(可能是個小白)也可能是
只會React但不曉得如何結合.NET Core後端的
又或者只會.NET Core後端但不曉得怎麼和React進行結合的
我希望這系列文章
是個對上述這些開發者戰友們或者以往家教學員
有幫助讀起來不會吃力也很容易吸收的技術篇章
此系列會使用
NodeJs 16以上
和
visual studio 2022
(.Net6長期支援版本)
會在Windows作業系統上做筆記文章
當然若是Mac愛好者的朋友.Net Core (.Net6)也以克服跨作業系統的限制
並不侷限於Windows OS
但Mac環境有關visual studio相關操作可能就都要用cli和vscode來搭配了
因為Mac上的Visual Studio for Mac我較沒接觸
請各位先準備好上述這些IDE和開發環境
有任何誤植或者觀點不認同皆可進行一些開發經驗分享
和批評指教一同成長
開啟vs2022創建第一個React.js配asp.net core的新專案
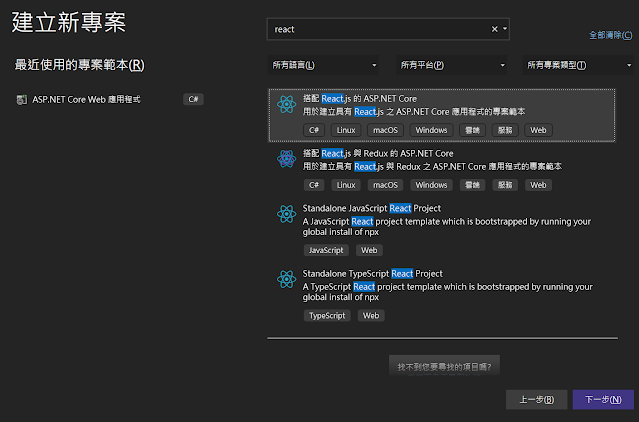
在此去命名專案名稱默認會配有一個.csproj(C#的專案檔)和.sln(方案)
方案中可包含一或多個專案
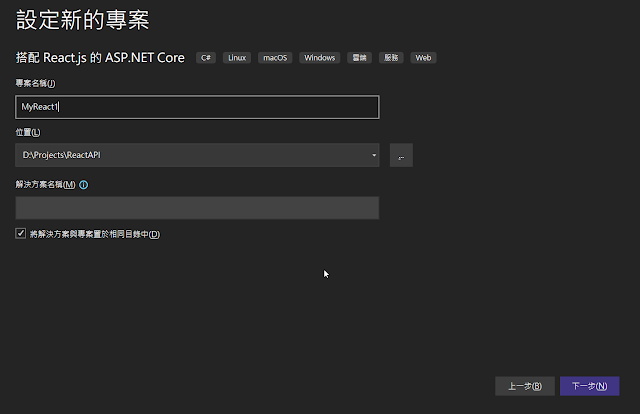
選.NET6.0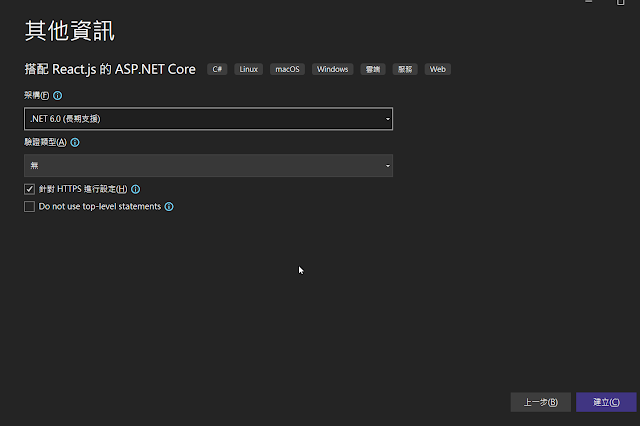
預設新專案建立好後就可看到如下專案結構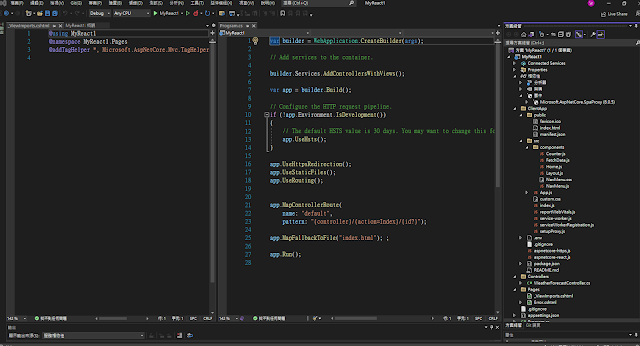
有默認範本的asp.net core web api(相關先備知識可參閱過去技術部落格貼文)
於此系列可能就會稍微帶過
可以觀察到專案目錄下有一份前端的專案檔
裡面有熟悉的NodeJs package.json
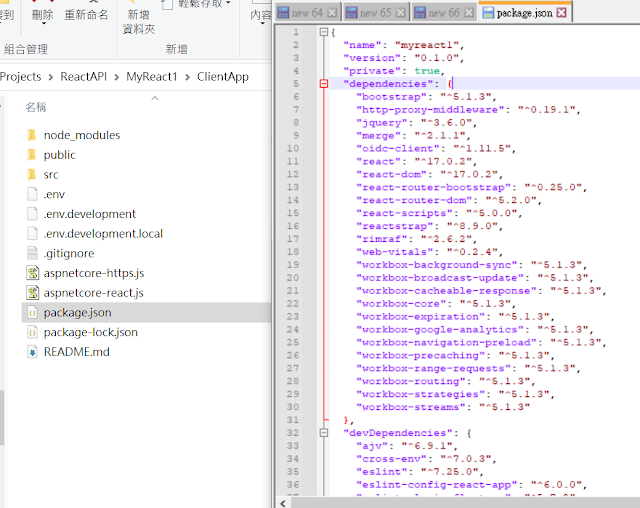
於後端C#專案中的範疇
主程式進入點會在Program.cs當中
~\MyReact1\Program.cs
var builder = WebApplication.CreateBuilder(args);

// Add services to the container.

builder.Services.AddControllersWithViews();

var app = builder.Build();

// Configure the HTTP request pipeline.
if (!app.Environment.IsDevelopment())
{
    // The default HSTS value is 30 days. You may want to change this for production scenarios, see https://aka.ms/aspnetcore-hsts.
    app.UseHsts();
}

app.UseHttpsRedirection();
app.UseStaticFiles();
app.UseRouting();


app.MapControllerRoute(
    name: "default",
    pattern: "{controller}/{action=Index}/{id?}");

app.MapFallbackToFile("index.html"); ;

app.Run();
到了.net6以後採用Minimal API
也跟過去.net3.1和.net5架構又有所不同了省略Startup.cs
和namespace外層包覆
一個後端Get請求抓取一個string List資料
~\MyReact1\Controllers\WeatherForecastController.cs
using Microsoft.AspNetCore.Mvc;

namespace MyReact1.Controllers
{
    [ApiController]
    [Route("[controller]")]
    public class WeatherForecastController : ControllerBase
    {
        private static readonly string[] Summaries = new[]
        {
        "Freezing", "Bracing", "Chilly", "Cool", "Mild", "Warm", "Balmy", "Hot", "Sweltering", "Scorching"
    };

        private readonly ILogger<WeatherForecastController> _logger;

        public WeatherForecastController(ILogger<WeatherForecastController> logger)
        {
            _logger = logger;
        }

        [HttpGet]
        public IEnumerable<WeatherForecast> Get()
        {
            return Enumerable.Range(1, 5).Select(index => new WeatherForecast
            {
                Date = DateTime.Now.AddDays(index),
                TemperatureC = Random.Shared.Next(-20, 55),
                Summary = Summaries[Random.Shared.Next(Summaries.Length)]
            })
            .ToArray();
        }
    }
}
於前端React Js中的範疇
我們前端程式進入點位於Index.js這支程式檔中
~\MyReact1\ClientApp\src\index.js
import 'bootstrap/dist/css/bootstrap.css';
import React from 'react';
import ReactDOM from 'react-dom';
import { BrowserRouter } from 'react-router-dom';
import App from './App';
import * as serviceWorkerRegistration from './serviceWorkerRegistration';
import reportWebVitals from './reportWebVitals';

const baseUrl = document.getElementsByTagName('base')[0].getAttribute('href');
const rootElement = document.getElementById('root');

ReactDOM.render(
  <BrowserRouter basename={baseUrl}>
    <App />
  </BrowserRouter>,
  rootElement);

// If you want your app to work offline and load faster, you can change
// unregister() to register() below. Note this comes with some pitfalls.
// Learn more about service workers: https://cra.link/PWA
serviceWorkerRegistration.unregister();

// If you want to start measuring performance in your app, pass a function
// to log results (for example: reportWebVitals(console.log))
// or send to an analytics endpoint. Learn more: https://bit.ly/CRA-vitals
reportWebVitals();
而當中間接進行App Component的Render
~\MyReact1\ClientApp\src\App.js
在App.js中又間接去存取專for web api存取的Component 也就是FetchData.js
import React, { Component } from 'react';
import { Route } from 'react-router';
import { Layout } from './components/Layout';
import { Home } from './components/Home';
import { FetchData } from './components/FetchData';
import { Counter } from './components/Counter';

import './custom.css'

export default class App extends Component {
  static displayName = App.name;

  render () {
    return (
      <Layout>
        <Route exact path='/' component={Home} />
        <Route path='/counter' component={Counter} />
        <Route path='/fetch-data' component={FetchData} />
      </Layout>
    );
  }
}
~\MyReact1\ClientApp\src\components\FetchData.js
import React, { Component } from 'react';

export class FetchData extends Component {
  static displayName = FetchData.name;

  constructor(props) {
    super(props);
    this.state = { forecasts: [], loading: true };
  }

  componentDidMount() {
    this.populateWeatherData();
  }

  static renderForecastsTable(forecasts) {
    return (
      <table className='table table-striped' aria-labelledby="tabelLabel">
        <thead>
          <tr>
            <th>Date</th>
            <th>Temp. (C)</th>
            <th>Temp. (F)</th>
            <th>Summary</th>
          </tr>
        </thead>
        <tbody>
          {forecasts.map(forecast =>
            <tr key={forecast.date}>
              <td>{forecast.date}</td>
              <td>{forecast.temperatureC}</td>
              <td>{forecast.temperatureF}</td>
              <td>{forecast.summary}</td>
            </tr>
          )}
        </tbody>
      </table>
    );
  }

  render() {
    let contents = this.state.loading
      ? <p><em>Loading...</em></p>
      : FetchData.renderForecastsTable(this.state.forecasts);

    return (
      <div>
        <h1 id="tabelLabel" >Weather forecast</h1>
        <p>This component demonstrates fetching data from the server.</p>
        {contents}
      </div>
    );
  }

  async populateWeatherData() {
    const response = await fetch('weatherforecast');
    const data = await response.json();
    this.setState({ forecasts: data, loading: false });
  }
}
以上是一個大致前後端如何互動的程式碼導讀
我們可將專案運行起來
默認啟動起來(按綠色撥放按鈕)
預設由於還要做前置build因此等他一段時間會自動跳轉到真正的主頁 URL
這邊是兩個站台應用(因此會有各自不同的port)
後端7248,前端44481
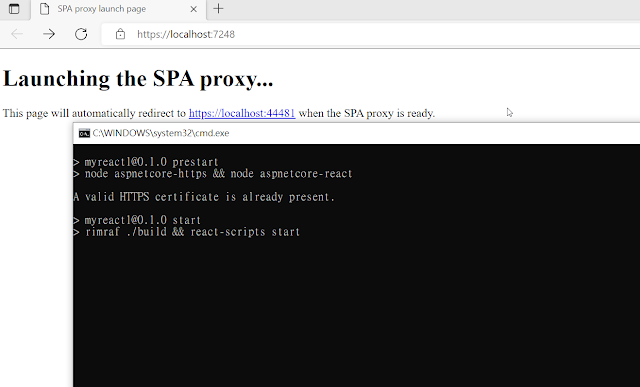
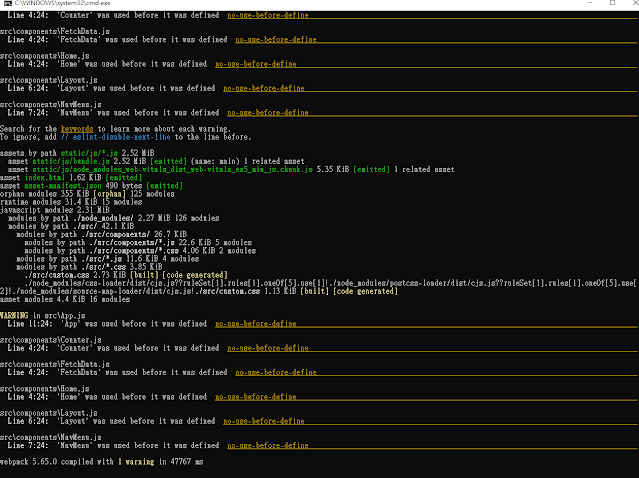
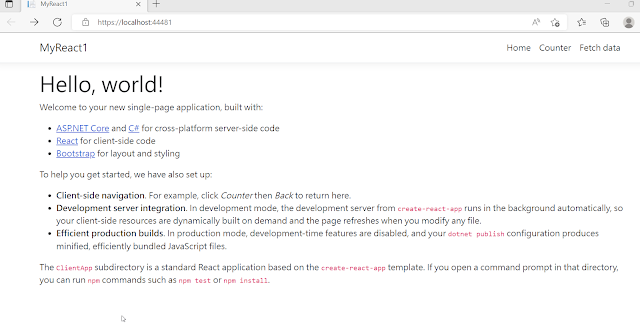
可看到React呼叫web api後呈現到頁面的結果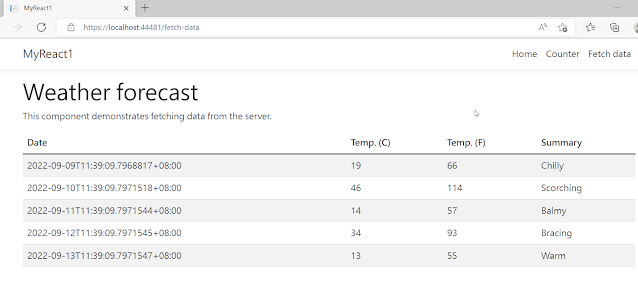
本篇已同步發表至個人部落格
https://coolmandiary.blogspot.com/2022/09/net-corereact01.html





 iThome鐵人賽
 看影片追技術