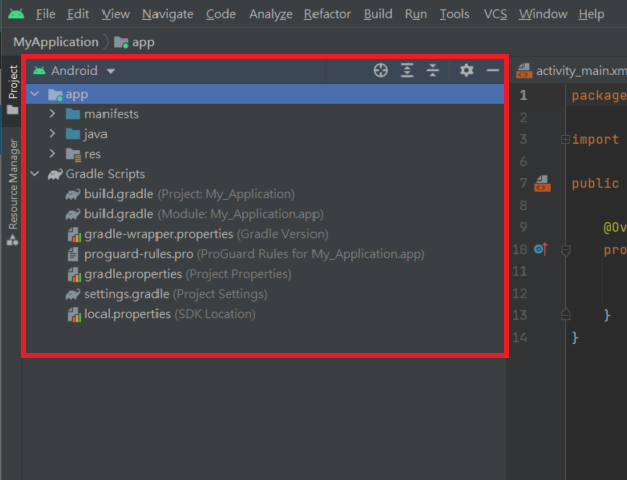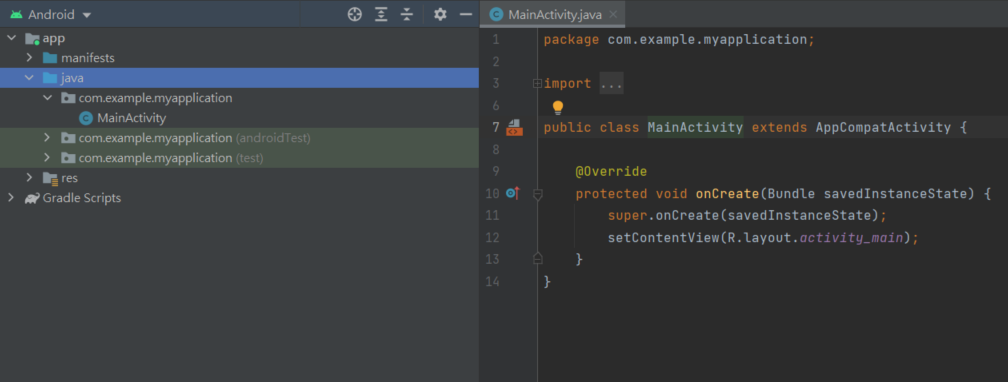
應用程式的根目錄。
<?xml version="1.0" encoding="utf-8"?>
<manifest xmlns:android="http://schemas.android.com/apk/res/android"
    package="com.example.myapplication">
    //「application」擁有許多不同屬性可供設定,例如:app的圖示和名稱。
    <application
        android:allowBackup="true"
        android:icon="@mipmap/ic_launcher"
        android:label="@string/app_name"
        android:roundIcon="@mipmap/ic_launcher_round"
        android:supportsRtl="true"
        android:theme="@style/Theme.MyApplication">
        //activity元素是用來宣告在這個應用程式中將會使用到的畫面控制元件。
        <activity
            android:name=".MainActivity"
            android:exported="true">
            //「intent-filter」代表該Activity類別會在本應用程式啟動時被第一個執行。
            <intent-filter>
                <action android:name="android.intent.action.MAIN" />

                <category android:name="android.intent.category.LAUNCHER" />
            </intent-filter>
        </activity>
    </application>

</manifest>
裡面放著你的程式碼等等。

- drawable:存放圖片檔案,如果解析度沒什麼要求的圖片都放這裡節省切換資源。
- layout:存放各個UI介面。
- mipmap:存放各種尺寸的圖片檔案,讓各種不同解析度的圖片顯示在各種尺寸的手機上。
- values:存放各種屬性的檔案,預設就有colors、strings、stylesn三種屬性,能讓日後更有紀律性的,開發、修改和維護程式。
build.gradle(project):專案的建置設定。
build.gradle(Module):模組的建置設定,引用別人套件時會用到。
plugins {
    id 'com.android.application'
}
//SDK版本。
android {
    compileSdk 32

    defaultConfig {
        applicationId "com.example.myapplication"
        minSdk 21
        targetSdk 32
        versionCode 1
        versionName "1.0"

        testInstrumentationRunner "androidx.test.runner.AndroidJUnitRunner"
    }
    buildTypes {
        release {
            minifyEnabled false
            proguardFiles getDefaultProguardFile('proguard-android-optimize.txt'), 'proguard-rules.pro'
        }
    }
    compileOptions {
        sourceCompatibility JavaVersion.VERSION_1_8
        targetCompatibility JavaVersion.VERSION_1_8
    }
}
//引用別人套件時,要放入dependencies裡。
dependencies {
    implementation 'androidx.appcompat:appcompat:1.4.2'
    implementation 'com.google.android.material:material:1.6.1'
    implementation 'androidx.constraintlayout:constraintlayout:2.1.4'
    testImplementation 'junit:junit:4.13.2'
    androidTestImplementation 'androidx.test.ext:junit:1.1.3'
    androidTestImplementation 'androidx.test.espresso:espresso-core:3.4.0'
}
下一篇文章就會開始講解各種元件的使用喔!!!![]()
