既然都安裝Lunx而且畢生都得跟Linux 為伍,必須得跟文字介面為伍。但是我記性偏偏不好,大腦記憶體只有256KB少的可憐,所以安裝完Linux第一件事情是優化文字介面。
sudo apt install curl wget git
下載 Meslo Nerd Font 讓 terminal 可以正常顯示icon
sudo mkdir -p /usr/share/fonts/custom
sudo wget -P /usr/share/fonts/custom https://github.com/romkatv/powerlevel10k-media/raw/master/MesloLGS%20NF%20Regular.ttf
sudo wget -P /usr/share/fonts/custom https://github.com/romkatv/powerlevel10k-media/raw/master/MesloLGS%20NF%20Bold.ttf
sudo wget -P /usr/share/fonts/custom https://github.com/romkatv/powerlevel10k-media/raw/master/MesloLGS%20NF%20Italic.ttf
sudo fc-cache -v -f
官方網站: https://tabby.sh/
安裝指令
curl -sL -o ~/Downloads/tabby.deb https://github.com/Eugeny/tabby/releases/download/v1.0.183/tabby-1.0.183-linux-x64.deb && sudo dpkg -i ~/Downloads/tabby.deb
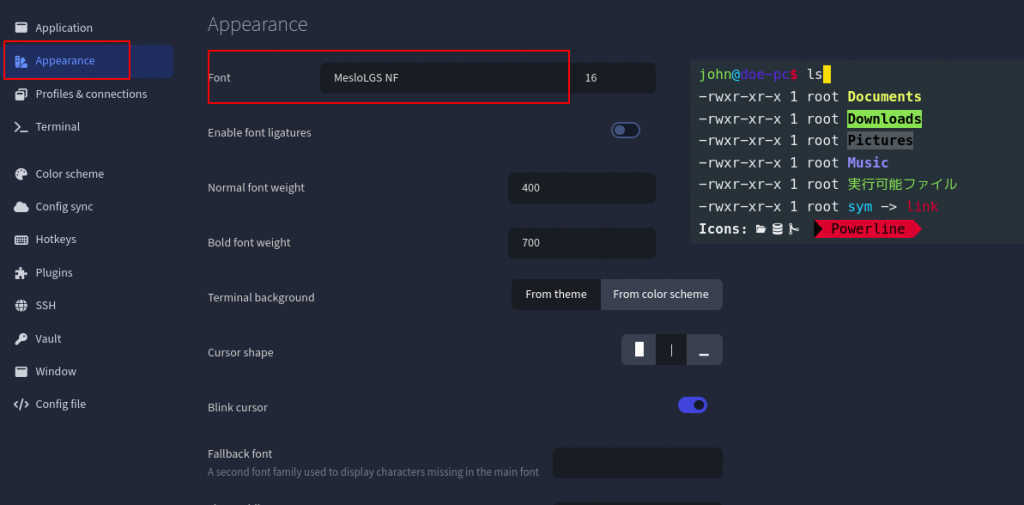
設定字型為 MesloLGS NF
sudo apt install zsh
zsh 為殼層chsh -s $(/usr/bin/zsh)
sudo chsh -s /usr/bin/zsh
重新登入後生效
sh -c "$(wget -O- https://raw.githubusercontent.com/ohmyzsh/ohmyzsh/master/tools/install.sh)"
git clone https://github.com/zsh-users/zsh-completions ${ZSH_CUSTOM:=~/.oh-my-zsh/custom}/plugins/zsh-completions
git -C ${ZSH_CUSTOM:-$HOME/.oh-my-zsh/custom}/themes/zsh-completions pull
會依據歷史紀錄預覽顯示,效果如圖
git clone https://github.com/zsh-users/zsh-autosuggestions ${ZSH_CUSTOM:-~/.oh-my-zsh/custom}/plugins/zsh-autosuggestions
git -C ${ZSH_CUSTOM:-$HOME/.oh-my-zsh/custom}/themes/zsh-autosuggestions pull
可以輕易識別一行指令中的組成成份,上面是原始,下面是套用過的效果。

git clone https://github.com/zsh-users/zsh-syntax-highlighting.git ${ZSH_CUSTOM:-~/.oh-my-zsh/custom}/plugins/zsh-syntax-highlighting
git -C ${ZSH_CUSTOM:-$HOME/.oh-my-zsh/custom}/themes/zsh-syntax-highlighting pull
可以漂亮顯示當前目錄的狀態。

git clone --depth=1 https://github.com/romkatv/powerlevel10k.git ${ZSH_CUSTOM:-$HOME/.oh-my-zsh/custom}/themes/powerlevel10k
git -C ${ZSH_CUSTOM:-$HOME/.oh-my-zsh/custom}/themes/powerlevel10k pull
下載完成之後,接下來就是配置設定啦。首先我們先編輯 .zshrc 文件。
... 部份省略

# Set name of the theme to load --- if set to "random", it will
# load a random theme each time oh-my-zsh is loaded, in which case,
# to know which specific one was loaded, run: echo $RANDOM_THEME
# See https://github.com/ohmyzsh/ohmyzsh/wiki/Themes
# ZSH_THEME="robbyrussell"
# 異動內容
ZSH_THEME="powerlevel10k/powerlevel10k"

... 部份省略

# Which plugins would you like to load?
# Standard plugins can be found in $ZSH/plugins/
# Custom plugins may be added to $ZSH_CUSTOM/plugins/
# Example format: plugins=(rails git textmate ruby lighthouse)
# Add wisely, as too many plugins slow down shell startup.
# 異動內容
plugins=(
        git
        zsh-syntax-highlighting
        zsh-autosuggestions
        zsh-completions
)

... 部份省略
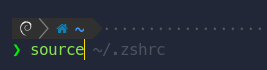
配置完 .zshrc 文件之後就是跑 powerlevel10k 設定啦!
source ~/.zshrc
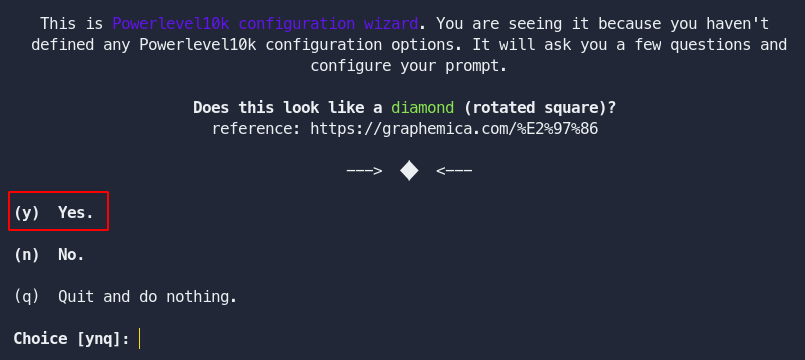
接下來就會自動引導設定
經過一系列喜好設定這就是我自己喜歡的樣式

如果之後想改樣powerlevel10k樣式設定執行下列命令就可以了。
p10k configure