今天來整理利用DOM的Canvas元件的getContext("2d")圖像核心(context),來執行圖像內容的繪製。
Canvas的圖像核心為 getContext("2d") -> CanvasRenderingContext2D
let can;
let ctx;
let can_1;
let ctx_1;
function setup() {
	can = createCanvas(400, 400);
	can.id("can1");
	can.position(100, 100);
	ctx = can.elt.getContext("2d");
	console.log(ctx); //--  CanvasRenderingContext2D

	can_1 = document.getElementById("can1");
    ctx_1 = can_1.getContext("2d");
	console.log(ctx_1);  //--  CanvasRenderingContext2D

	background(100);
}
在p5.js建立的DOM元件屬於p5.js的元件。
例如:
let can = createCanvas(400, 400);
can.id("can1"); //--- id 為 can1
利用 can.elt 轉換成 DOM 元件。
利用 document.getElementById("can1"); 取得DOM 元件。
can.elt == document.getElementById("can1");
//------------------------------
canvas的繪圖核心 就從 canvas元件的getContext("2d")功能開始。
let can;
let ctx;
function setup() {
	can = createCanvas(400, 500);
	can.id("can1");
	can.position(100, 100);
	ctx = can.elt.getContext("2d");
	console.log(ctx);
	background(200);

	//-----------------------------
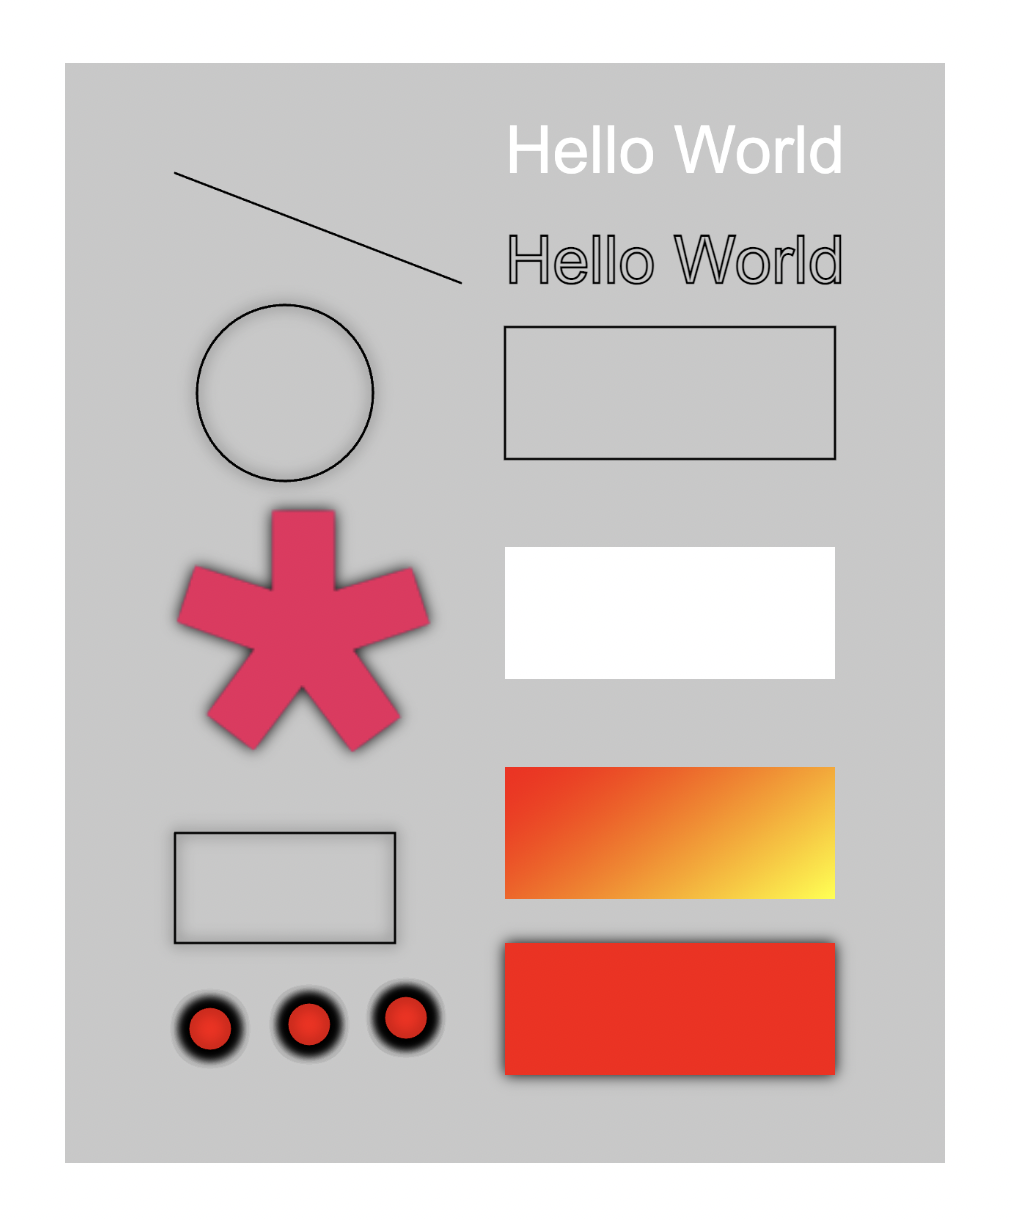
	//-- 線段 --
	ctx.moveTo(50, 50);
    ctx.lineTo(180, 100);
    ctx.stroke();

	//-- 圓形 --
	ctx.beginPath();
    ctx.arc(100, 150, 40, 0, 2 * Math.PI);
    ctx.stroke();

	//-- 文字 --
	ctx.font = "30px Arial";
    ctx.fillText("Hello World", 200, 50);

	ctx.font = "30px Arial";
    ctx.strokeText("Hello World", 200, 100);

	//-- 方形 --
    ctx.strokeRect(200, 120, 150, 60);
	ctx.fillRect(200, 220, 150, 60);

	//-- 漸層色 --
	// 建立漸層色
	let grd = ctx.createLinearGradient(200, 320, 280, 430);
	grd.addColorStop(0, "red");
	grd.addColorStop(1, "yellow");

	// 填入漸層色
	ctx.fillStyle = grd;
	ctx.fillRect(200, 320, 150, 60);

    //-- context.createLinearGradient(x0, y0, x1, y1);
    //-- x0 -> x1 為X方向的漸層變化
    //-- y0 -> y1 為Y方向的漸層變化
    //-- 漸層色的用法 可看作是先用createLinearGradient(x0, y0, x1, y1)指令
    //-- 畫出漸層色的區塊,而用fillRect(x2, y2, w, h)將要看到的漸層色框出來呈現。

    //-- createLinearGradient 與 fillRect 的座標關係
    //-- x0 = x2, y0 = y2, x1 = x2+w, y1 = y2+h

	//-- 陰影色 --
	ctx.shadowBlur = 20;
    ctx.shadowColor = "black";
    ctx.fillStyle = "red";
    ctx.fillRect(200, 400, 150, 60);

	//-- 圖片 -- 利用建立DOM的img元件
    let img = createImg(
      "https://p5js.org/assets/img/asterisk-01.png",
      "the p5 magenta asterisk"
    );
	img.id("img1");
	img.position(50, 200);  //-- 這個是以body為基準的座標
	img.hide();             //-- 將建立img的元件隱藏

    //-- 將img元件繪製到canvas中,並以canvas為基準的座標
	ctx.drawImage(img.elt, 50, 200);

    //-- ctx.drawImage()是以DOM的方式將img元件繪製到canvas中,
    //-- 因此,由p5.js建立的img元件,要用img.elt轉換成DOM的img元件。

    //-- 圖片 -- 利用p5.js建立img元件
    loadImage("/assets/asterisk-01.png", img1 => {
      image(img1, 50, 250);
      //-- 這是callback的語法,用於確保在圖片完全下載後,
      //-- 才接著將圖片顯示出來。
    });
    //-- 用loadImage()的指令載入圖片,圖片的路徑需與網頁本身同網域。
    //-- 用createImg()的指令載入圖片,圖片的路徑可以是外部網域。

	//-- 端點圖形 --
	ctx.moveTo(50, 350);
    ctx.lineTo(150, 350);
	ctx.lineTo(150, 400);
	ctx.lineTo(50, 400);
	ctx.lineTo(50, 350);
    ctx.stroke();

}

function draw() {
    if(mouseIsPressed){
      //- 當滑鼠按下時,以p5.js的circle()指令繪出圓形
      circle(mouseX, mouseY, 20);
    }
}
另一種利用preload()將圖片預先載入
let img;
function preload() {
  img = loadImage('assets/asterisk-01.png');
}
程式執行結果
//-- 參考網頁 --
p5.js Reference
https://p5js.org/reference/#/p5/createImg
HTML Canvas Reference
https://www.w3schools.com/graphics/canvas_reference.asp
CanvasRenderingContext2D
https://developer.mozilla.org/en-US/docs/Web/API/CanvasRenderingContext2D
