嗨~今天我們首先來一一介紹能高效率選取HTML節點的 選擇器(selector) ~
以 * 表示
範例:
*{
   color: rgb(48, 124, 217);
 }
實作結果:
使用uiversal selector就會將全部變成你所設定的屬性值
在前面初探CSS其實我們有使用過element selector呦~
範例:
h1{
    color: rgb(48, 124, 217);
}
實作結果:
以 # 表示
範例:
#grayText{
    color: gray;
}

加此 id (grayText) 到< h4 >中
實作結果:
以 . 表示
範例:
.seagreenText{
            color:seagreen;
        }

實作結果:
Id 只能賦予唯一一個
Class則可賦予多個
element、id、class selector可以相互結合使用範例:
    h1.seagreenText{
        color:seagreen;
    }
    #grayText{
        color: gray;
    }
    .centerText{
    text-align: center;
    }
實作結果: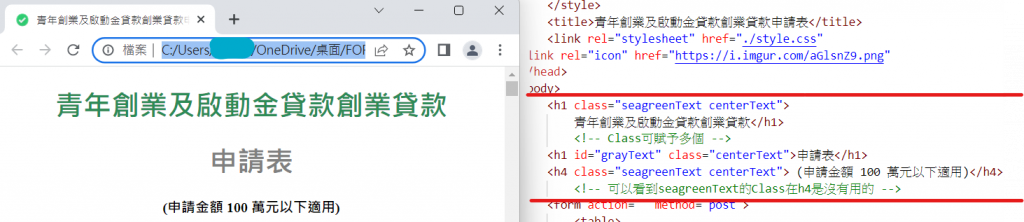
將許多element設定相同的style
每個element以 , 隔開
範例:
h1,h4{
text-align: right;
}
實作結果: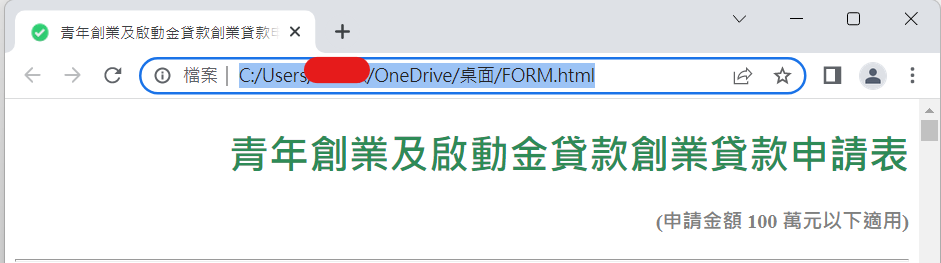
以空白作為組合符號選擇器1 選擇器2 { style屬性值 }
選擇只有第一個選擇器中的第二個選擇器的元素
範例:
        div.one h1{
            background: #3b3b6d;
            color: aliceblue;
         }
         /*選擇 <div> 元素內的所有 <one> 的<h1>的元素 */
實作結果:
針對某一個Attribute進行設定
範例:
        input[type="number"]{
            color: rgb(197, 25, 25);
        }
實作結果:
偽類別能夠在特定動作時改變 CSS 樣式
會用 : 做前綴詞宣告
Pseudo Class這邊有介紹每個偽類別
網頁最常用的偽類別應該是 :hover
能夠在滑鼠移到設定的 :hover 的元素時,讓它改變原有的 CSS
範例:
        input:hover{
            background-color:lightgoldenrodyellow;
        }
實作結果:
為什麼會叫 偽類別 呢?
在看到這個範例中,可以看到並不是input裡class 的屬性,但滑鼠移動到上面就會暫時變成了 :hover 版本的 background-color:lightgoldenrodyellow
那在偽元素也是同道理~
偽元素是添加到選擇器的關鍵字,可讓您設置所選元素的特定部分的樣式
Pseudo Element這邊有介紹每個偽類別
偽元素前綴詞使用 ::
如果按檢視網頁原始碼應該不少人都會看過 ::before 和 ::after
它能夠在原元素的前面或後面增加另一個元素
範例:
        th::after{
            content: ":";
        }
        th::before{
            content: "***";
        }
實作結果:
出來的結果每個表頭前面都加了 "***" 後面都加了 ":"
偽元素也可以和偽類別同時使用呦~
範例:
        div::after{
            content: "點我看看有什麼有趣的事情~";
            color: rgb(249, 182, 182);
        }
        div:hover::after{
            content: "哈哈哈沒事!";
            color: rgb(34, 80, 139);
        }
實作結果:
當滑鼠移過去時...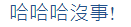
大家可以慢慢玩玩看選擇器XD
我們明天見~~~