本系列文已改編成書「甚麼?網頁也可以做派對遊戲?使用 Vue 和 babylon.js 打造 3D 派對遊戲吧!」
書中不只重構了程式架構、改善了介面設計,還新增了 2 個新遊戲呦!ˋ( ° ▽、° )
新遊戲分別使用了陀螺儀與震動回饋,趕快買書來研究研究吧!ლ(╹∀╹ლ)
在此感謝深智數位的協助,歡迎大家前往購書,鱈魚感謝大家 (。・∀・)。
助教:「所以到底差在哪啊?沒圖沒真相,被你坑了都不知道。(´。_。`)」
鱈魚:「你對我是不是有甚麼很深的偏見啊 (っ °Д °;)っ,來人啊,上連結!」

讓我們開啟 Web 專案,遊戲應該要有遊戲的感覺,第一步先來建立第一個背景吧!
預期建立一個有各種浮動多邊效果的背景。

預計有以下功能:
首先建立 background-polygons-floating 組件
src\components\background-polygons-floating.vue
<template>
</template>

<script setup lang="ts">
import { ref } from 'vue';

interface Props {
  label?: string;
}
const props = withDefaults(defineProps<Props>(), {
  label: '',
});
</script>

<style scoped lang="sass">
</style>
依據需求定義 Props
interface Props {
  mainColor?: string;
  /** 初始數量,畫面出現時,內部初始方塊數量 */
  initialQuantity?: number;
  /** 色塊最大數量,超過此數量時,會暫停產生方塊 */
  maxQuantity?: number;
  /** 產生間距,越短生成速度越快,單位 ms */
  generateInterval?: number;
}
const props = withDefaults(defineProps<Props>(), {
  mainColor: '#ffce5c',
  initialQuantity: 10,
  maxQuantity: 30,
  generateInterval: 500,
});
接著建立方塊容器,並建立背景樣式 backgroundStyle
<template>
  <div
    class="overflow-hidden"
    :style="backgroundStyle"
  >
  </div>
</template>

<script setup lang="ts">
import { computed, onBeforeUnmount, ref } from 'vue';
import { colors } from 'quasar';

const { lighten, textToRgb, rgbToHsv, hsvToRgb, rgbToHex } = colors;

...

const backgroundStyle = computed(() => {
  // 變亮
  const lightenColor = lighten(props.mainColor, 10);

  // 變暗並偏移色相
  const darkColor = lighten(props.mainColor, -10);

  const hsvColor = rgbToHsv(textToRgb(darkColor));
  hsvColor.h -= 10;

  const offsetColor = rgbToHex(hsvToRgb(hsvColor));

  return {
    background: `linear-gradient(-30deg, ${offsetColor}, ${props.mainColor}, ${lightenColor}, ${props.mainColor}, ${offsetColor})`
  }
});
</script>
透過 Quasar 提供之 Color Utils,可以輕鬆調整顏色。
接著在 the-home 組件中引入 background-polygons-floating 組件,來實際看看效果。
src\views\the-home.vue
<template>
  <background-polygons-floating class="absolute inset-0" />
</template>

<script setup lang="ts">
import { ref } from 'vue';

import BackgroundPolygonsFloating from '../components/background-polygons-floating.vue';
</script>

<style scoped lang="sass">
</style>
背景出現了!

接著是最重要的方塊部份了,定義一個 polygon-base 組件,用來產生方塊。
老樣子先定義方塊 Props
<script lang="ts">
export enum ShapeType {
  ROUND = 'round',
  TRIANGLE = 'triangle',
  SQUARE = 'square',
  PENTAGON = 'pentagon'
}

export enum FillType {
  SOLID = 'solid',
  FENCE = 'fence',
  SPOT = 'spot',
}
</script>

<script setup lang="ts">
import { ref } from 'vue';

interface Props {
  size?: string;
  color?: string;
  rotate?: string;
  opacity?: string | number;
  shape?: `${ShapeType}`,
  fill?: `${FillType}`
}
const props = withDefaults(defineProps<Props>(), {
  size: '10rem',
  color: 'white',
  rotate: '0deg',
  opacity: '0.4',
  shape: 'round',
  fill: 'fence',
});
</script>
在 setup script 中 export 會發生異常,所以在此建立另一個一般的 script,用來 export 型別資料。參考資料
接著提供 div,準備切割成多邊形外觀
<template>
  <div class="frame">
    <div
      class="polygon"
    />
  </div>
</template>
切割形狀部分,使用 CSS 之 clipPath 實現,所以根據定義的 ShapeType,列舉一下對應的種類。
const clipPathMap = {
  [ShapeType.ROUND]: `circle(50% at 50% 50%)`,
  [ShapeType.SQUARE]: `polygon(50% 0%, 100% 50%, 50% 100%, 0% 50%)`,
  [ShapeType.TRIANGLE]: `polygon(50% 0%, 0% 100%, 100% 100%)`,
  [ShapeType.PENTAGON]: `polygon(50% 0%, 100% 38%, 82% 100%, 18% 100%, 0% 38%)`,
}
const clipPath = computed(() => clipPathMap?.[props.shape] ?? clipPathMap[ShapeType.ROUND]);
接著是填滿樣式(fill)的部分,實心很容易,但是網格狀或斑點狀的填滿效果要怎麼實現呢?有一個辦法,一樣透過萬能的 CSS 實現,也就是 maskImage!(CSS 萬歲 ♪(´▽`))
所以我們從百寶袋(大家可以直接前往 GitLab 專案中下載)變出 mask 要用的 svg 檔案:
放置於 public\images 目錄中,並列舉 fill 內容。
const fillMap = {
  [FillType.SOLID]: ``,
  [FillType.FENCE]: `url(/images/line.svg)`,
  [FillType.SPOT]: `url(/images/round.svg)`,
}
const fill = computed(() => fillMap?.[props.fill] ?? fillMap[FillType.SPOT]);
最後把剛剛定義的所有內容集結成 style。
const style = computed(() => ({
  width: props.size,
  height: props.size,
  backgroundColor: props.color,
  maskImage: fill.value,
  maskSize: `6%`,
  opacity: props.opacity,
  clipPath: clipPath.value,
  transform: `rotate(${props.rotate})`,
}));
並加入 div 中。
<template>
  <div class="frame">
    <div
      class="polygon"
      :style="style"
    />
  </div>
</template>
最後我們在 background-polygons-floating 中引入 polygon-base 看看效果吧!
src\components\background-polygons-floating.vue
<template>
  <div
    class="overflow-hidden"
    :style="backgroundStyle"
  >
    <polygon-base
      shape="round"
      fill="solid"
    />
    <polygon-base
      shape="round"
      fill="spot"
    />
    <polygon-base
      shape="triangle"
      fill="fence"
    />
    <polygon-base
      shape="square"
      fill="spot"
    />
    <polygon-base
      shape="pentagon"
      fill="solid"
    />
  </div>
</template>

...
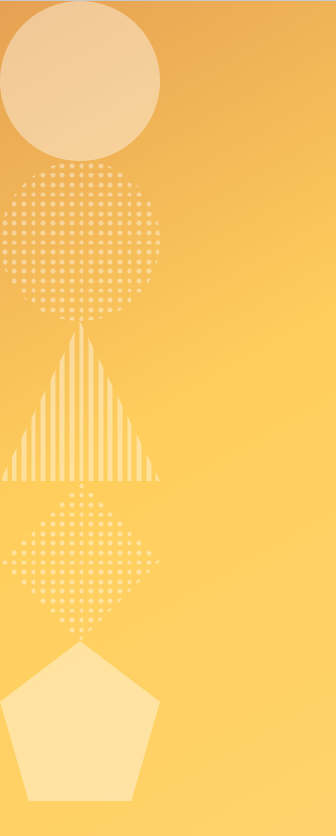
可以看到多樣的多邊形們出現了!ヽ(✿゚▽゚)ノ
接下來準備讓多邊形們飄起來吧!
以上程式碼已同步至 GitLab,大家可以前往下載:


 iThome鐵人賽